It’s time for another Karen Burniston Design Team Challenge. This month we were asked to use the Fireplace Pop-up die set to celebrate a specific holiday.
I have Father’s Day, which in the USA is in June which is not necessarily when American football is played, but once a fan of a sports team, always a fan of a team. GO Bears!

Card Base: The card base is an A7 size. I took a medium weight piece cardstock cut to 10 x 7 inches and folded in half. The base was what I glued decorative papers to as well as attaching the fireplace pop-up mechanism and floor flap.
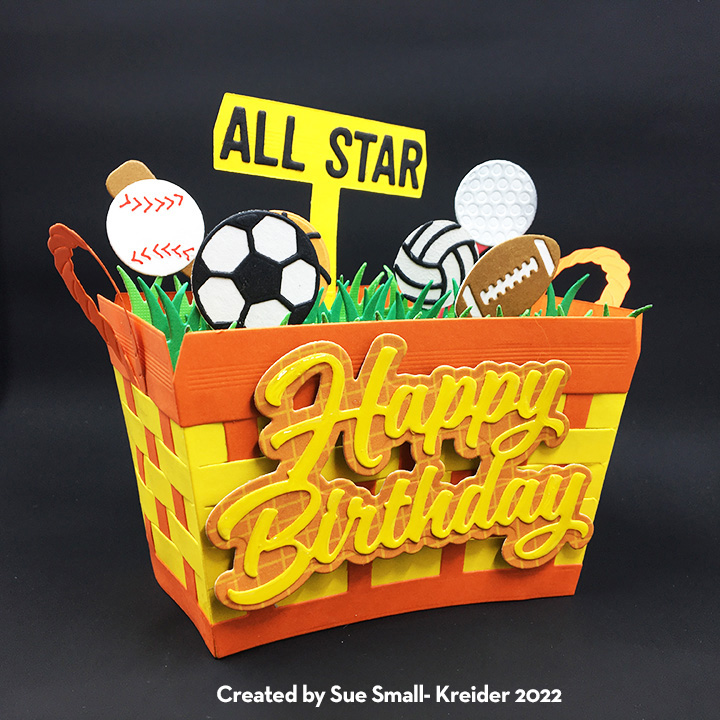
Bears and Accessories: The bears, their football helmets and footballs, beer mug, and pizza are all Karen Burniston dies – colored to match the Chicago bear’s uniforms. Beer mug is made from Coffee Charms (mug) and Happy Hour Charms (foam) and a pizza (circle from a snowman set). Pizza box is my own creation. (You could change up the sport by using any of the new Sports Charms.)

TV: The TV is the fireplace mechanism with a print of bears game covering the top portion while the bottom portion acts a table.


Flip Floor: I have made another flip floor for a Halloween card using the furniture from the family room die set. What I learned from my previous card is to use strong tape. I used duct tape on this card and full pieces of suede paper (for carpet) and wood-grain to make the flap have a sturdy hinge. The flap is cut to stop just before the TV table and locks under the right end table.


Lamps: To make the lamps feel in proportion to the size of the room, I placed them on end table cubes which also act as the locking device for the flip floor. The lamps are part of the Karen Burniston Family Room die set. I placed a thin foam square under the lamp shades to made them curve round.

Furniture: I turned the chair of the Family Room dies set into a table by gluing a rectangle over the arm rests instead of adding the seat back. The back of the sofa is just the seat portion left flat. I cut pieces to cover the black base of the sofa.

Sentiments: Using contrasting colors to cut background plaques for the front sentiment of “GO Wild!” makes them standout on the busy patterned paper. The Father’s Day sentiment comes with its own shadow background in the die set.
CRX Sheet: Because of the flip floor and locking mechanism being atypical for what most card recipients expect, I have included a sheet with directions for opening and locking the card open. (You can download for free.)
Thank you for reading this blog post. Please like and leave comments 😊
Materials Used:
Dies
- Karen Burniston in cahoots with Riley and Company – Fireplace Pop-Up – 1210
- Karen Burniston in cahoots with Riley and Company – Happy Father’s Day -1164
- Karen Burniston in cahoots with Riley and Company – Go Wild – 1128
- Karen Burniston in cahoots with Riley and Company – Happy Hour Charms – 1110
- Karen Burniston in cahoots with Riley and Company – Family Room Pop-Up – 1099
- Karen Burniston in cahoots with Riley and Company – Tiny Accessories 3 – 1095
- Karen Burniston in cahoots with Riley and Company – Squares – Crosshatch – 1056
- Karen Burniston in cahoots with Riley and Company – Coffee Charms – 1041
- Karen Burniston in cahoots with Riley and Company – Winter Animals – 1016
Papers
- Photoplay Paper – 12 x12 Double-sided coated cardstock – 1st and Goal-FBL3192
- Hot Off The Press – 8.5 x 11 – Smoke Suede – 10434
- Spellbinders – Santa Lane – 6×6 Paper Pad – Wood Boards
- EKSuccess – Martha Stewart Crafts – 12×12 Double-sided Paper Pad – Gothic Manor – 48-20301Colored Cardstock Scraps
- Computer and color printer
- White A7 Envelope
Pens & Inks
- Blue, Red, Yellow and Blue Fine-Tipped Markers
- Gelly Roll 08 Pen – White
- Pigma Micron 05 – Archival Ink .045mm – Dark Brown
- Ranger – Tim Holtz – Distress Ink – Antique Linen and Fossilized Amber
Miscellaneous
- Neutral PH Adhesive by LINECO
- Fine-Tip Glue Bottle
- Die Cutting machine
- Pokey tool
- Sponge Dauber
- Craft Mat
- Foam squares