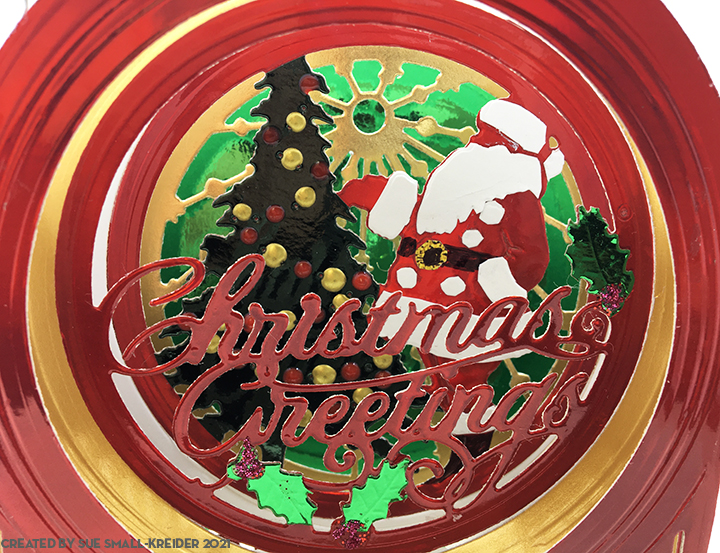
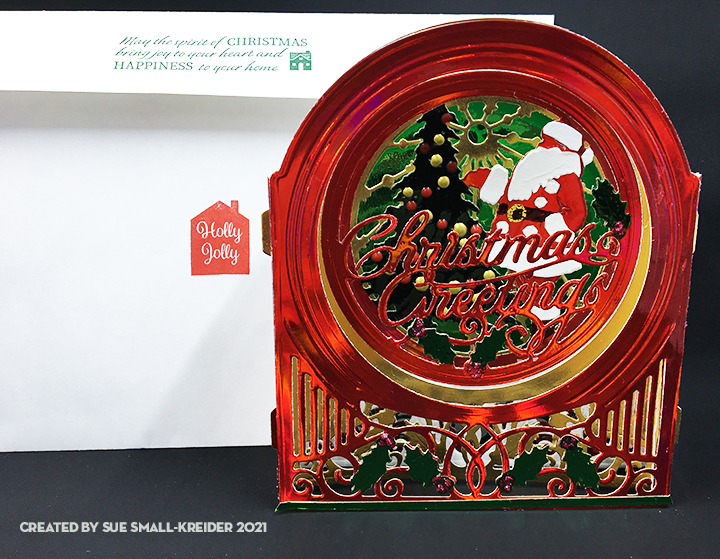
What a jolly feeling the “Ho Ho Ho” of Santa brings to anyone who hears or sees it. This 3D snow globe designed by Becca Feeken for Spellbinders makes you hear the jolly old elf.
This was my first time using these die sets. I focused on using just four colors of red, green, white and gold and mostly mirror or foiled cardstock.
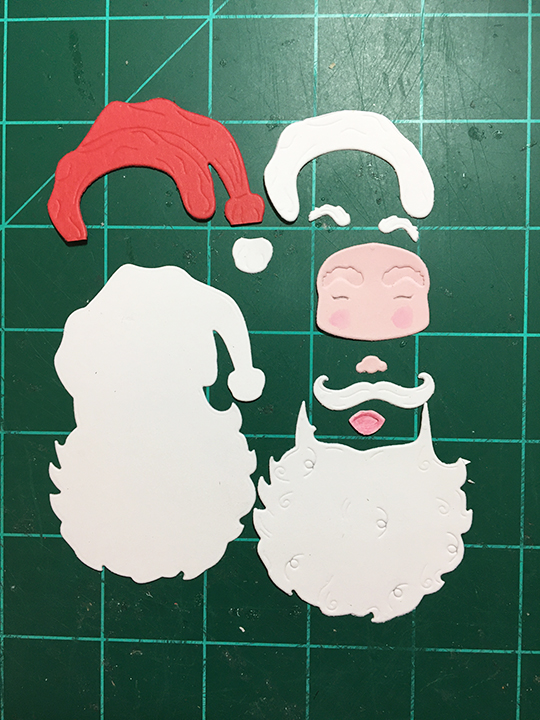
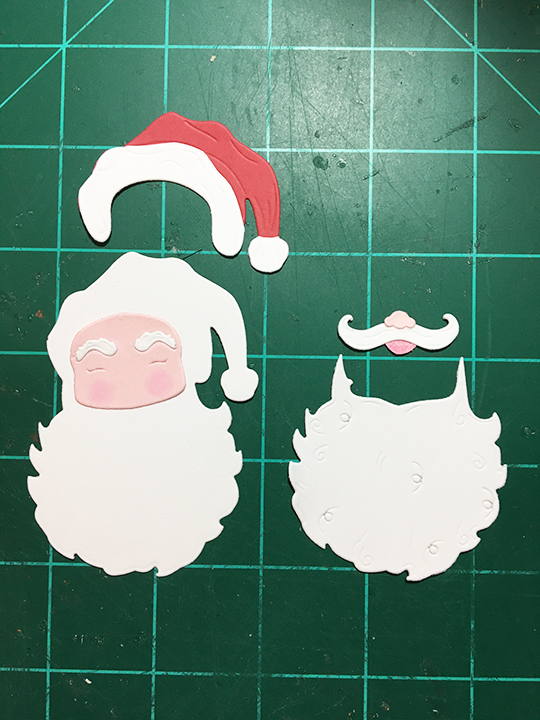
My Santa and tree are based off of the picture on the packaging using Nuvo Drops instead of jewels. I die cut several layers of the Santa and tree using up scraps to fussy cut the various pieces of the scene which are glued onto a red base. The belt and boots are colored with a fined-tipped black permanent marker. The belt buckle is a freehanded square of gold paper.
The holly leaves are fussy cut and glued onto the sentiment and front layers. The red berries are red glitter glue. I added a thin green stripe at the bottom of the front layer for interest.
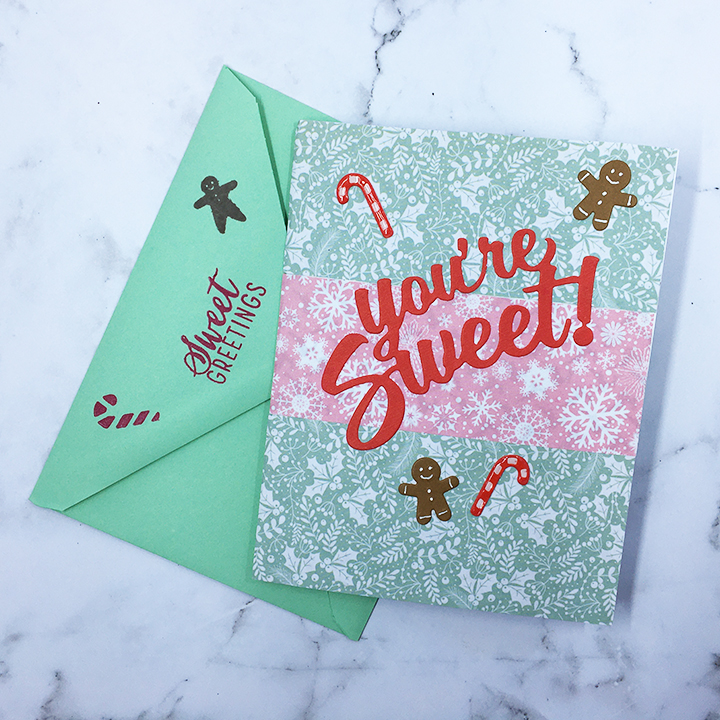
As is my style, I stamped the back of the envelope with hints of what’s inside using red and green ink and Christmas sentiment stamps from Paper Discovery. I used a new stamping tool with my stamping platform for an even and easy stamped image. I highly recommend the Stampendable Stamping Tool.
Thank you for reading. If you enjoyed this blog post, please like it and follow the blog. 😊
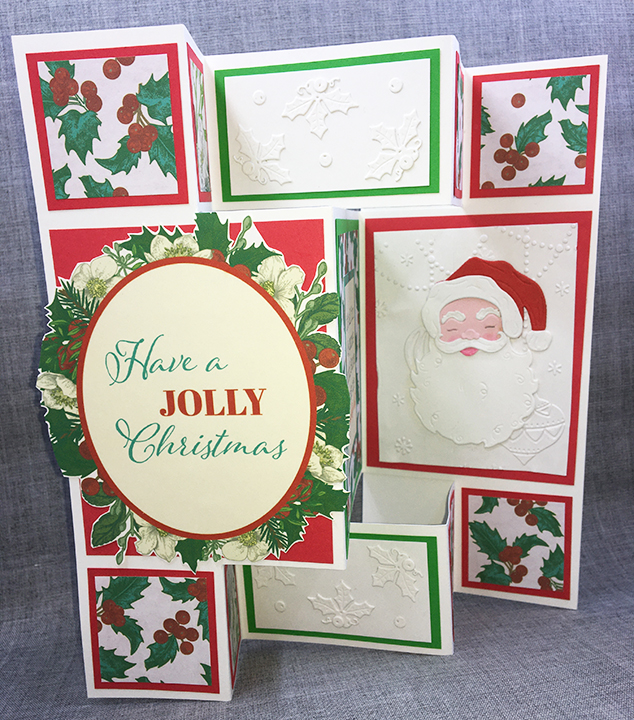
Staying off Santa’s naughty list can be a challenge sometimes. This fun shutter card featuring a retro Santa die-cut and papers is sure to bring back childhood memories of the holidays.
Based on a card in the Die-cutting Essentials, issue 82, by Sharon-Elaine Jones, the card uses the free dies and printable papers and sentiments from the magazine. I had to convert the template from 20cm x 30cm to fit an 8 ½ inches x 11 inches card base. It took me several tries to get the correct measurements and folds, but in the end I got there. (See template).
You will need to cut:
One rectangle from white cardstock 8 ½ inches x 3 ¾ inches for the card back
Six 1 ¾ inch squares from red cardstock
Two rectangles 1 ¾ inches x 1 3/8 inches from red cardstock
Two rectangles 3 3/8 inches x 4 ¼ inches from red cardstock
One rectangle 3 ½ inches x 4 ¼ inches from green cardstock
Two rectangles 3 inches x 1 ¾ inches from green cardstock
Two rectangles 2 ¾ inches x 1 ½ inches from white cardstock
One rectangle 3 1/3 inches x 4 inches from white cardstock (to be embossed)
One rectangle 3 ¼ inches x 4 inches from patterned paper
Two rectangle 1 1/3 inches x 1 1/2 inches from patterned paper
Six 1 ½ inch squares from patterned paper
Die-cut:
Six of the holly die from white cardstock
One of the Santa outline from white cardstock
One hat from white cardstock (Fussy cut just the fir trim and ball to be glued on to red hat.)
One beard, mustache and eyebrows from white cardstock
One hat from red cardstock
One of face, nose and mouth from pink cardstock (Using a watercolour pencil and water brush, color the cheeks and mouth pieces rosy pink. Then using a fine-tipped pencil or maker, highlight the eyes.)
Print and fussy cut from sentiments:
One oval sentiment topper
One rectangular Santa’s naughty list sentiment
To emboss the background of the Santa panel, lightly mist the white card stock (3 1/3 x 4 inches) with water before placing in embossing folder. This will allow the paper fibers to bend in the embossing folder rather than break and tear. Set emboss piece aside to dry before gluing onto red matting piece (1 3/8 x 1 ¾ inches).
Assembling Santa: Position the face piece on the Santa outline backing piece with the bread and hat over it. Mark position of face with pencil. Glue eyebrows on to face in indentations. Glue white fur pieces to red hat. Attach nose on top of mustache and mouth under it. Adhere face on to backing using pencil markings. Glue beard onto backing and just up to face. Attach hat over face matching it up with same shape on backing. Glue on mustache with nose and mouth attached. Glue assembled Santa onto embossed panel that was already glued to red mat.
Faux Embossing of Holly Panels: Glue three of the holly die cuts and three of the berries on to one of the white rectangles (2 ¾ x 1 ½ inches). Adhere white panel onto a green rectangle mat (3 x 1 ¾ inches). Repeat with another three holly die-cuts, white rectangle and green mat.
Other Panels: Glue the six square pattern papers on to six red square mats. Glue the two small pattern paper rectangles onto the two small red rectangle mats. Glue the large patterned paper rectangle to the large green mat and then glue the Santa’s naughty list sentiment onto the center of the patterned paper.
To Assemble Card: Take white card base that has been cut, scored and folded into shutter card and open-out flat. Glue red squares and rectangles in the areas shown in photo. The large rectangle for the card front will have its topper sentiment glued on after the squares have been glued down. Adhere the green rectangles into the appropriate spaces in the center of card base. Fold-up and glue large white rectangle piece to back of card. This back piece will be where you can write a personal message as well as helping stablish the card when opened and set on display.
Envelope: The card folds to fit inside a #10 business size envelope. To hint at what is inside the envelope, I stamped the flap with a sentiment “Have a Holly Jolly Christmas” and below it a Santa’s sleigh with reindeer.
Thank you for reading. If you enjoyed this blog post, please like it and follow the blog. 😊
Dies & Embossing Folder:
Retro Santa from Die-cutting Essentials, issue 82, October 2021
Cut & Emboss Baubles from Papercraft Essentials, issue 192, November 2020
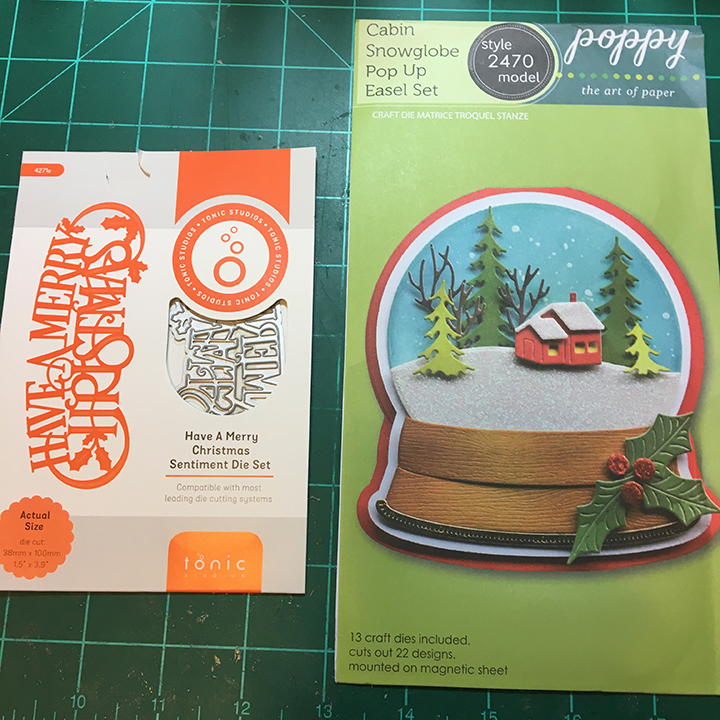
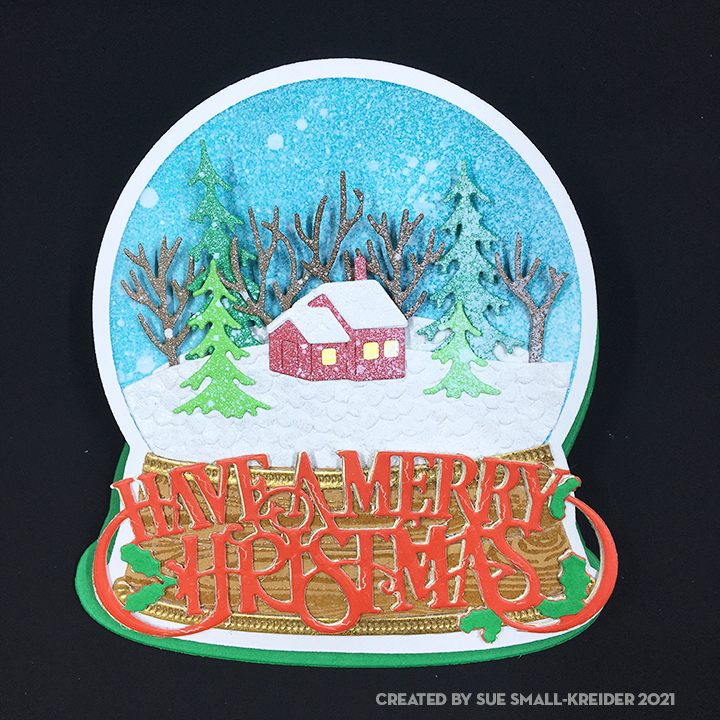
All is calm, all is bright until you shake-up the snow globe. This traditional style snow globe easel card is made with PoppyStamps/Memory Box die set with the sentiment coming from a Tonic Studios die.
This was my first go at using these dies, so I followed the package example for the assembly and easel stopper (three holly berries placed on top of tiny foam circles with holly leaves cut from thin paper.) My green base card stock was lightweight, so I double cut the base and glued together before burnishing the fold lines.
The background white circle was ink blended use a sky-blue ink and a large blending brush. Next, I spritzed with circle once with a white ink spray. The snowy ground is a specialty handmade paper I’ve had for a while. For the cabin, I used a yellow scrap for the house outline/windows. Its roof is more of the specialty textured paper. I like the variety of fir and hardwood trees in this set which can easily be cut from various shades of green and brown scraps. The scene was laid-out and then glued to together before spraying the whole scene with white ink spray a few times.
For the woodgrain globe base, I used some heat embossed stamped woodgrain paper I had made for another project. (Click here to learn more about the paper.) I cut two of the thin trim piece from gold foil cardstock and trimmed one piece to fit the top of the woodgrain base.
To assemble the snow globe, there is a white globe outline die-cut that the assembled globe is glued onto and then the woodgrain base followed by the two gold trim pieces.
The sentiment was cut three times using the Tonic Studios die. The base layer is gold foil while the top layer is a thick red cardstock that was from some packaging that I had saved. I cut the tiny green holly leaves from a green paper.
Foam circles topped with the holly berries are used as the easel stop on the bottom card base with the holly leaves cut from thin dark green paper.
A personalized message can be written inside the card base. The card fits inside an A2 envelope (4 3/8 x 5 3/4 inches.) with its back flap stamped with stamps from the Winter Stags set by Stampendous! in a dark green ink.
Thank you for reading. If you enjoyed this blog post, please like it and follow the blog. 😊
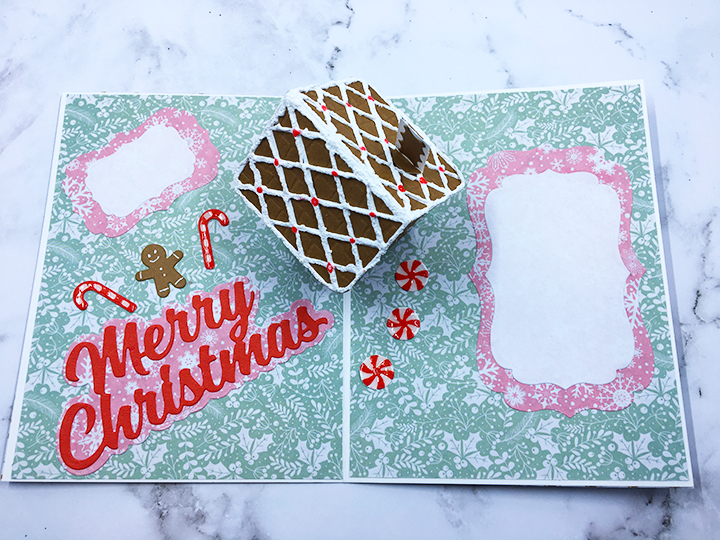
Can you smell the fresh baked gingerbread straight from the oven? This card is made for a child’s Christmas and depicts a gingerbread house complete with white sugar icing, cinnamon drops, peppermint drops and candy canes.
This was my first attempt making Karen Burniston’s Tiny House Pop-Up and I made some mistakes that created a catch point on a roof corner. (I highly recommend watching the assembly video to avoid some of my mistakes such as making the front door of the house on the end with the bottom attachment flaps and gluing the roof unevenly on top of the house.)
Overall, the Gingerbread Tiny House Add-ons set is easy to use with the Tiny House set. The cane canes and peppermint drops are tiny and may require tweezers to assemble. (I added Glossy Accents to the tops of the candy canes and peppermint drops to give them a shiny coating.) There are other decorative die pieces for gum drops and tiny dots in the set, but I opted to use some Nellie’s Effect Snow media for dimensional icing and Nuvo Drops for red cinnamon drops. (The Effect Snow made the roof curl up some creating more of a catchpoint on the roof corner.)
The card base is an A2 size card (5 ½ x 4 ¼ inches) made of heavy white cardstock and covered with patterned papers for smooth surfaces for the house to slide over. The sweets decorations are placed so that they don’t hinder the house mechanism opening.
Merry Christmas has a shadow die cut background of patterned paper and all the sentiments are cut from red paper so there are less chances of creating catchpoints. (I used some fancy nested label dies to create areas for a personal message.)
As is my style, I stamped the back of the envelope with hints of what’s inside using two colors of ink and a gingerbread house stamp set from Hero Arts.
Thank you for reading. If you enjoyed this blog post, please like it and follow the blog. 😊
Other cards that use the Tiny House Pop-up die Set
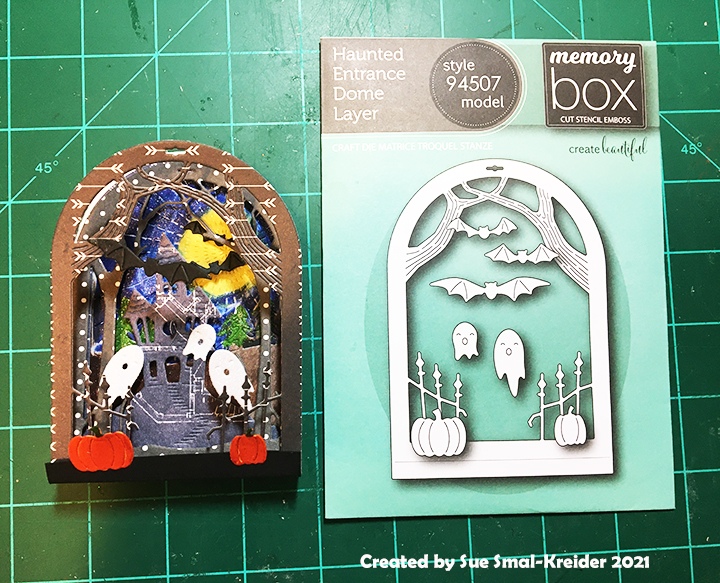
What do you get when you cross a snowglobe with a haunted house? A Haunted Home Dome!
This cute small Halloween card is also a Halloween decoration. The dies to make the dome are all from Memory Box. The Snowglobe Backer is the base which all four layers are glued to and needs to be cut from a sturdy cardstock. The sky background is also part of the earlier snowglobe release. The front three layers are part of the newer dome release. The tiny ghosts, bats and pumpkins are all from the Haunted Entrance Dome set.
I used patterned paper for all the layers except the backer which is a heavy weight black cardstock. The Radiant die cuts out the sky section which I taped on the backside into its frame and then glued the black backer pieces to it. Using glitter ink pens by Spectrum Noir, I colored in the night sky leaving a hazy yellow moon for the bats to fly in front of for contrast.
Each of the layers has a tab at the bottom that is folded back and glued onto the backer base flap. The front fold of the backer, I trimmed down to show more of the iron fence.
The tiny ghosts are cut from white glitter cardstock while the pumpkins are cut from orange cardstock and then colored with glitter ink pens. These tiny elements are glued onto the various layers to add depth and dimension to the open card. I used a white gel pen to highlight the tiny embossed cut features of the haunted house layer.
The die-cut “Happy Halloween” is from Karen Burniston and colored with glitter ink pens as well before being glued on to the card. (I find a fine-tipped glue bottle makes the gluing process of these tiny intricate sentiments easier.)
A piece of spider ribbon from my stash holds the top of the dome layers together. (I found it is better to tie the ribbon as a loop rather than at the hole, so that the card and easily open and close.)
A personalized message can be added to the back using a white gel pen.
The card will fit into an A2 size envelope, but I used a mini-slimline envelope. The back of the envelope is stamped with “Spooky Halloween” using a bat to hint at what is inside.
Thank you for reading. If you enjoyed this blog post, please like it and follow the blog. 😊
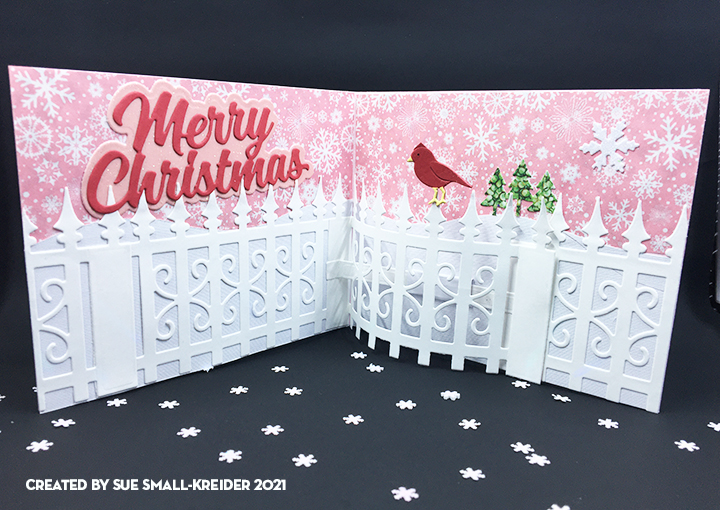
I love a crisp winter morning where tiny snow crystals fill the air and sparkle in the sunlight. This is a card celebrating such a morning in lighthearted pastels. Karen Burniston dies are used for the card focusing on the Iron Fence Pop-Up die set.
To make this A2 size card, cut a rectangle 4 1/4 x 11 inches of pink heavy cardstock and fold in in the middle to make a 4 ½ inches tall by 5 1/2 inches wide card base. Cut four decorative snowflake paper panels at 2 1/4 x 5 1/4 inches. Adhere these panels to the top of front, back and insides of the card base. Using one of the hillside edging dies, cut four hills that are 5 1/2 inches long and the lowest point is 2 1/4 inches tall. (I used white glitter card stock on the front and back sides and a textured white inside.) Glue the snowy hills to bottom of each panel of card base.
It is easiest to die cut all the pieces you will need to make both the inside and outside fences at the same time so that they are similar in colors and papers used. (I cut four fences, but I really should have cut six fences so I could have finished the back of the card with a fence too.) Cut one of the slider fence arm and one of the arm sleeve from the same paper you used for the inside snowy hills. Cut at least six green fir trees from the Long Nature Edges set to decorate in odd numbers on the front and inside of the card.
After watching the assembly video on the re-released inside pop-up fence, assemble as directed. (I found that the best way to decorate the hills and fence is to not glue the fence tops down. You can do this latter if needed using a fine tipped glue bottle.)
The birds in the fence die set are designed as crows so they are larger than a cardinal would be. There are smaller birds in the Frame Pull Pop-Up die set that are better sized as songbirds. This assembly video also has a tip on how to make the cardinal or chickadee crest on the head of the birds.
Everyone needs sunshine and the feeling that someone is thinking of them. This flippy flappy card uses dies by Lawn Fawn for the pop-up mechanism as well as the sunshine motifs.
When I began this card, I made a prototype card first to figure out how the mechanism worked. I watched an assembly video and still got it wrong by putting assembling from the front instead of the back. (See photo below.) The pop-up ended up working, but the flap was too long. (I recommend watching the assembly video several times or assemble the mechanism going step by step with video.)
For my actual card I changed up some of the design to make the sunshine really pop. Adding some ink to the background die cut helps emphasize the sun rays . The sun frame is cut from yellow, and the back sun outline is cut from orange with its center circle taped into the hole in the inked background.
The “Hello Sunshine” sentiment is cut twice from a darker orange cardstock to add some dimension. A fine tipped glue bottle makes gluing the fine lines of the letters easy.
The pop-up sun face is adhered to a strip cut from some clear plastic packaging.
To give the card recipient a hint at what is inside the envelope, I stamped the back of the envelope with a background sun burst pattern stamp from Hero Arts using a brown ink onto an orange envelope.
Thank you for reading. If you enjoyed this blog post, please like it and follow the blog. 😊
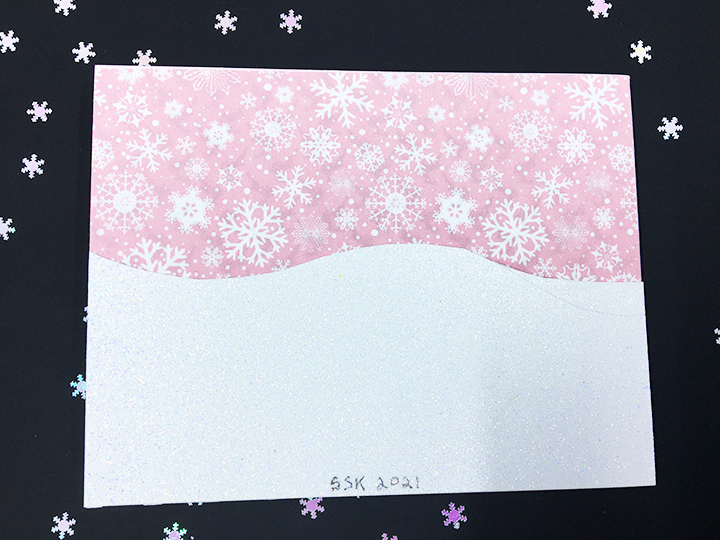
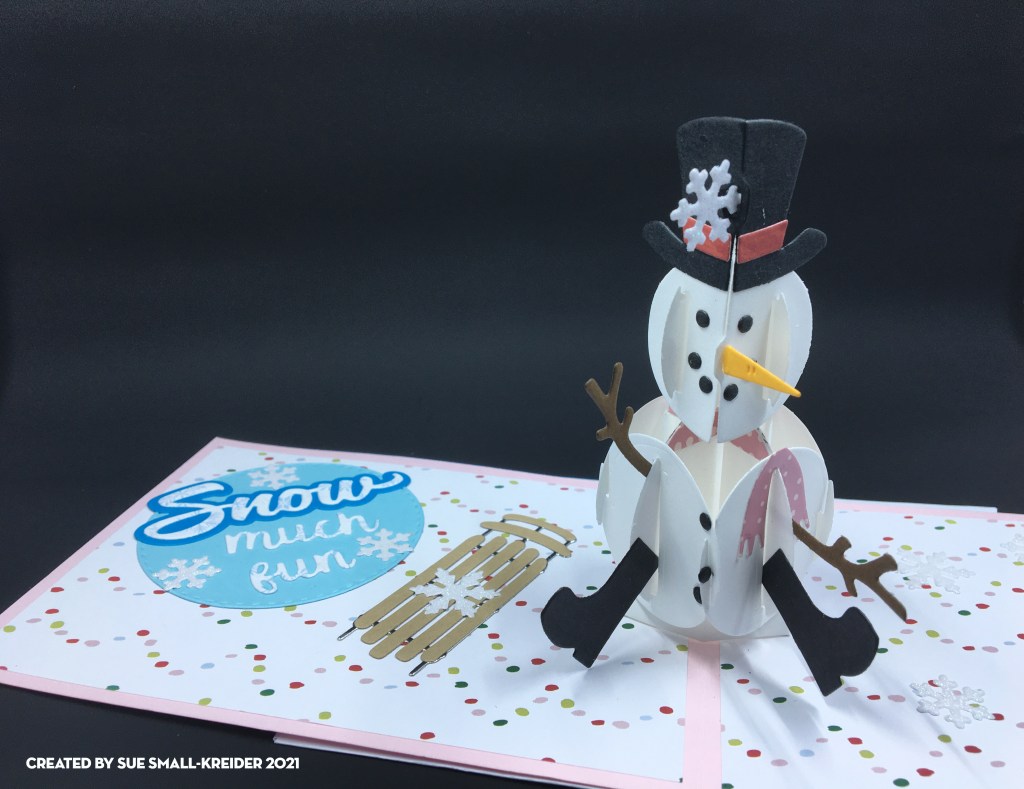
What North American children hasn’t hoped for a school closing day due to a snowstorm. This is a card celebrating a snowy day in lighthearted pastels. Karen Burniston dies are used for the card.
To make this A2 size card, cut a rectangle 4 ¼ x 11 inches of pink heavy cardstock and fold in in the middle to make a 4 ½ inches tall by 5 ½ inches wide card base. Cut four decorative paper panels at 4 x 5 ¼ inches. Adhere these panels to front, back and insides of the card base.
It is easiest to die cut all the pieces you will need to make both the inside and outside snowmen at the same time so that they are similar in colors and papers used. Also cut three circles or other label shapes on which to mount your sentiments. (For the personalized message circle, I added a smaller white circle.) Think about using contrasting colors for your words and their backgrounds. (I used blue to make the mostly white with snowflake paper I used for the words standout.)
After watching the assembly video on the inside snowman assemble as directed. Once the snowman is adhered to the card base, you can begin to decorate the card. (I used a sled die-cut from Memory Box to add to the snow time activities.) Remember to balance out the position of decorations from one side of the card to the other. There are two different snowflakes in the two snowmen die sets by Karen Burniston. They make wonderful filler decorations for the card.
Because I could not make up my mind on which stamp to use on the back of the envelope, I stamped two envelopes with hints as to the card’s theme. The word cloud is from Stampendous while the snowman is from Art Impressions.
Thank you for reading. If you enjoyed this blog post, please like it and follow the blog. 😊
The anticipation of the holiday season, the longing to see family and friends, the desire for relaxation and time off from the work world, and all the other anticipated joys and adventures of the holidays are what this card is about.
Colorado Craft company’s clear stamps and coordinating dies of Anita Jeram’s delightful drawings and hand lettering make it a joy to make a holiday card using a permanent black ink and watercolor pencils. Thin foam squares and festive background paper complete the front of the card.
My Favorite Things has a cute, layered stamp set and coordinating die which I used inside the card for the famous red suited elf.
I made this card in an evening starting with an A2 card base (4 ¼ x 5 ½ inches) in white. I trimmed a 6×6 background paper down to 4 x 5 ¼ inches and saved the scraps to decorate the back of the card. Using the leftover white cardstock from the card base, I stamped all the images and sentiments and then colored the images. Next, I die cut the images and fussy cut the sentiments. The front of the card decorations are adhered with thin foam squares while the inside stamped pieces are glued in place.
The back of the card was stamped in white with a snarky sentiment of “Yep I made this . (Don’t throw it out.)” from Technique Tuesday. (If I had had more time and forethought, I would have heat embossed all the sentiments on this card.)
To set the experience for the card recipient, I always decorate the envelope back. This time the flap was stamped with a sentiment from another Anita Jeram’s stamp sets Make A Wish and sparkles from a vintage Disney stamp set.
Thank you for reading. If you enjoyed this blog post, please like it and follow the blog. 😊
Stamps
Colorado Craft Company – clear stamps & dies – AJ527 – On The Lookout by Anita Jeram
Colorado Craft Company – clear stamps & dies – AJ481 – Make A Wish Mini by Anita Jeram
My Favorite Things – clear stamps & dies – CS-600 Sweet Christmas