This is the second card in the Fireplace Christmas Card series.
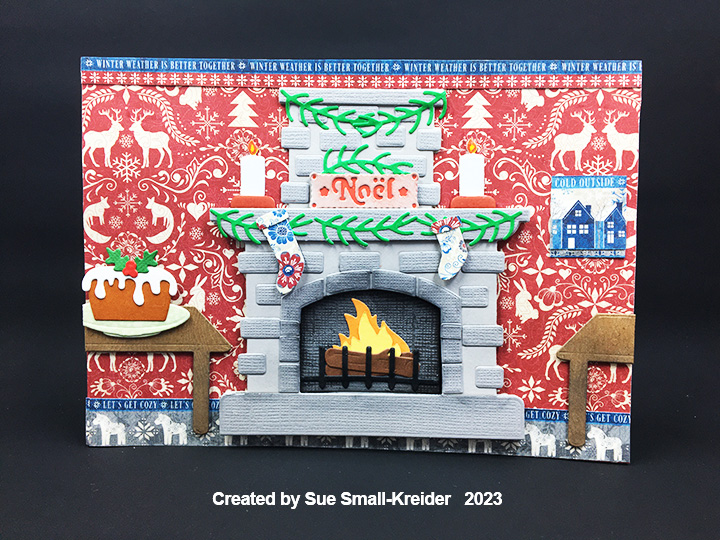
My inspiration for this cozy fireplace scene comes from the Graphic 45 paper collection Let’s Get Cozy and the Elizabeth Craft Designs Cozy Fireplace and Let’s Bake die sets.
Cardbase: A purchase A7 (5×7 inches) cardbase was covered with decorative papers on the two outside panels with leftover scraps used inside.

Fireplace: To create the stone fireplace, I cut two chimney pieces and two mantel pieces from the smooth side of the Bazzill cardstock and one mantel piece from the textured side of the same cardstock to get a textured firebox arch, mantel shelf and hearth stone. (The mantel shelf and hearthstone were fussy cut from the die-cut.) The individual stones (cut twice) and stones around the firebox were cut from the textured side of the gray cardstock. The top piece of the chimney was also cut from the textured cardstock. Glue individual stones to one fireplace piece then attach the stones around the opening. With black ink color the firebox piece if sooty.
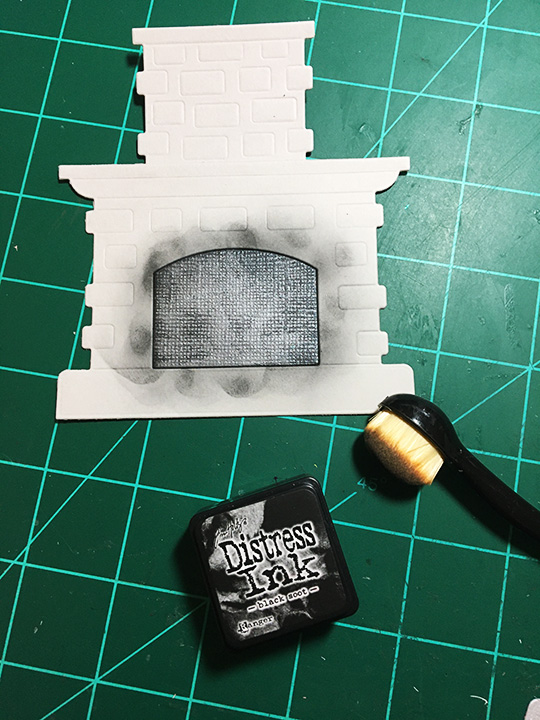
Glue the two chimneys together. Glue the three chimney top strips together and then attach it to the chimney top. Center the chimney piece behind the fireplace piece with firebox. Using clear tape across the back of the fireplace piece without the stones attached, add the sooty firebox and with an inky blending brush add soot to the surrounding area of the firebox. Assemble the burning logs and glue onto firebox.

Add foam squares to the front of the fireplace with chimney, backsides of mantel shelf and hearthstone pieces. Attach the fireplace with stones onto base, then attach mantel shelf and hearthstone. Glue to front of cardbase.

Decorations: The Cozy Fireplace set comes with stockings, candles, and greenery. From the Let’s Bake set the table was cut from woodgrain embossed paper and ink blended with black ink. The Christmas pudding and its holly decoration comes from the same set with the cake stand cut down to a platter. The tiny NOEL plaque from an old Hunkdory set sits on the mantel shelf and was cut from gray cardstock, inked with red ink and a piece of red paper glued to the back. The candle flames were colored with markers. All decorations were popped-up on foam squares except the candles, greenery and picture which were glued in place.
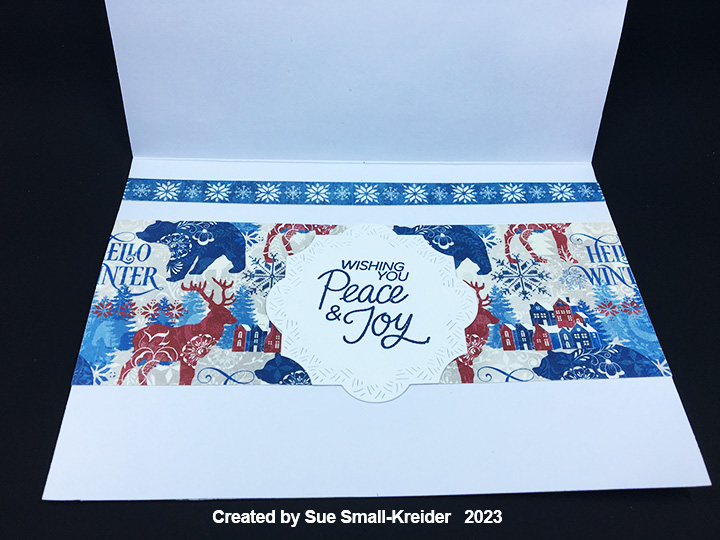
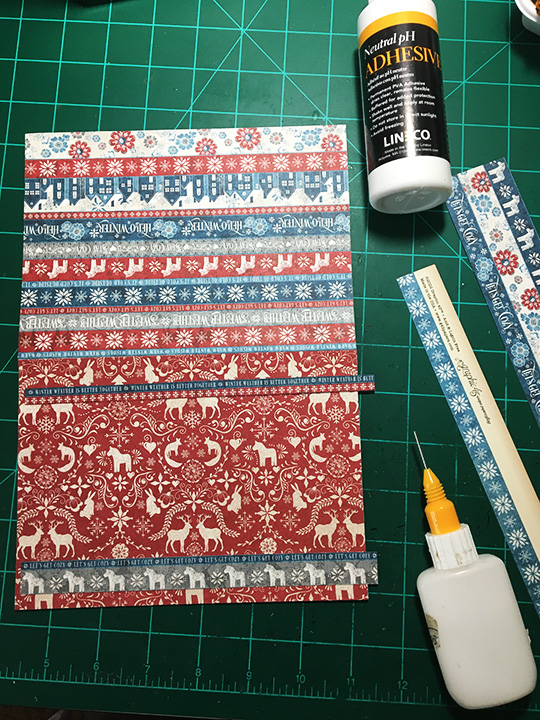
Sentiments: There is a whole sheet in the Graphic 45 Let’s Get Cozy collection of borders with sentiments like “Winter is better together,” “Let’s get cozy,” “It’s cold outside,” “Warm Winter Wishes,” “Sweater weather,” “Stay cozy” and “Hello winter.” Some of the thin word borders were used on the card front to set the tone of the card. Others are used to cover the card back. A tiny NOEL plaque from an old Hunkdory set, sits on the mantel shelf. Stamped in blue on a crosshatch label inside the card, is the main sentiment of “Wishing you Peace and Joy.”
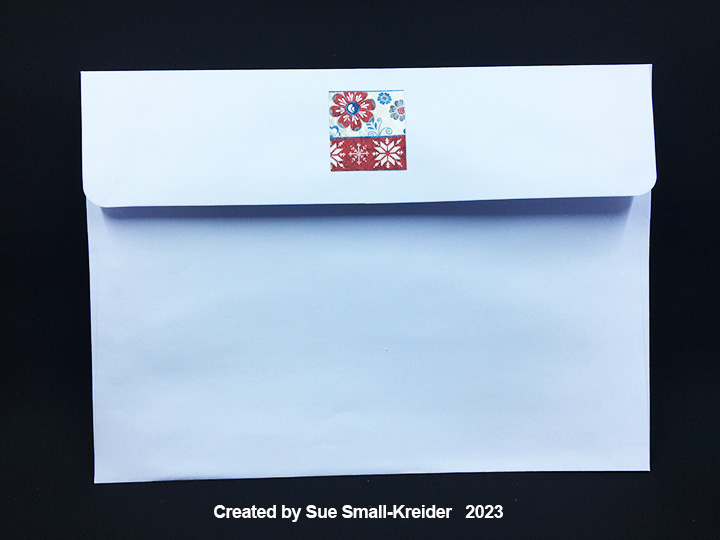
Envelope: A leftover decorative border scrap was glued to the envelope’s back flap as a subtle hint to what is inside.
Thank you for reading this blog post. I hope this inspires you and makes you smile. Please like and leave comments 😊
Other Fireplace Cards by designer/brand
- Anna Griffin – Holiday Hearth
- Altenew – A Modern Holiday Hearth
- Crafter’s Companion – Pop-Up Fireplace
- Elizabeth Craft Designs – Warm and Cozy Hearth
- Hero Arts – A Magical Fireplace
- Hero Arts – Burning Logs TV
- Karen Burniston – Santa Coming Down the Chimney
- Karen Burniston – Tired Santa
- Karen Burniston – Holiday Card for A Bookworm
- Paper Discovery – Gatefold Fireplace
- Sue Small – Vintage Christmas Cards – Fireplace
- Sue Small – Vintage Christmas Cards – Room Scene
- Multiple designers –An Old-Time Christmas
Materials Used:
Dies
- Elizabeth Craft Designs – Steel Cutting Dies – Let’s Bake – 1994
- Elizabeth Craft Designs – Steel Cutting Dies – Cozy Fireplace – 1992
- Karen Burniston in cahoots with Riley and Company – Labels – Crosshatch – 1196
- Hunkydory – Moonstone Cutting Dies – Winter Scene – MSTONE138
Stamps
- Catherine Pooler – Clear Photopolymer Stamps – Holiday Glimmer – CPS1172
Papers
- Graphic 45 – 8×8 Double-Sided Paper Pack – Let’s Get Cozy
- Fun Stampers Journey – 8.5×11 Cardstock – Pumpkin Bread – CS-0098
- Bazzill – 8.5×11 Textured Cardstock – Tiara -18-1002
- American Crafts – 12×12 Cardstock – Embossed Wood Grain – Dark Kraft
- Green, Red, Orange, Yellow, Brown, White and Black Cardstock Scraps
- Park Lane PaperieA7 Cardbase and Envelope – White
Ink
- Stampin’ Up – Classic Stampin’ Pad – Misty Moonlight
- Ranger – Tim Holtz – Distress Ink- Black Soot and Fired Brick
- Sharpie – Permanent Marker – Ultra Fine Tip – Orange, Red and Yellow
- Nuvo – Aqua Shimmer – Glitter Gloss
Adhesives
Tools
- Die Cutting Machine
- We R Memories – QuickStick
- Stamping Platform
- LDRS – Stampendable Stamping Tool
- Stamping Cloth
- Sponge Dauber
- Blending Brush
- Craft Mat
- Scissors