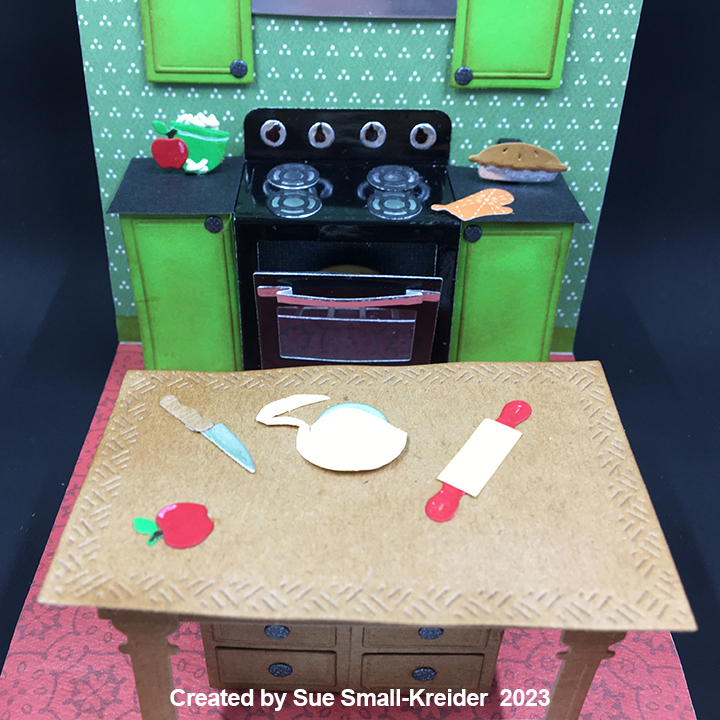
Some of my favorite birthday cards have been about food. Here is a look back at some of them.

Triple The Fun With Mini Mini Slimline Pop-Up Cards

Popcorn Lover’s Birthday Card From All of Us




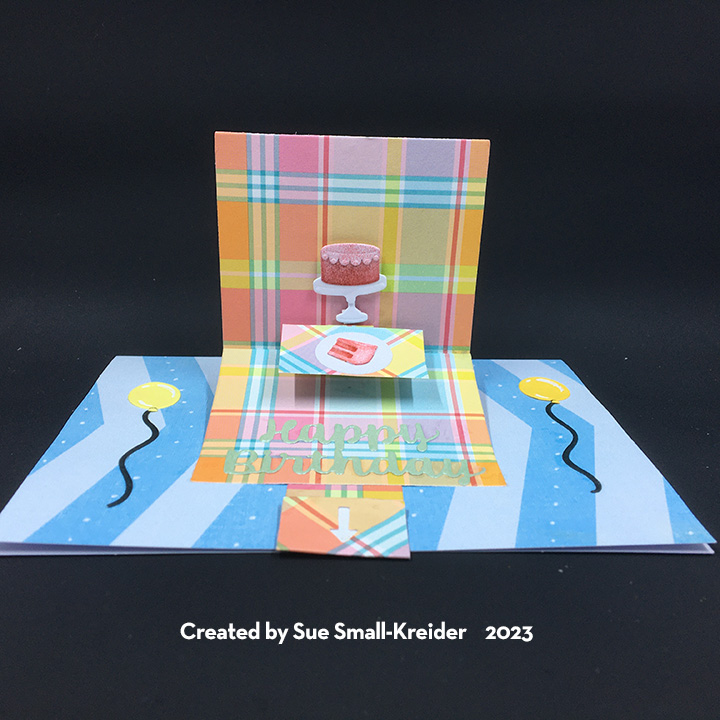
A Party Without Cake Is Just A Meeting


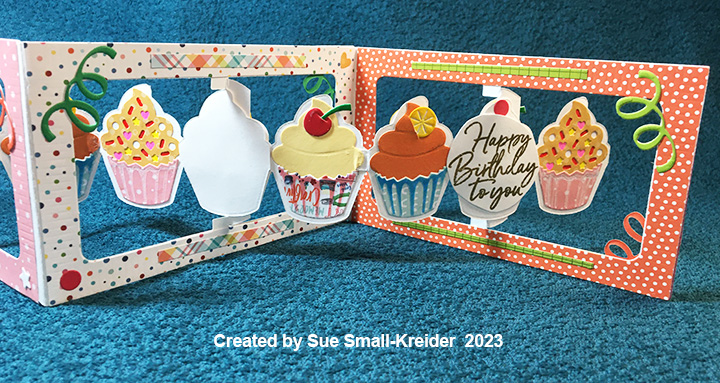
Some of my favorite birthday cards have been about food. Here is a look back at some of them.
Triple The Fun With Mini Mini Slimline Pop-Up Cards
Popcorn Lover’s Birthday Card From All of Us
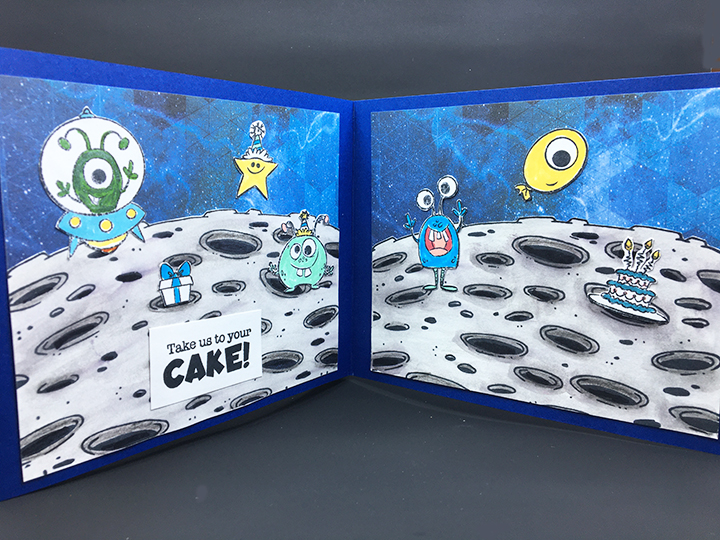
A Party Without Cake Is Just A Meeting

This card was made for Craft Roulette #209 whose parameters included a tri-fold card, sleigh ride colors, joke(s)or funny element and out of proportion. It has a number of insider jokes in it for that Craft Roulette fan to get.
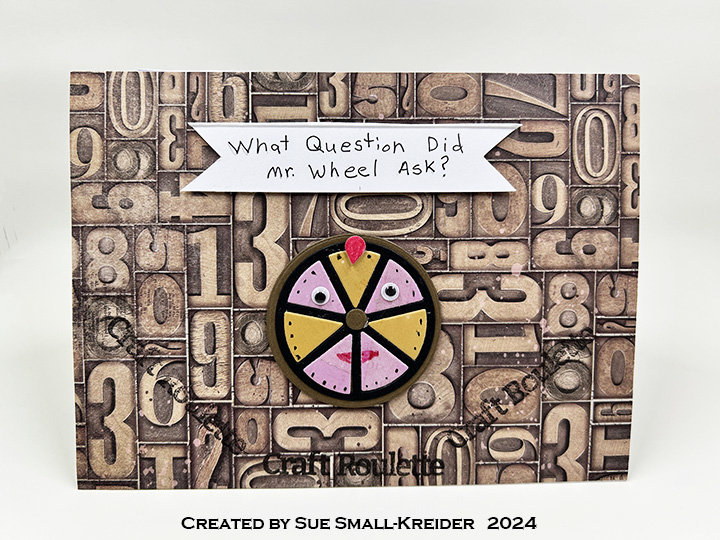

The card uses a purchase A6 cardbase (4.625 in x 6.25 in) as a top fold and two pieces of decorative 6 in x 8 in paper.
_________________________________________________________________
Thank you for experiencing this blog post.
I hope this inspires you and makes you smile.
Please like and leave comments 😊
__________________________________________________________________
Materials Used:
Dies
Stamps
Papers
Ink
Adhesives
Tools
Miscellaneous
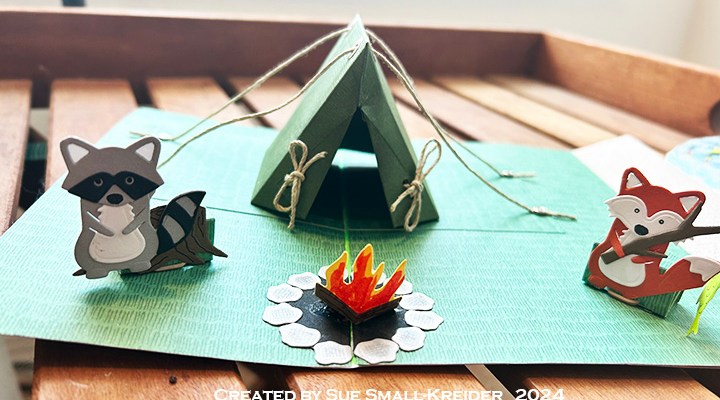
This card was made for Craft Roulette #208 whose parameters included a joy-fold card, buggy ride colors, sticks and stones element and trim(s) or trimming(s).
For this joy-fold card I used the colors of a buggy ride to the lake to go camping with a fishing stick and campfire stones. The lake is made of blue rick-rack trim on acetate. All dies used are by Karen Burniston.

Cardbase: A joy-fold is basically a smaller card that interleaves with a larger card. My smaller card is an oval cut from acetate and sandwiched between some kraft splattered cardstock with the cardstock folded and glued into the larger purchased 5×7 cardbase. The larger cardbase had its front panel trimmed to 4-inches wide. The larger cardbase was covered with green grass paper inside (covering over the kraft cardstock) and its front panel covered with blue dotted paper.

Lake: The front of the oval acetate flap was covered with rick-rack using double-sided tape. A kraft cardstock tab was added to make it easier to open the velco fastener that keeps the card close and the bam boxes from popping open. The tab is stamped with “Lift the flap.” The sentiment of “Hello nature” is cut using the Word Set 6 – Summer set.
Tent: Watch the assembly video at the bottom of the linked page. The tent pop-up can be made with out the cording, but I chose to add the cording using tiny brads on another layer of grass green cardstock to attach it.

Animals: The racoon and fox are made with the Woodland Animals die set. They are glued to small bam boxes to make them pop-up. The fish are from the Camping Charms set and are colored with pink and mint green glitter brush markers. The fishing stick is also in the Camping Charms set.
Campfire: The pop-up campfire is made up of five dies that form the campfire pit and burning logs. It is part of the Tent Pop-Up set.
Thank you for reading this blog post. I hope this inspires you and makes you smile. Please like and leave comments 😊
Materials Used:
Dies
Stamps
Papers
Ink
Adhesives
Tools
Miscellaneous

It’s time for the Karen Burniston April 2024 Design Team Challenge with the theme of Thirst Quencher. I chose lemonade as my thirst quencher and a card theme of a summer fete (festival or fair).

At a fete, there are generally small booths selling baked goods, drinks and other trinkets or handicrafts, so my card is a slimline (3 3/4 x 8 1/2-inch) card with three food booths using Karen Burniston dies.

Cardbase: Start with an 8 1/2 x 7 1/2-inch rectangle of a thick cardstock. (I used white.) Score at 3 1/2-inches and fold in half to create a top-fold 3 3/4 x 8 1/2-inch card base.
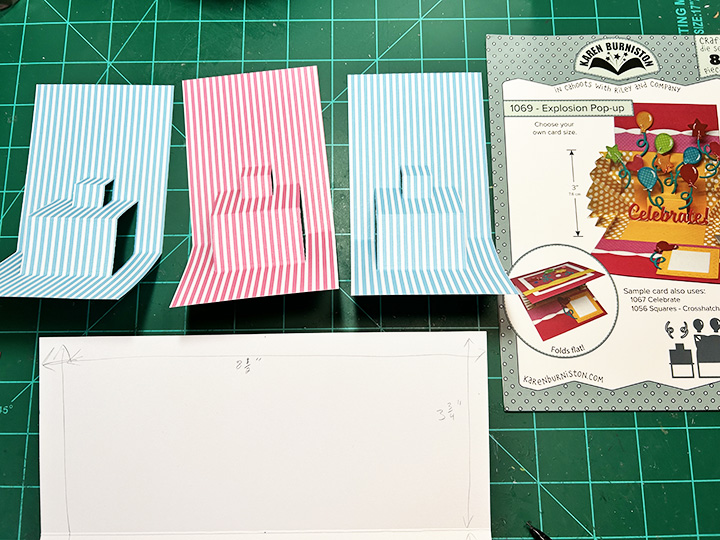
Booths: Cut three 6×3-inch panels of striped paper. (If you have longer than 6-inch striped paper cut them 7 1/2×3-inches.) Score and fold each panel at 3 3/4-inches. Using the pop-up center die from the Explosion Pop-Up, center the die on the fold of each panel. Train the folds as directed in the assembly video for the die set located at the bottom of the linked page. Glue pop-up panels inside card with the long side attaching to the inside top panel. Cover the bottom panel with grassy patterned paper. (I cut strips of the 6×6-inch patterned paper 1-inch wide to go through the pop-ups and cover over the striped paper.) I used a border print card layer to created the tablecloths on each booth table.

Posts and Banners: The posts are cut from glossy white cardstock using the Street Lantern die with the scrolling arms cut off. The pendant banners are made using the die from the Twist Panel Pop-Up set and threading them onto baker’s twine. The twine was wrapped around the knob top of a post before gluing it in place. (The two ends of twine can be taped to the front of the card to be covered over by the front panel.) The green bows that cover the looped twine on the posts are from the Street Lantern Pop-Up set. (I found it helped with the opening and closing of the card to place a small drop of glue at the top back center of each pendant to keep them from becoming catch-points, but still allowing them some dimension.) I used computer generated “Pies,” Lemonade” and “Cakes” printed on coiper paper and cut out with the banner label from the Lorna Label Pop-Up set.

Card Front: You will need to create a panel to hide the banner twine ends under. Cut a 3 3/4 x 8 1/2-inch of blue cardstock and a 3 3/8x 8 1/4-inch rectangle of dotted printed paper. Glue the dotted paper on top of the blue cardstock with an even border all around. Cut ten fishtailed banners from decorative paper using the die from the Twist Panel Pop-Up set. Cut the letters and shadows to spell out “SUMMER FETE” using the Mini Alphabet die set. Glue the letters onto the shadows and shadows onto the banners being careful not to cover the holes at the top of the banners.

Thread the two words on two separate pieces of twine. Die cut the “Enjoy the” from different colors using the Enjoy The Ride set. Once the placement of the words and banners have been established, tape the banner twine ends to the back of the panel. Glue the words and banners down onto the panel. Attach panel to cardbase front. (I used glue and double-side ½-inch tape.)

Pies: I created four pies using two different die sets. The top view lattice cherry pie and the key lime pie were created using the pie dies in the Baking Borders set. (I brushed the cherry pie red with a red glitter brush pen for some shine.) The horizontal pies were made with the pie die from the Picnic Elements set with the base piece cut from red and the crust cut from brown. All pie crust were inked with a light brown ink. The horizontal pie crusts had their slits inked red with an ultra-fine tipped red marker. I attached the horizontal pies using a foam square and a pop-up cube from a strip of white cardstock. (You could use the pop-up cube from the Oven Extras die set instead of making your own.)

Lemonade: The pitcher and glasses of lemonade were created from clear vellum with yellow cardstock behind. All the pieces were cut using the Picnic Elements die set. The pitcher is adhered to the pop-up base with a foam square and a drop of glue. The glasses are attached to a strip of clear packaging plastic with double sided tape all along the strip. The strip was threaded through the pop-up base and attached to the backside of the pop-up. (I covered the exposed adhesive on the strip with anti-static powder.)

Cakes: For these small cakes, I used the cupcakes in the Baking Borders set. I left the border base layer attached and trimmed off the excess behind the frosting. The bottom row has its center cake glued to the pop-up base while the upper row is attached to a pop-up cube.
Message Labels: The two white scalloped labels inside the card are for a personal message and are cut using the die from the Twist Panel Pop-Up set. (I did two to hide the seams of my patterned paper.)
Envelope: The card will fit into a #10 business size envelope.
_______________________________________
Thank you for reading this blog post.
I hope this inspires you and makes you smile.
Please like and leave comments 😊
_______________________________________
Materials Used:
Dies
Papers
Ink
Adhesives
Tools
Miscellaneous

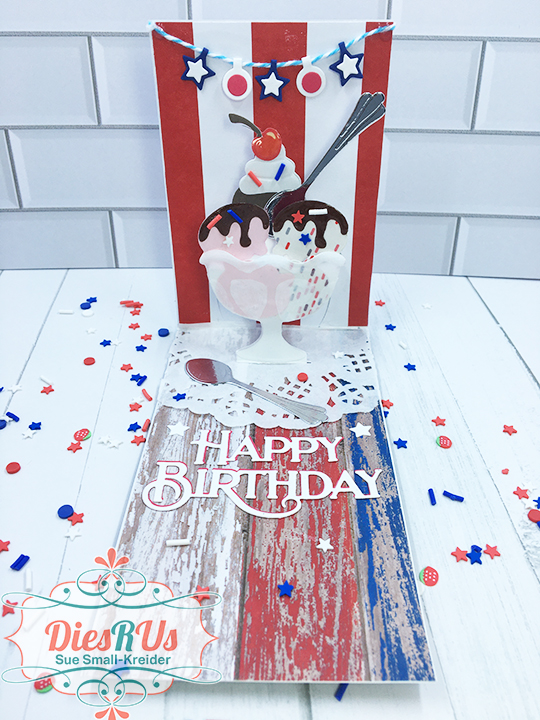
This card was made for Craft Roulette #207 whose parameters included an A2 size card, ice cream store colors, tasty or tastes element and a banner.
I wanted to make a pop-up or 3-dimensional A2 size card for this episode of Craft Roulette, so I modified a 3D postal truck I had made for my mail carrier to say thank you to fit into an A2 size envelope (4.25×5.5 inches.) (See Mail Truck blog post.)
___________________________________________
Thank you for reading this blog post.
I hope this inspires you and makes you smile.
Please subscribe, like and leave comments 😊
Follow my YouTube channel, Instagram and Pinterest as well.
___________________________________________
Materials Used:
Dies
Stamps
Papers
Ink
Adhesives
Tools
Miscellaneous
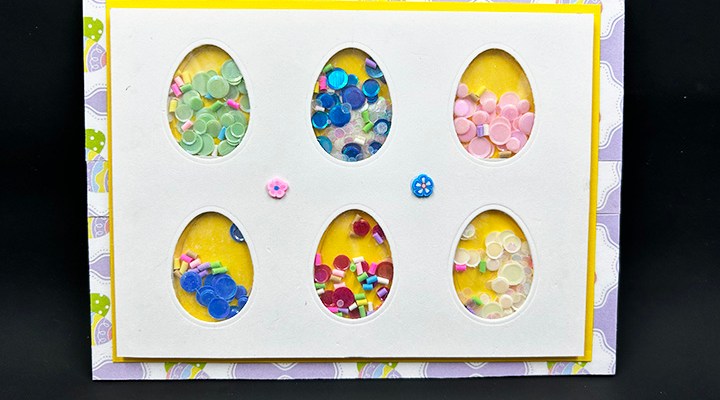
I saw a side-fold of like this card on social media and decided to make my own version using a top fold A6 (4 1/2 x 6 1/4-inches) purchased card base and the egg die from Karen Burniston’s Spring Animals die set.

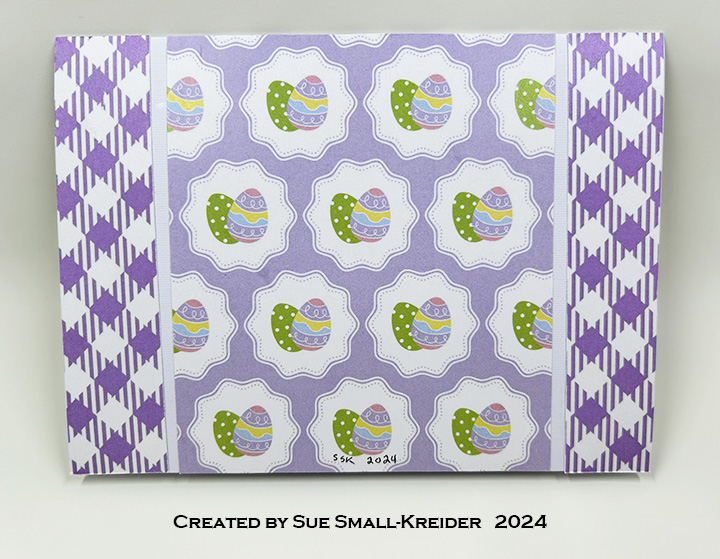
Cardbase: Using a purchased A6 card base, I used double sided patterned paper from Kat Scrappiness to make a mat frame on the front panel, piecing it together as the patterned paper was 1/2-inch smaller than the card height. Added a yellow 5 3/4 x 4 1/4-inches panel over mat frame. On the back panel, I used the leftover pieces to make an interesting symmetrical design utilizing both patterned sides of the paper.
Egg Panel: A 4×5 1/2-inches rectangle cut from white cardstock, I lightly marked in pencil lines at 1 1/8-inches, 2 3/4-inches and 4 3/8-inches. Along the tops and bottoms of these lines I marked 5/16-inches from the edge. These “T” marks where to center the top or bottom of the egg die. I used the center crack in the egg die to center on the vertical lines. After die-cutting out the six eggs, I erased the pencil marks. (I found it easier to sketch out the egg placement on the back side of the card, tracing around the die to see if it looked right before die-cutting from the front of the panel.) (I added two clay flower shaker elements to the front of the card.)

Shaker Assembly: Position the white panel over the yellow panel and mark the corners of the white panel on the yellow as well as tracing the egg cut-outs onto the yellow. Using double-sided tape, adhere a 4×5 1/2-inches rectangle of clear acetate/film to the back of the white panel. Add strips of narrow foam tape to create boxes around the traced eggs on yellow panel. Using an anti static tool to apply powder to the inside of each box (including the sides of the sides of the foam tape) and back side of acetate/film on white panel. Add confetti and clay sprinkles to each box, avoid putting too much in each box and level out any high points to below the foam tape level. Holding the card base, carefully peel off the backing paper on the foam tape. Remove any confetti from tape. Using the corner marks on the yellow panel line-up the white panel and adhere to foam tape, sandwiching the confetti inside the boxes. (I like to use the confetti sequins from This Calls For Confetti who have a variety of colors, sizes and finishes and have wonderfully quick customer service/delivery time. They also have the best anti-static tool for making shaker cards.)

Sentiment: I cut out the words only using Karen Burniston’s Happy Easter word die from purple cardstock for the inside of the card.

Envelope: I cut out a sticker from the decorative paper to embellish the back of the envelope flap.
__________________________________________________________
Thank you for reading this blog post. I hope this inspires you and makes you smile.
Please like and leave comments 😊
__________________________________________________________
Materials Used:
Dies
Papers
Shaker Elements
Adhesives
Tools

This card was made for Craft Roulette#206 whose parameters included Project type of card with a heart, vintage colors, plant(s) element and lace on the base.
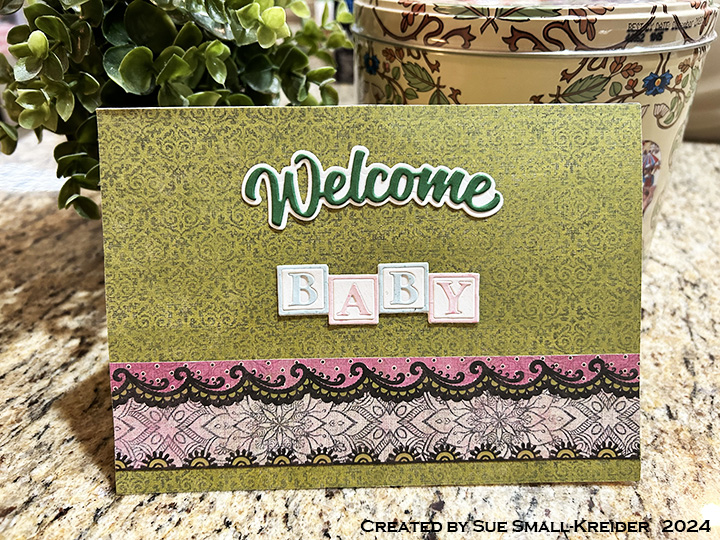
In honor of Craft Roulette’s host Mary Gunn’s new grandchild, I made a new baby card using the parameters listed above.
Cardbase: I used a 5×7-inch purchase cardbase and covered all four panels with vintage green patterned paper. The decorative stripes and lacy decorations were scraps from the opposite side of the paper.

Potted Plants: I decorated the panels with potted animal planters that were made from solid color cardstock using My Favorite Things Potted Pets die set.

Pop-Up Twist Panel: I used Karen Burniston’s Twist Panel Pop-Up die set. Watch video below for instructions.
Sentiments: I used Karen Burniston Welcome and Baby Charms die sets to create the “Welcome Baby.” In the video above I explain how I used Karen Burniston’s Connectors word set dies to perform “word surgery” to create the phrase “oh baby.”
_____________________________________
Thank you for experiencing this blog post. I hope this inspires you and makes you smile.
Please like and leave comments 😊
____________________________________________
Materials Used:
Dies
Papers
Ink
Adhesives
Tools

The sweet pinks and reds of old-fashion rose bushes always remind me of their scent. This Mother’s Day card is a loving way to say how much mothers are appreciated.
I used Honeybee Stamps’ layering Bold Backgrounds Vintage Roses dies for the front of the card. The roses are cut from three different shades of pink cardstock and inked with a bright red ink. The leaves were cut in an apple green and inked with a medium green ink. There layering guide which you have to download from the Honeybee Stamps website shows how the the three sizes of roses are assembled. The sentiment banner is a strip of apple green cardstock 4 1/2-inched wide by 1/2-inches tall with fishtails ends cut free-hand and inked to match the leaves. The gold foiled sentiment strip “Appreciate You” is from Spellbinders that I had batched foiled previously.

The inside “Happy Mother’s Day” sentiment is cut from the apple green cardstock using a die by Papertrey Ink. The back of the card is covered with a striped sheet of printed paper from This Calls for Confetti.


I went stash diving to find a old-fashioned looking rose for the back of the envelope and ended up using a stamp set from Pinkfresh Studios called Pretty Paisley. The roses were stamped in melon red ink while the tiny sentiment “It’s the little things that make life big” was stamped in a green pear ink.

_________________________________________________________
Thank you for experiencing this blog post. I hope this inspires you and makes you smile.
Please like and leave comments 😊
__________________________________________________________
Materials Used:
Dies
Stamps
Papers
Ink
Hot Foiling
Adhesives
Tools