Sometimes it just feels like we’re off to see the Wizard of Oz to get all our problems solved. But what we learn as we traverse the road, it’s the people we meet along the way that mean more to us than the real issue.

This is a card to let the friends you meet along the journey know you appreciate them. It uses stamps and dies by Riley and Company to recreate the characters from the movie, The Wizard of Oz. Riley of course is a moose, so it’s moose in OZ costumes.
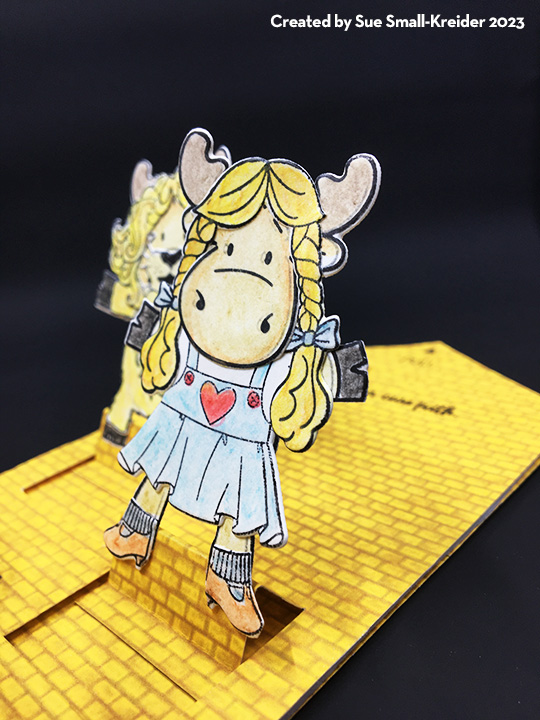
I stamped Riley four times and then stamped the costumes for the Tin Man, Lion, Scarecrow and Dorothy from the two Oz Dress-Up sets and Toto too. Watercolor pencils were used to color the individual pieces before die-cutting out the colored pieces. I found that cutting apart the bodies made it easier to assemble the costumed moose allowing for feet and arms to be positioned in more interesting ways. (The dies cut very close to the stamped images and are very easy to line-up.)


Using a download template that I had created for other cards using multiple sliders I first printed by yellow brick paper on medium weight white cardstock and then printed the template on the back of the yellow brick paper.


I had to edit the template, x-ing out some sliders and moving two others by half an inch to accommodate the size of the moose. Using a metal ruler and craft knife I cut the red lines around each slider and then scored the blue and green lines before folding the sliders.
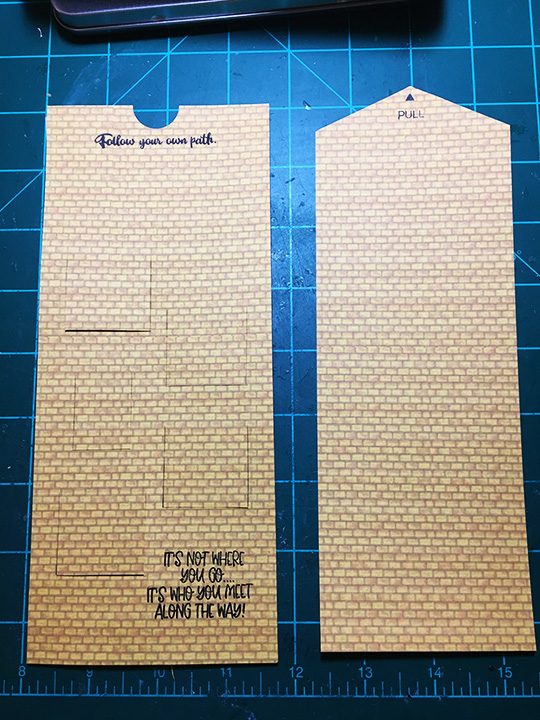
Before assembling the card, I stamped the sentiments on to the card front and the interactive directions on to the pull tab of the main slider piece.


Double sided tape was added to the thin tabs on the five multi-sliders. To adhere the card front to the card back, I used narrow strips of foam tape along the sides and bottom edges. Place the main slider piece with the print side down to adhere the multi-slider panels to it. Making sure it can slide between the foam tape. Peel off foam tape backing and adhere the card back.
Turn to the front to train the multi-slider panels to slide open and close. Glue figures on to the panels.

Decorate the back of the card with scraps and you can write your personal message there.

As is my usual, I stamped the envelope flap back to hint as to what is inside. I used the ruby slippers and the “Where are my freakin’ ruby slippers when I need them?” which came-out upside-down and I think sets the card up nicely for the journey.
Hope you enjoyed the card and found inspiration from it.
Here are more split easel slider cards I’ve blogged about:
Thank you for reading this blog post. Please like and leave comments 😊
Materials Used:
Dies
- Riley and Company – Cool Dies – Dress-Up- Oz Set 1 Dies – RD55
- Riley and Company – Cool Dies – Dress-Up- Oz Set 2 Dies – RD56
- Riley and Company – Cool Dies – Dress-Up Basic Die Set – RD01
Stamps
- Riley and Company – Cool Stamps – Dress-Up- Oz 1 – RCLR55
- Riley and Company – Cool Stamps – Dress-Up- Oz 2 – RCLR56
- Riley and Company – Cool Stamps – Dress-Up Riley – DUR1
- My Favorite Things – Clear Stamps – Interactive Labels – CS-204
Inks & Pigments
- StazOn Solvent Ink – Jet Black
- Ranger – Tim holtz – Distress Water Color Pencils – Sets 1, 2 & 3
- American Crafts – Metallic Marker – Silver
- Pigma Micron 01 – Black
Papers
- Yellow Brick Road designed by Whimzwhirled
- White Cardstock
- #10 Business Envelope – Brown Craft
Miscellaneous
- Neutral PH Adhesive by LINECO
- Fine-Tip Glue Bottle
- Foam Tape
- Stamping Platform
- Stamping Block
- Pencil
- Craft Knife
- Metal Ruler
- Scissors
- Water Brush
- Scoring Tool

These are so cute. But then, I love everything you do.
LikeLiked by 1 person
I love everything about this card. The stamp set is adorable. The yellow brick road…perfect. And the fact that it’s interactive is icing on the cake. Cute, cute, cute!
LikeLiked by 1 person