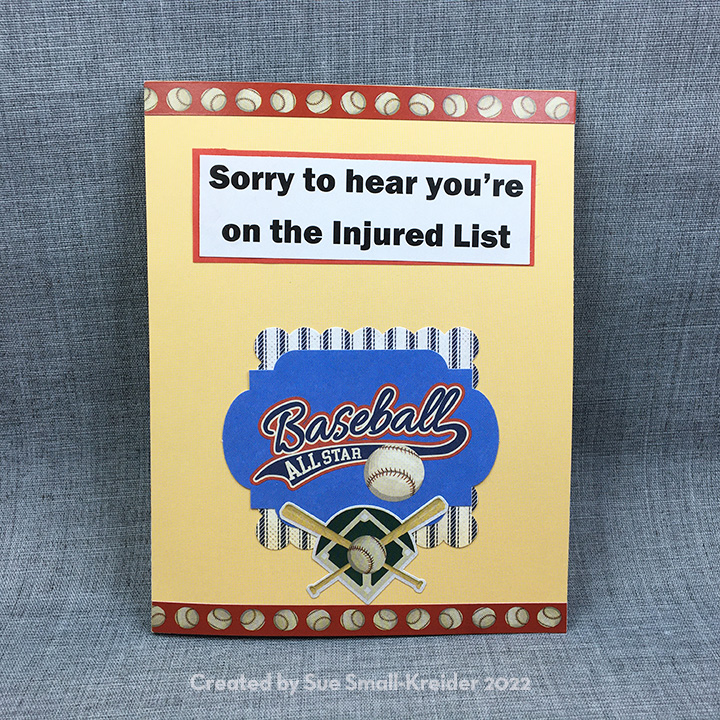
For a baseball fan, having your favorite player on the injured list, is bad, having yourself on the list is even worse. This card is for a sports fan recovering from surgery.
Echo Park Paper Co. makes a Baseball mega bundle of double-sided papers and ephemera that works well with Carta Bella’s Baseball element stickers. I used items from both these sets along with the circle twisting mechanism designed by Karen Burniston to make this card.
After watching Karen’s assembly video for the Snowman Twist Circle die set, I selected the largest two circle dies, cutting the largest from sand colored paper and the smaller stitched circle from white cardstock. I used a pencil to sketch where the red stitching would be on the white circle and used a fine tipped marker to mark the baseball’s stitching. The striped paper for the inside of the card was folded and die-cut as directed in the video. The arm piece was also cut from the striped paper.
A lightweight 5 x 6.5 inch card base was what I glued the striped inside paper to. For the outside I cut two 5 x 6.5 inch pieces of the sand colored paper. Decorating the card with the stickers and pre-cut ephemera was the fun part of the card. Using a computer, I created the two sentiments playing off the twisting action of the batter on the circle. “It won’t be long before your back in the swing of things!”
The envelope is also decorated with a baseball sticker.
Thank you for reading this blog post. Please like and leave comments 😊
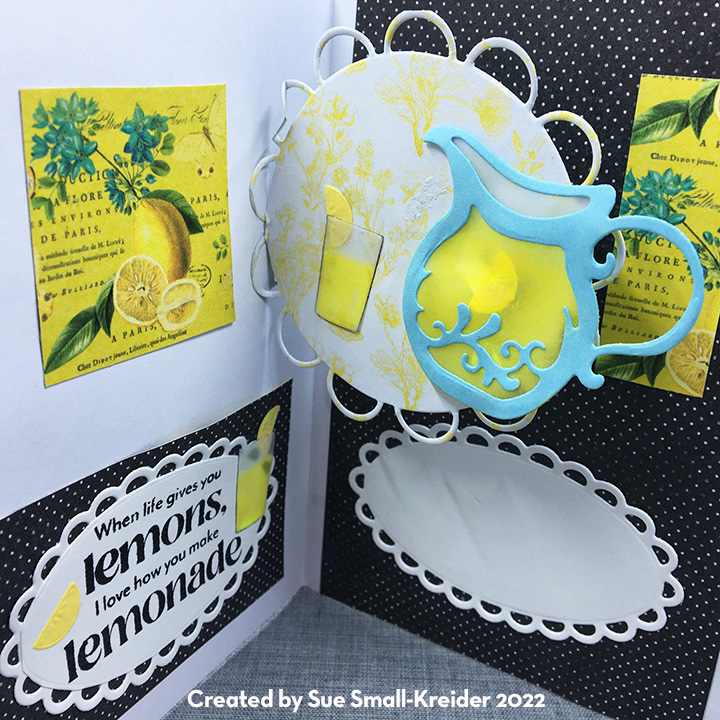
Sometimes life keeps throwing lemons at people. I am always amazed at how individuals keep smiling through it all and even find time to do kind things for others as well. This is a card for those smiling individuals that know how to make lemonade out of what life throws at them.
Using the Vintage Lemon Twist papers by Simple Stories and the You Shine stamp set both in the Simon Says Stamp! July 2022 Card Kit of the Month, I crafted this card with dies from Karen Burniston, Divinity Designs, Crafter’s Companion, Made to Surprise and Oriental Trading.
The front of the card is made from the paper collection with Nuvo Drops, buttons and a tiny ribbon bow from my stash. A symmetry is a theme for this card. The back of the card is a collage of leftover pieces from making the rest of the card. (I decorated both the inside and outside of the card base because the card base was thin cardstock. I adhered the papers with double side tape and an occasional drop of glue.
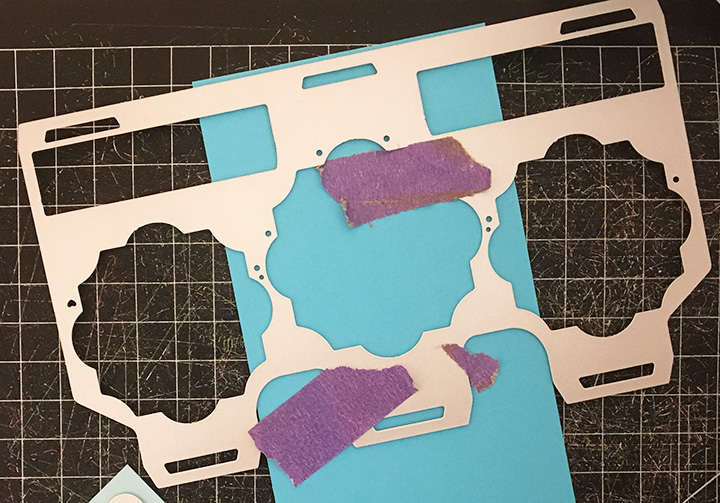
I had the idea of a pitcher of lemonade pouring into a glass with a lemon slice as the inside interactive mechanism of the card. After looking at a number of Karen Burniston pop-up/interactive dies, I settled on the Mailbox Pop-Up after watching a video by Karen using the mechanism for a double spinner card which I adapted into a tilting pitcher. I cut from scrap cardstock, a template of the mailbox to know where to cut the square opening in my decorative scalloped circle (Made to Surprise). After trimming the lower lever mechanism off, I folded the piece as directed in the video and trimmed the small section off one edge that would not be covered by the scalloped circle.
Using clear vellum to resemble glass, I die cut two tumblers (Divinity Designs) and fitted a scrap of vellum behind the die-cut pale blue pitcher (Crafter’s Companion). Using a bright yellow marker, I colored the back side of the vellum as the lemonade. I always color the edges of exposed vellum with a black marker to make them more defined. From the backing paper from some adhesive sheets that I had saved because the paper had a shiny yellow surface, I cut some lemon slices (Divinity Designs) for the tumblers and pitcher.
The lemonade sentiment is from the You Shine stamp set and is heat embossed with black ink and clear embossing powder. Once heat embossed, I die cut the sentiment out with a wave oval die from oriental Trading. I cut a second oval of plain white cardstock as the sentiment for a personal message to be added.
Black backgrounds inside the card make the white scalloped circle and ovals pop. Small scraps of the yellow printed paper were used to balance out the inside decorations.
The card fits into an A2 size envelope which has been stamped on the front with a lemon slice and back flap with a whole lemon. the back flap image is colored with markers. All the stamps are from the Simon Says Stamp You Shine stamp set.
Thank you for reading this blog post. Please like and leave comments 😊
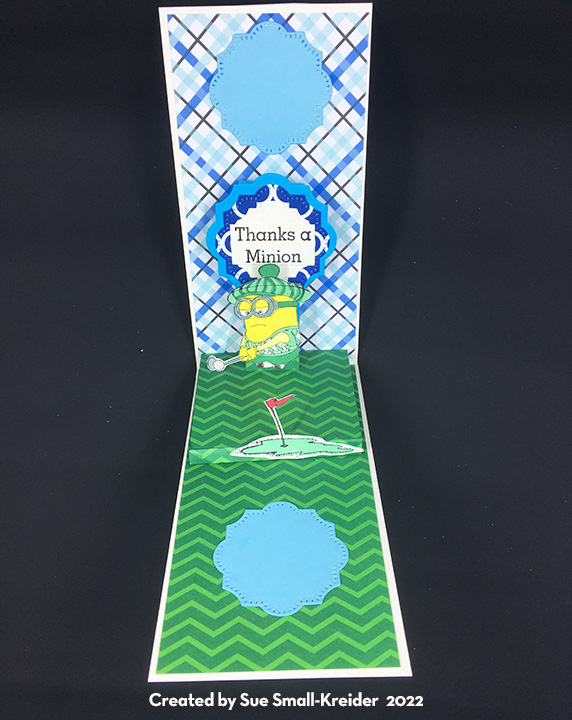
Making cards for loved ones requires a good idea and secrecy to make the card. For a dad who shares his love of golf with his children, is known to wear blue plaid shirts and loves green, this card’s concept came easily.
For the card base I cut two panels (6 1/4 inches x 3 1/4 inches and 6 1/2 inches by 3 1/4 inches) the longer piece I scored a 1/4 inch tab and glued the tab to the other panel. The tabbed piece is the top of the card.
I’ve used the platform from the House & Fence Pop-up by Karen Burniston a few times before and knew it would work to have Bob the Minion standup as well as provide a place to glue the green with the flag image.
The card needed some height, so I cut the middle section from another Karen Burniston die, the Little Labels Pop-up, and modified the width of the top tab. The blue labels at the top and bottom panels inside are also from the Little Labels set and are spaces to personalize the card.
All the images are stamped in a permanent ink and colored with makers and then fussy cut.
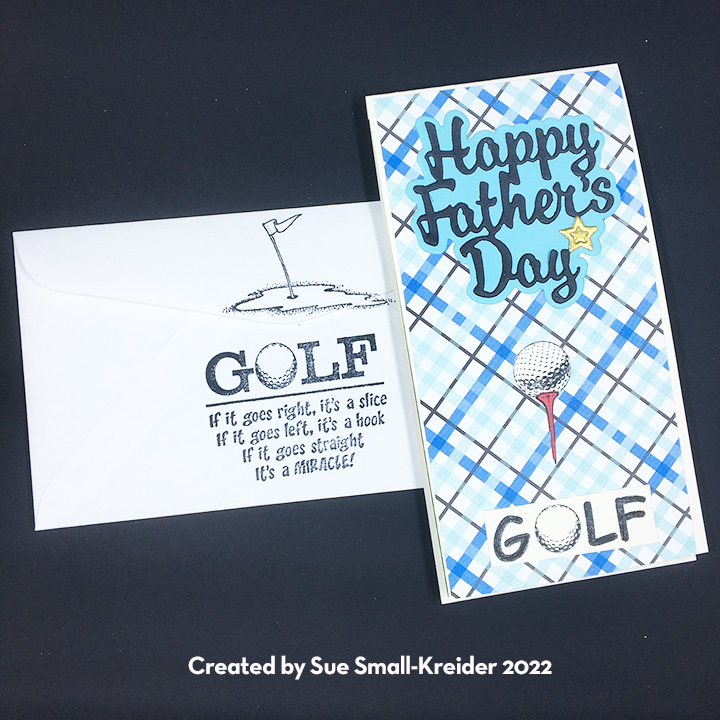
For the front die-cut “Happy Father’s Day” sentiment and its background shadow piece I used another die set by Karen Burniston. The small gold star is cut from a small scrap of gold foiled cardstock and glued it on top of the sentiment. The stamped golf images are from Crackerbox Stamps.
The card fits into a mini slimline envelope which has been stamped on the front with a golf ball on a tee. The back of the envelope has a humorous golfing sentiment along with the flag on the green. The stamps are all from Crackerbox Stamps.
Thank you for reading this blog post. Please like and leave comments 😊
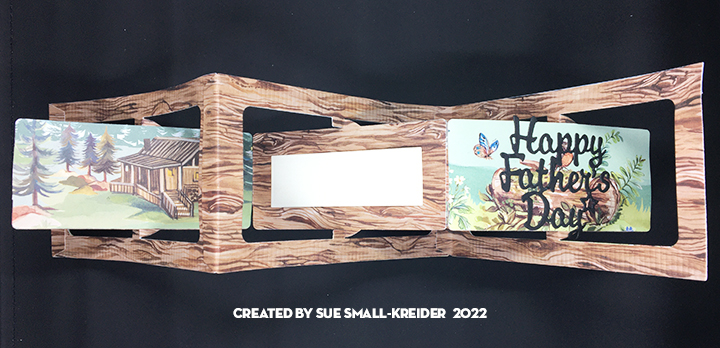
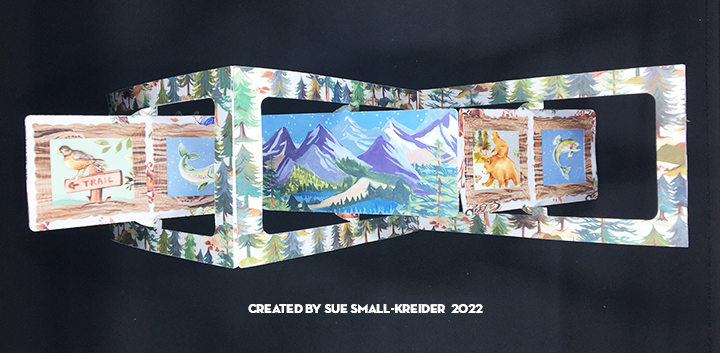
Designed for a gentleman who use to take his sons up to a mountain cabin in the 1960s, this card should help evoke memories of good father and son times.
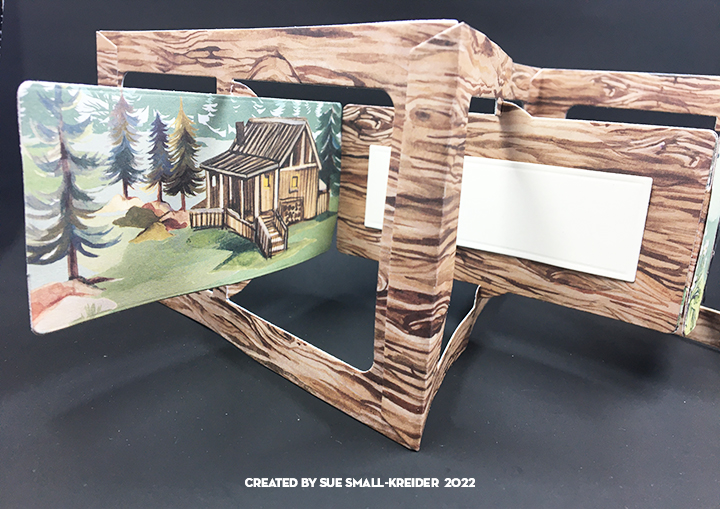
The mechanism for this triple panel accordion card is by Karen Burniston. The 12-inch by 12- inch double-sided paper pad in the In The Forest Collection by Clare Therese for Craft Consortium has a page with three narrow panorama scenes that work for the main panels. The smaller framed animals are from the cover of the 6-inch by 6-inch pad of papers from the same collection while the wood grain paper is from the larger pad. The large panorama scenes were cut with scissors from the die-cut frames and glued to the woodgrain frames’ center panels that pivot.
To make the card frame sturdy the woodgrain paper was glued to the back of the scenic paper. I followed the assembly video for the accordion fold card. (I found it useful to layout the card and its decorative pieces before gluing as sometimes a tab that connects the various panels needs to be hidden by a decorative piece so the order of gluing all the tabs together needs to be thought through before assembly.)
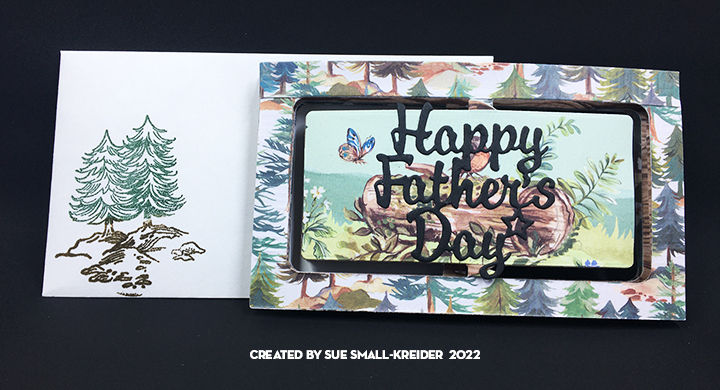
For the black “Happy Father’s Day” I used another Karen Burniston die and glued it in place letting the edges of some letters overhang the panel but making sure they would not impede the pivot mechanism. The small white rectangle can be written on with a personal message and then glued to the card. It is cut with a rectangle die from another coordinating Karen Burniston die set.
The card fits into a mini slimline envelope which has been stamped on the front with pine trees in both green and brown ink. The back of the envelope has a trail signpost stamped in brown ink. The stamps are coordinating ones from the In The Forest Collection by Clare Therese for Craft Consortium.
Thank you for reading this blog post. Please like and leave comments 😊
Before assembling this card, I rewatched the two assembly videosKaren Burniston has made for the Spinner Square Pop-Up. Once I understood how to fold the mechanism, I folded it backwards from the video so that it would move its arm upwards instead of downwards.
I wanted a slimline card, so I cut a front panel with a ½ inch tab (9 x 3 ¾ inches) from heavy white cardstock. The back panel is 8 ½ x 3 ¾ inches also cut from heavy white cardstock. The inside panel that floats up is 7 ½ x 3 ¾ inches cut from light weight white cardstock. I die-cut the mechanism and its arm (3 ½ x 1 ¼ inches) from lightweight white cardstock. The stamping was completed before assembling the card.
Stamping the trees on the front and inner panels, required creating masking papers to cover the trees that were to be in front of the other trees. The back trees are the darker color and stamped after the front tree. A white pigment ink was used to stamp the snow onto the trees. The moon was stamped in Citrine with the crescent specks in Sunbeam. The “Winter Wonderland” sentiment is by Stampendous! while the inside “Magical Christmas Wishes” is by Sheena Douglass.
To assemble, the front tab was folded and glued on the back panel. Next, the pop-up mechanism was folded backwards and glued into the inside of the card. The arm was glued onto the square spinner as directed in the assembly video. With the card closed I positioned the fussy cut Santa’s sleigh and reindeer onto the arm top so that it would not be visible when the card was closed and played with the positioning before the glue set-up. Last to glue, is the inside stamped panel that hides the mechanism. It is glued on to the small raised platform on the mechanism.
The card fits into a #10 business envelope with the Sheena Douglass “Winter Wonderland” sentiment stamped on its back flap in black ink.
Thank you for reading. If you enjoyed this blog post, please like it and follow the blog. 😊
Sometimes spending a holiday alone in a place far from home means that one must adapt and make new traditions, friends and feasts.
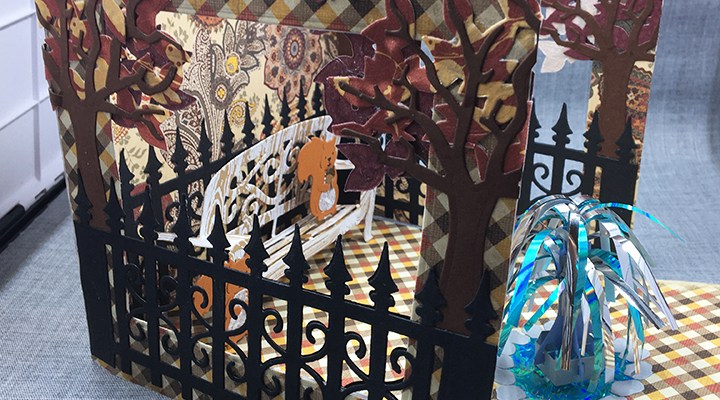
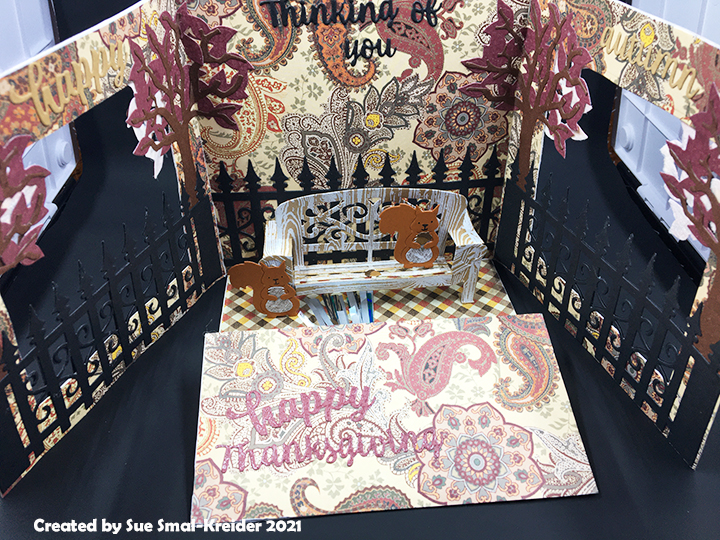
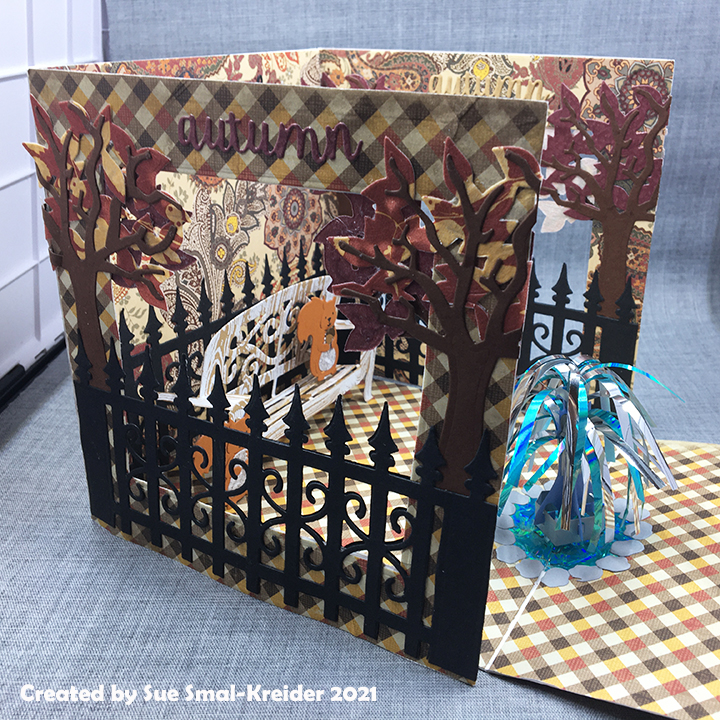
This penta-fold aperture card opens out to form a park scene complete with a water fountain and squirrels sharing acorns. Karen Burniston dies are used for all but the 4 inch square apertures.
Card base: Cut four pieces of heavy weight cardstock 6 inches x 6 ¼ inches and one piece 6 inches by 3 inches. Score and fold all the 6 ¼ inches sides at ¼ inch to form tabs.
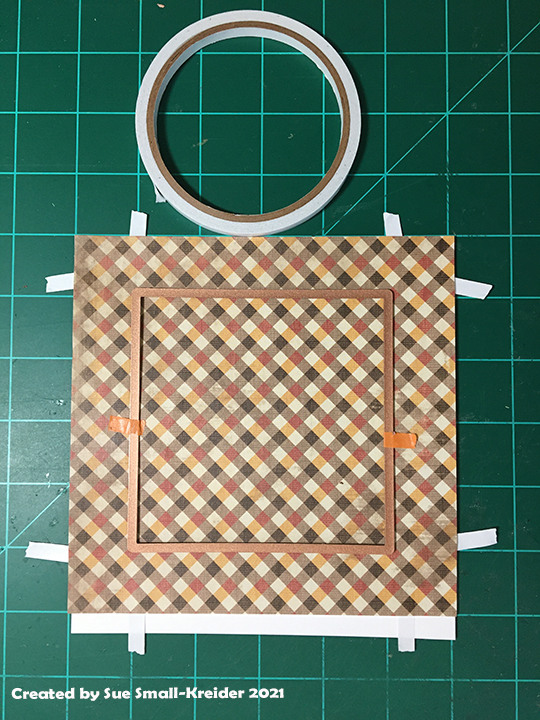
Adhere decorative papers to the front and back of two of the tabbed squares. (I used double-sided tape at the outer edges of paper.) Center a 4-inch square die over the patterned paper and secure with removable tape. (Remember if you are using different papers for the inside and outside of your card to test that you have the papers on the correct sides of your tabbed card base panels before you cut the apertures.)
Glue the aperture side panels to the 6-inch sides of the back panel whose tab is glued to the floor panel. The floor panel’s tab is glued to the 6-inch side of the 6 inch x 3inch piece. Adhere decorative paper onto all panels on the card base.
Trees: Cut four tree trunks using Tree Pop-Up die set. Cut four leaves dies. Glue trunks to leaves. Use a fence piece to position each tree trunk on the sides of the apertures, gluing the overlapping leaves together in the aperture opening. Repeat all steps for other aperture panel.
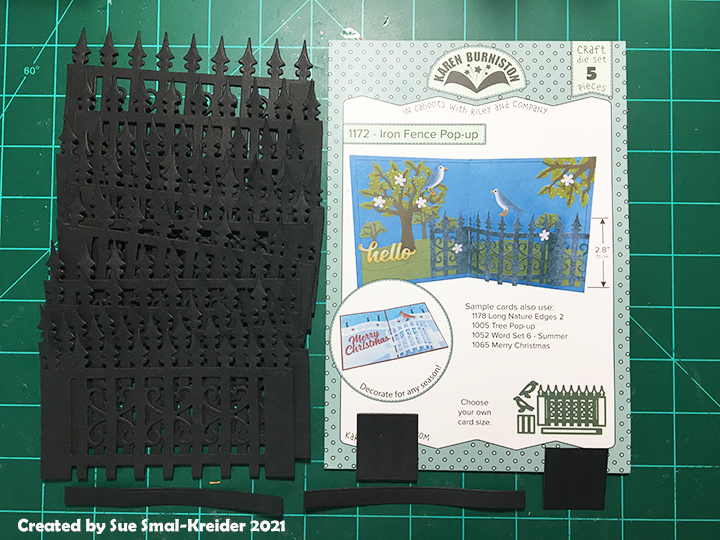
Fence: Cut ten fence panels from the Iron Fence Pop-Up die set. (I cut twelve fence piece incase I made a mistake in cutting, which I did.) Trim five fence panels at the sixth post from the left. Trim the remaining fence panels at the sixth post from the right. Trim off sixth post tip and scrolls at the right of post on left panel as shown in photo. Glue right panel over left panel. Take one elongated fence panel and adhere to the back panel. Glue fences over aperture panels front and back matching up fence tips.
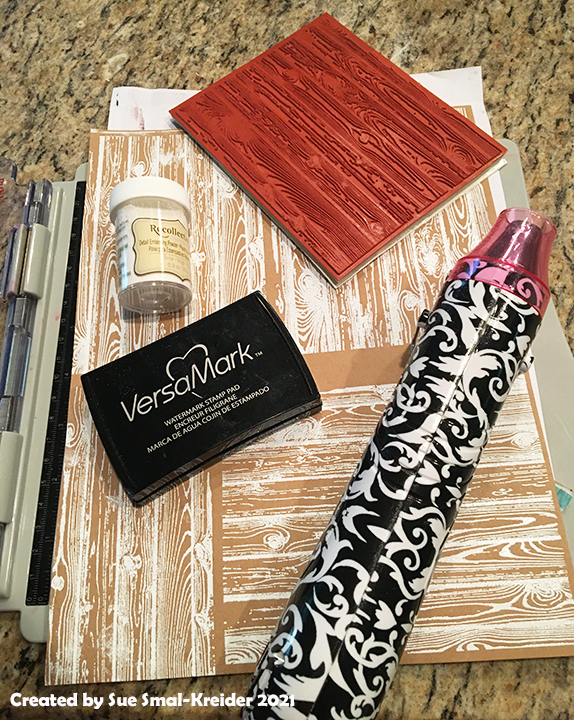
Bench: Stamp with woodgrain stamp onto brown kraft card stock and heat emboss with white embossing powder.
Die cut one whole bench using the Garden Bench Pop-Up die set. Cut the seat section again with the woodgrain going with the seat planks. Save two of the scrolling out-cuts from the bench back to glue onto the front of bench arms. Glue seat onto bench matching up planks. Follow package directions to attach the bench to the back and floor panels.
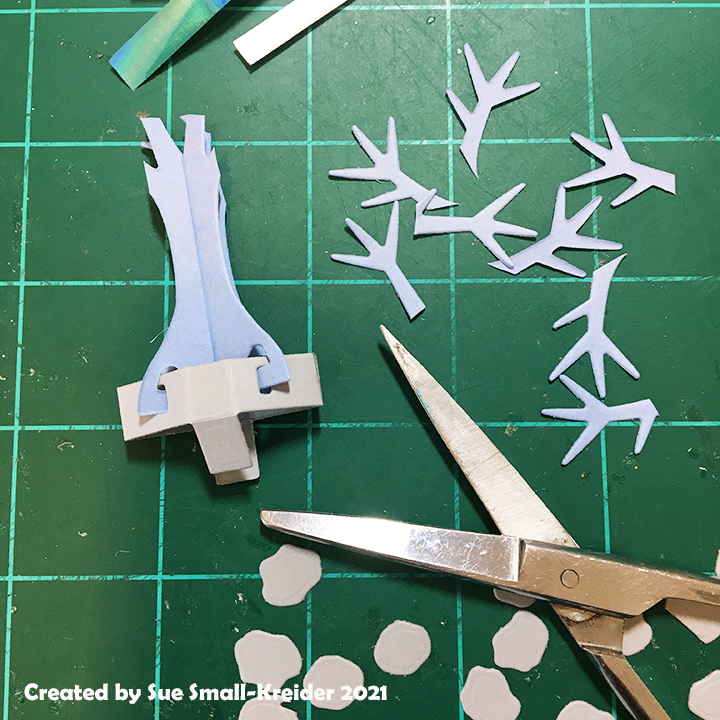
Fountain: Cut one of each of the two pieces of tree trunk from Tiny Trees Pop-Up die set of blue card stock. Cut tree base from gray card stock. Cut two sets of rocks from Tent Pop Up die set.
Assemble tree as per package directions. Trim the tips of branches off
Trim two colors of mylar foil into 1/8 inch wide strips. (I used the Spellbinders Quick Trimmer) Glue two color strips to each side of the trimmed tree trunk.
Cut a circle of blue foil and glue to fold made by the floor panel and the 6×3 inch panel. Cover edges with gray rocks. Attach the tiny tree foundation per directions on package.
Squirrels: Cut two squirrels and the tummy fur from two different colors. Cut two acorns from a light brown and two acorn tops from a dark brown. Assemble squirrels and acorns per package directions. Cut one of the long pop-up platforms from the bench pop-up die set. Attach to bench per directions on package. Glue squirrel to platform.
Sentiments: “autumn colors”, “happy autumn” , “Happy Thanksgiving” and “Thinking of you” are sentiments from two of Karen Burniston Word die sets – Greetings and Autumn Word Set.
Thank you for reading. If you enjoyed this blog post, please like it and follow the blog. 😊
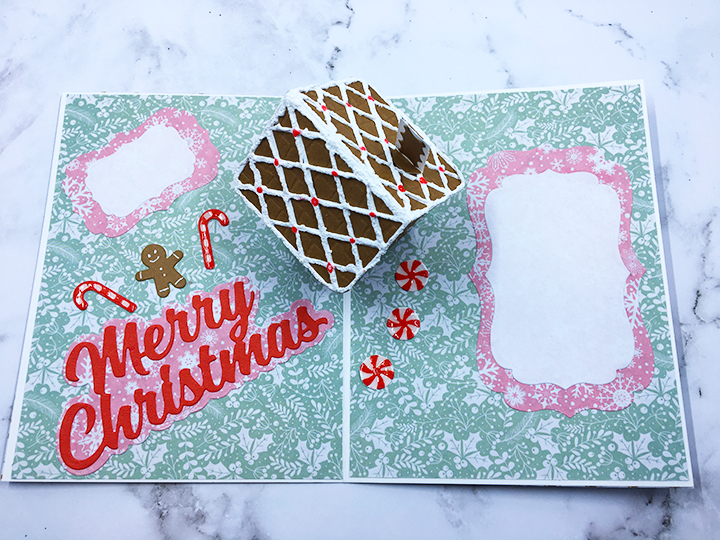
Can you smell the fresh baked gingerbread straight from the oven? This card is made for a child’s Christmas and depicts a gingerbread house complete with white sugar icing, cinnamon drops, peppermint drops and candy canes.
This was my first attempt making Karen Burniston’s Tiny House Pop-Up and I made some mistakes that created a catch point on a roof corner. (I highly recommend watching the assembly video to avoid some of my mistakes such as making the front door of the house on the end with the bottom attachment flaps and gluing the roof unevenly on top of the house.)
Overall, the Gingerbread Tiny House Add-ons set is easy to use with the Tiny House set. The cane canes and peppermint drops are tiny and may require tweezers to assemble. (I added Glossy Accents to the tops of the candy canes and peppermint drops to give them a shiny coating.) There are other decorative die pieces for gum drops and tiny dots in the set, but I opted to use some Nellie’s Effect Snow media for dimensional icing and Nuvo Drops for red cinnamon drops. (The Effect Snow made the roof curl up some creating more of a catchpoint on the roof corner.)
The card base is an A2 size card (5 ½ x 4 ¼ inches) made of heavy white cardstock and covered with patterned papers for smooth surfaces for the house to slide over. The sweets decorations are placed so that they don’t hinder the house mechanism opening.
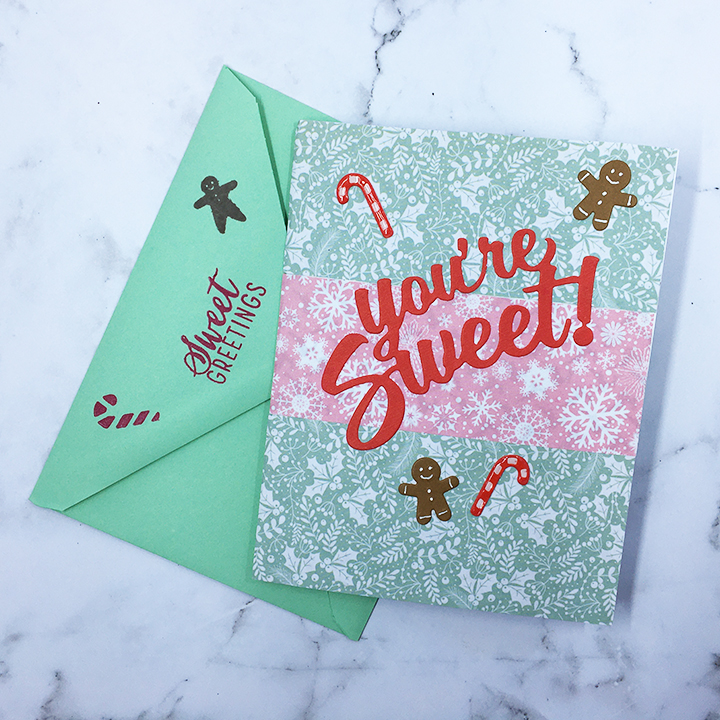
Merry Christmas has a shadow die cut background of patterned paper and all the sentiments are cut from red paper so there are less chances of creating catchpoints. (I used some fancy nested label dies to create areas for a personal message.)
As is my style, I stamped the back of the envelope with hints of what’s inside using two colors of ink and a gingerbread house stamp set from Hero Arts.
Thank you for reading. If you enjoyed this blog post, please like it and follow the blog. 😊
Other cards that use the Tiny House Pop-up die Set
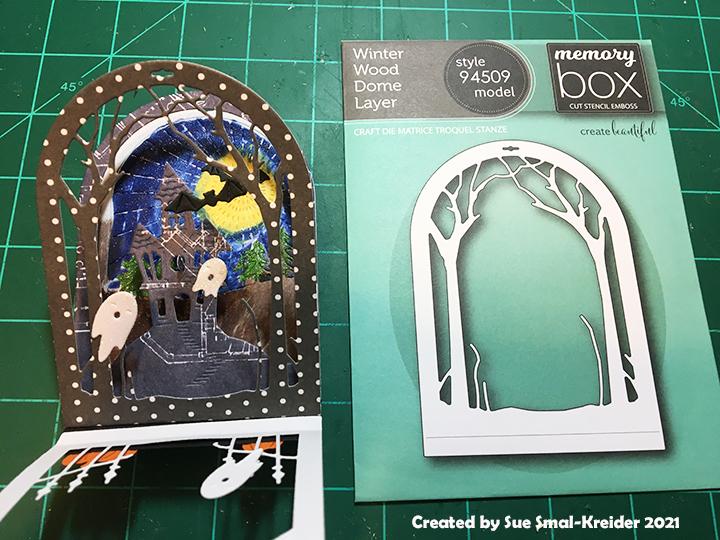
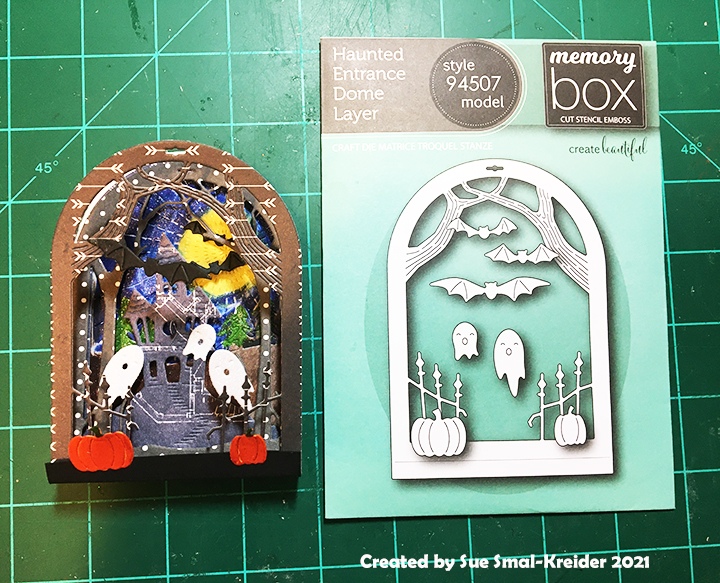
What do you get when you cross a snowglobe with a haunted house? A Haunted Home Dome!
This cute small Halloween card is also a Halloween decoration. The dies to make the dome are all from Memory Box. The Snowglobe Backer is the base which all four layers are glued to and needs to be cut from a sturdy cardstock. The sky background is also part of the earlier snowglobe release. The front three layers are part of the newer dome release. The tiny ghosts, bats and pumpkins are all from the Haunted Entrance Dome set.
I used patterned paper for all the layers except the backer which is a heavy weight black cardstock. The Radiant die cuts out the sky section which I taped on the backside into its frame and then glued the black backer pieces to it. Using glitter ink pens by Spectrum Noir, I colored in the night sky leaving a hazy yellow moon for the bats to fly in front of for contrast.
Each of the layers has a tab at the bottom that is folded back and glued onto the backer base flap. The front fold of the backer, I trimmed down to show more of the iron fence.
The tiny ghosts are cut from white glitter cardstock while the pumpkins are cut from orange cardstock and then colored with glitter ink pens. These tiny elements are glued onto the various layers to add depth and dimension to the open card. I used a white gel pen to highlight the tiny embossed cut features of the haunted house layer.
The die-cut “Happy Halloween” is from Karen Burniston and colored with glitter ink pens as well before being glued on to the card. (I find a fine-tipped glue bottle makes the gluing process of these tiny intricate sentiments easier.)
A piece of spider ribbon from my stash holds the top of the dome layers together. (I found it is better to tie the ribbon as a loop rather than at the hole, so that the card and easily open and close.)
A personalized message can be added to the back using a white gel pen.
The card will fit into an A2 size envelope, but I used a mini-slimline envelope. The back of the envelope is stamped with “Spooky Halloween” using a bat to hint at what is inside.
Thank you for reading. If you enjoyed this blog post, please like it and follow the blog. 😊
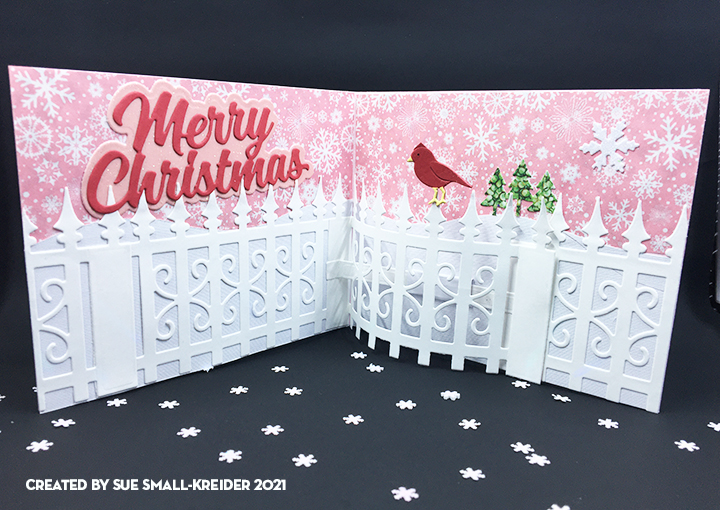
I love a crisp winter morning where tiny snow crystals fill the air and sparkle in the sunlight. This is a card celebrating such a morning in lighthearted pastels. Karen Burniston dies are used for the card focusing on the Iron Fence Pop-Up die set.
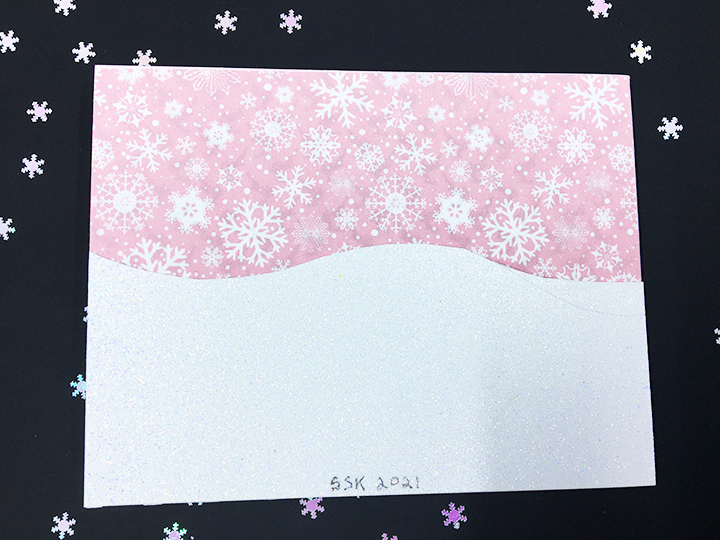
To make this A2 size card, cut a rectangle 4 1/4 x 11 inches of pink heavy cardstock and fold in in the middle to make a 4 ½ inches tall by 5 1/2 inches wide card base. Cut four decorative snowflake paper panels at 2 1/4 x 5 1/4 inches. Adhere these panels to the top of front, back and insides of the card base. Using one of the hillside edging dies, cut four hills that are 5 1/2 inches long and the lowest point is 2 1/4 inches tall. (I used white glitter card stock on the front and back sides and a textured white inside.) Glue the snowy hills to bottom of each panel of card base.
It is easiest to die cut all the pieces you will need to make both the inside and outside fences at the same time so that they are similar in colors and papers used. (I cut four fences, but I really should have cut six fences so I could have finished the back of the card with a fence too.) Cut one of the slider fence arm and one of the arm sleeve from the same paper you used for the inside snowy hills. Cut at least six green fir trees from the Long Nature Edges set to decorate in odd numbers on the front and inside of the card.
After watching the assembly video on the re-released inside pop-up fence, assemble as directed. (I found that the best way to decorate the hills and fence is to not glue the fence tops down. You can do this latter if needed using a fine tipped glue bottle.)
The birds in the fence die set are designed as crows so they are larger than a cardinal would be. There are smaller birds in the Frame Pull Pop-Up die set that are better sized as songbirds. This assembly video also has a tip on how to make the cardinal or chickadee crest on the head of the birds.