A Pumpkin Patch Kind of Halloween

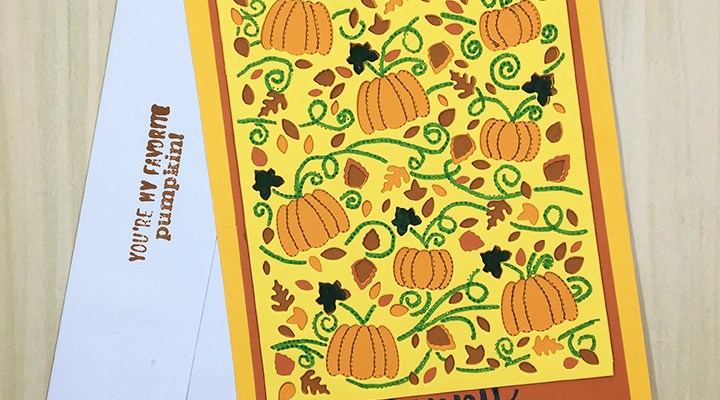
Here is a quick layered card for Halloween or Fall greetings using one of the Birch Press layered designs.  It went together in less than an hour.

First decide on your colors. I knew orange for the pumpkins and then decided on autumn leaf colors for the four layers needed.  The dies cut an A2 size panel (4 ¼ x 5 ½ inches), I decided to go for a 5 x 7 inches card, so I also cut a 5 x 7 inches rectangle of an orange card stock and a mat layer of Terra Cotta card stock at 4 ½ x 6 ½ inches.

I cut layer A from Lemon, layer B from Terra Cotta and layer C from Orange. All the layers will give you lovely small leaves as off-cuts, but layer B also gives you large, veined leaves that can be used to decorate your card or save for other projects. You will want to cut a fourth layer for the backing. I cut my 4 ¼ x 5 ½ inches backing from Pumpkin Bread cardstock.

Using a green fine-tip marker, I colored in the pumpkin vine leaves and vine once the layers were all glued up.  (Another alternative would be to cut same green squares of paper to cover behind the lemon layer the pumpkin leaves.)

The sentiment was an extra one left from another project using Karen Burniston’s Halloween Charms.

Because the card has so many layers, I have opted to leave it as a single layer -postcard style card that will fit in an A7 envelope as it is too thick to send as a postcard.

Hope you enjoyed this quick card. If so, please comment and like and follow this blog. 😊

Supplies used:

64th Anniversary Wishes

It is wonderful when people get to celebrate 64 years of marriage, so a special card is needed.

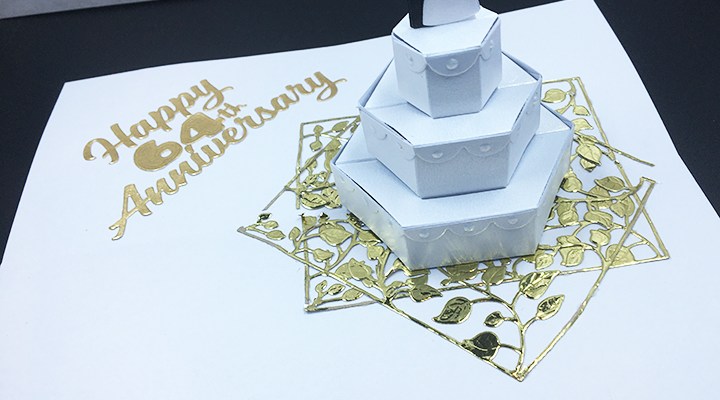
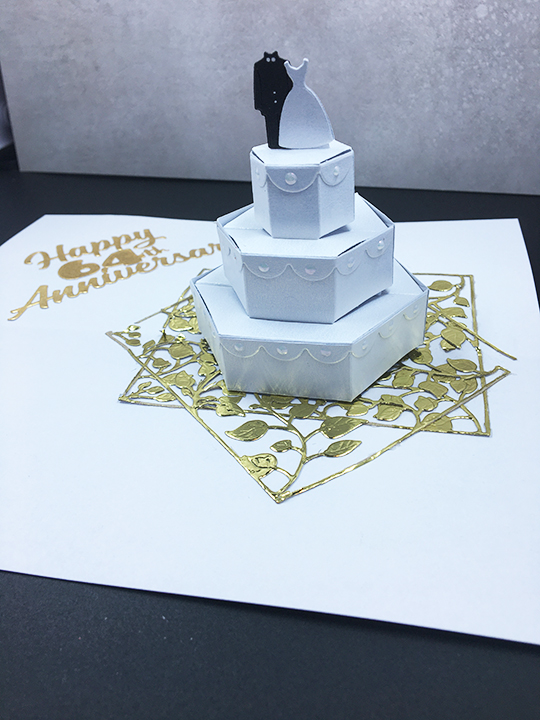
This card is primarily made with Karen Burniston dies focusing on the Cake Pop-Up in a 3 3/4 inch x 8 3/4 inch card base. (I used a green leafy coated card stock for the base.)

Cut out two of each of the cake tier pieces, two of the three scalloped edging pieces and two of the bride and groom piece. (I used shimmer cardstock for all but the groom pieces.) Fold tier pieces on scored lines as shown in the photos. Glue each tier together following the video photos.

It is easier to decorate the cake before attaching it to the card. (I added some embellishment drops to the scalloped edges that needed to dry overnight.) Glue one set of bride and groom together on to tab at cake top. Glue the second set on to back side of cake top. Adhere the scalloped edging on to each tier of cake, starting and stopping each scalloped piece at the center fold of each tier.

Use two rectangular foiled gold leaf die-cuts for the cake platter, cutting them in half where they go over the fold. Glued each layer down.

Align the cake center fold with the card base fold on top of the platter+. Place glue on the lowest tier’s folded tabs and glue in place. Fold card closed and firmly press cake to card base. Wait until glue has set to open.

The sentiments for the card front are Karen Burniston’s Word Set 12 -Anniversary and Happily ever after. The heart on the front with “Happily Ever After” is covered with Nuvo Glitter Drops in red. The “64th”was cut using a numbers die from The Greetery and the “th” was cut from one of the word dies in a Hunkydory-Moonstone die set.

Thank you for reading this blog. Please like and follow Ully Cat’s World blog. 😊

Other Anniversary cards I’ve blogged about:

SUPPLIES Used:

Dies

Miscellaneous:

Other Supplies:

  • Papers by BoBunny and Recollections’ Shimmer Cardstock
  • Colored and mirror cardstock scraps
  • Nuvo Dream Drops – Cloud 9
  • Nuvo Glitter Drops – Red Sunstone
  • Stampin’ Up – Crumb Cake ink pad
  • Neenah Social – A7 envelope – Bare white techweave
  • Heart dies & stamp set from Papercraft Inspirations, issue 176, April 2018

Luscious Wedding Wishes

Hi, it’s Sue here from the Dies R Us Design Team with an interactive wedding card.

This card is primarily made with Karen Burniston dies focusing on the Cake Pop-Up in a 3 3/4 inch x 8 3/4 inch card base. (I used a green leafy coated card stock for the base and coordinating mosaic tile cardstock inside.)

Cut out two of each of the cake tier pieces, two of the three scalloped edging pieces and two of the bride and groom piece. (I used shimmer cardstock for all but the groom pieces.) Fold tier pieces on scored lines as shown in the photos. Glue each tier together following the photos.

It is easier to decorate the cake before attaching it to the card. (I added some embellishment drops to the scalloped edges that needed to dry overnight.) Glue one set of bride and groom together on to tab at cake top. Glue the second set on to back side of cake top. Adhere the scalloped edging on to each tier of cake, starting and stopping each scalloped piece at the center fold of each tier.

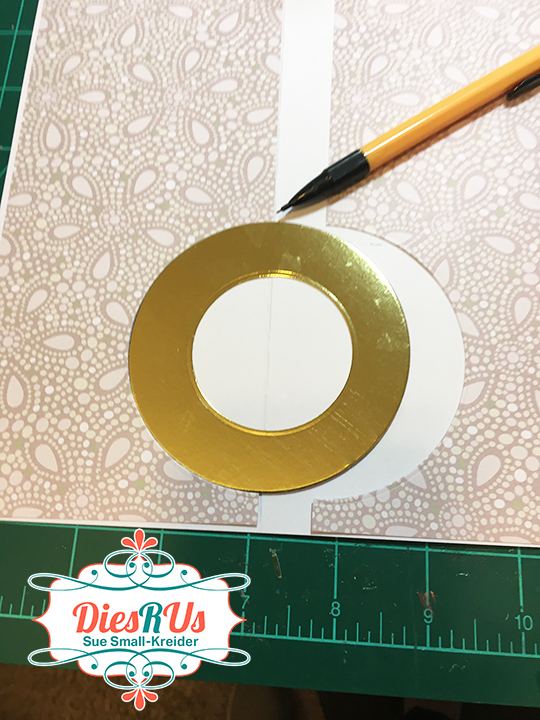
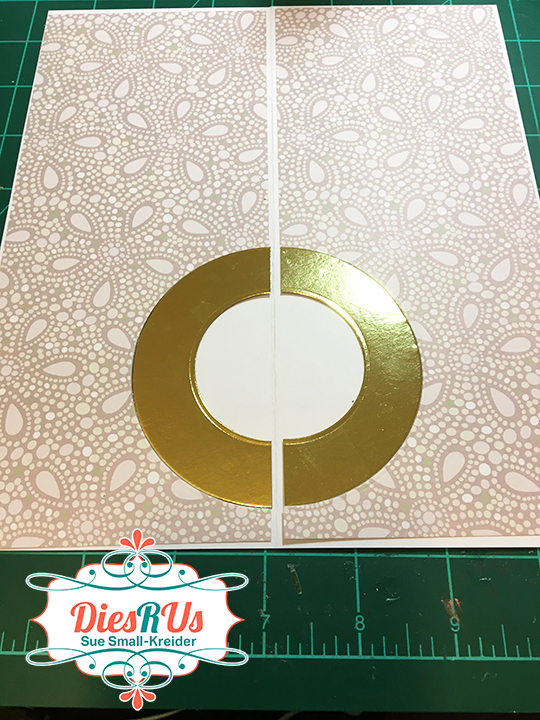
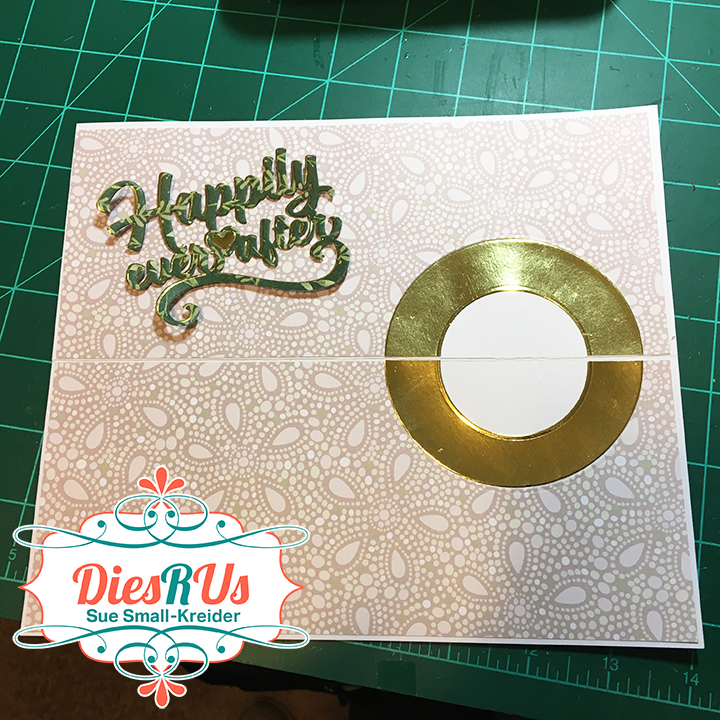
Cut a 3 1/2 inch circle from gold mirror and then cut a 2 inch circle from the center of the larger circle. Cut in half and glue on either side of the card base fold. (Because I used inside decorative panels, I cut out the 3 1/3 circle from my panels so the card would have no catch points and lessen the bulk of the card.) Play with the layout of your decorative pieces before gluing the cake to the gold circle. Align the cake center fold with the card base fold. Place glue on the lowest tier’s folded tabs and glue in place. Fold card closed and firmly press cake to card base. Wait until glue has set to open.

The sentiments for the card front are Karen Burniston’s Word Set 12 -Anniversary and Happily ever after that I cut twice so that I could off-set the gold and green letters and to be able paper piece the gold heart into the green words. The gold borders on the card front are from another Karen Burniston dies set of Party Border Blends.

Hope this fun card has provided some inspiration for your crafting. 😊

SUPPLIES Used from Dies R Us:

Dies

Miscellaneous

Other Supplies:

  • Papers by BoBunny and Recollections’ Shimmer Cardstock
  • Colored and mirror cardstock scraps
  • Nuvo Dream Drops – Cloud 9
  • Stampin’ Up – Crumb Cake ink pad
  • Neenah Social – A7 envelope – Bare white techweave

A Toolbox Father’s Day

Hi, it’s Sue from the Dies R Us Design Team with an interactive Father’s Day card.

This card is made with Karen Burniston dies focusing on the Tool Charms and Tiny House Pop-Up dies in a 5 1/2 inch x 4 1/4 inch card base. (I used a kraft paper card base and its matching envelope.) My inspiration for this card comes from Sandy Diller.

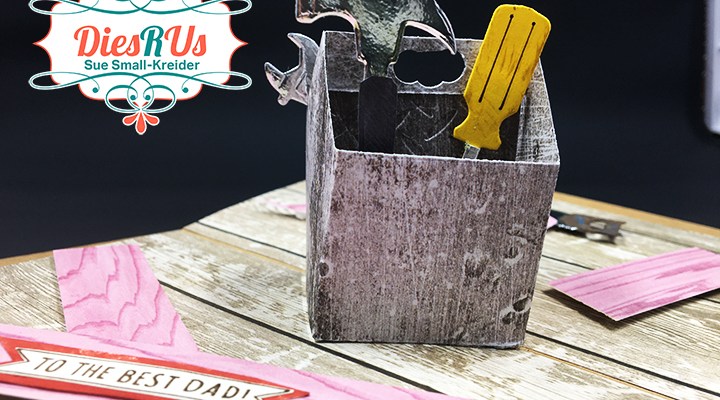
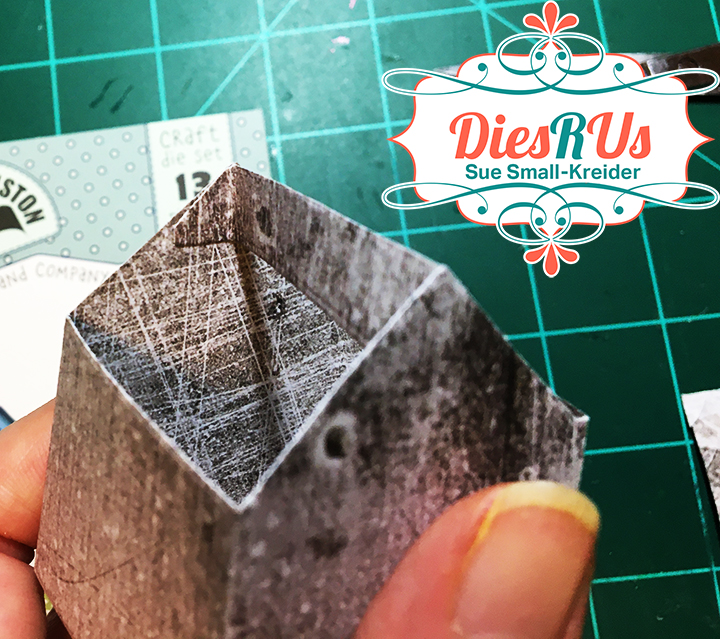
It is simple to alter the tiny house into a toolbox by not attaching the roof and adding a side panel cut from the house die cut and then adding it to the crossbar. I used a hole punch to create the handle on the crossbar.

The tool charms are great for using up your tiny scraps. You don’t have to cut the full piece if you are piecing handles on to the silver mirror cardstock. Just cut enough beyond the piece to glue the other half onto. (I used white and brown ink to “age” my tools.)

Once you adhere the toolbox to the card’s inside fold, following the directions on the packaging, you can decorate the card as you want. (I used some woodgrain cardstock cut into planks as well a scrap that looked like a wooden candle holder and the pieces are on foam squares to add some dimension to the card.)

The “Happy Father’s Day” was cut from the words in Karen Burniston’s Word Set 1 – Greetings and Word Set 2 – Birthdays. Piecing Father and Day together from letters from various words in both sets. You could also use the new “Happy Father’s Day” sentiment by Karen Burniston.

Hope this fun card has provided some inspiration for your crafting. 😊

Other Father’s Day cards on my blog

A Tool Box Father’s Day

A Fishing Father’s Day

A Father’s Day Waterfall Pop-Up

A Work Bench Father’s Day Card

In-Vested Father’s Day Card

SUPPLIES Used from Dies R Us:

Other Supplies:

  • Wood grain and scratched medal cardstock
  • Colored and silver mirror cardstock scraps
  • Black fine tipped pen
  • Hampton Art ink pads
  • Stampin’ Up – Early Espresso ink pad
  • Sizzix World’s Best Dad stamp set
  • A2 sized kraft card base and matching envelope

Don’t forget to come join in the fun at the Dies R Us Challenge Blog. There’s a new challenge theme offered on the 1st and 15th of each month and one lucky randomly drawn winner will receive a gift voucher prize to the Dies R Us Store.  

 For your convenience, all the important Dies R Us links are provided below.

click below for:

STORE

CHALLENGE BLOG

FACEBOOK

INSPIRATION BLOG

FRIENDS OF DIES R US PINTEREST PAGE

Swing Gate Fold

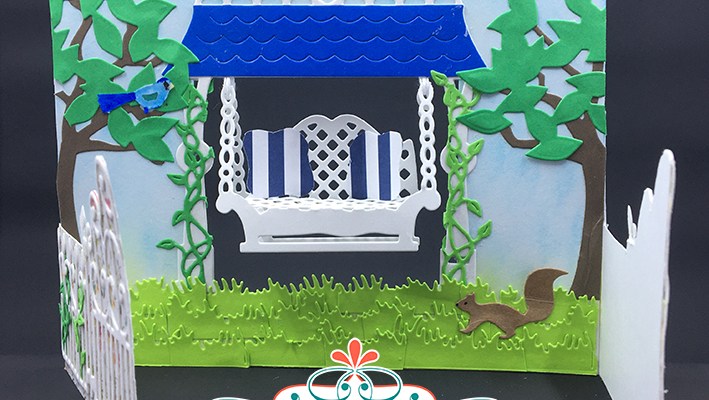
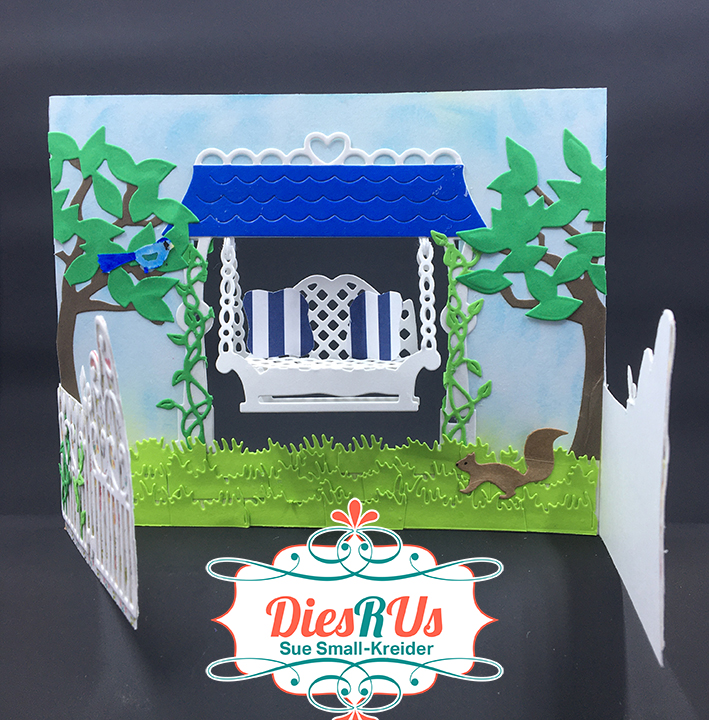
Hi it’s Sue here from the Dies R Us Design Team with another interactive swing gatefold card.

I based this card off of a swing card I made in last week’s blog post. You can get the specific instructions on how to make the bench swing by clicking here.

After cutting a 3 inch square opening on a 5 inches x 6 inches piece of heavy white cardstock, ink blend a soft blue sky all over.

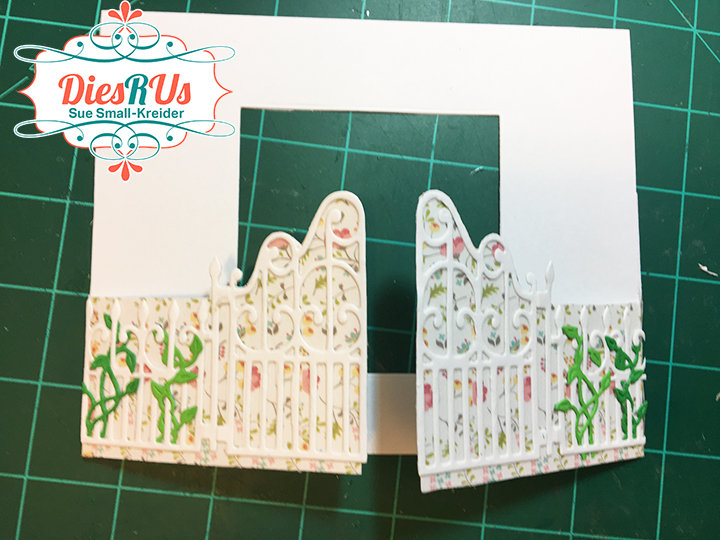
Using two pieces of heavy white cardstock 3 inches x 3 1/2 inches, cover with tiny flowered washi tape (you could use patterned paper instead). Next die cut the gate and fence pieces to fit a 3 inch on each side. Before gluing the fence pieces down, use some of the leafy vine from a birdhoue die set to grow up around the fence.

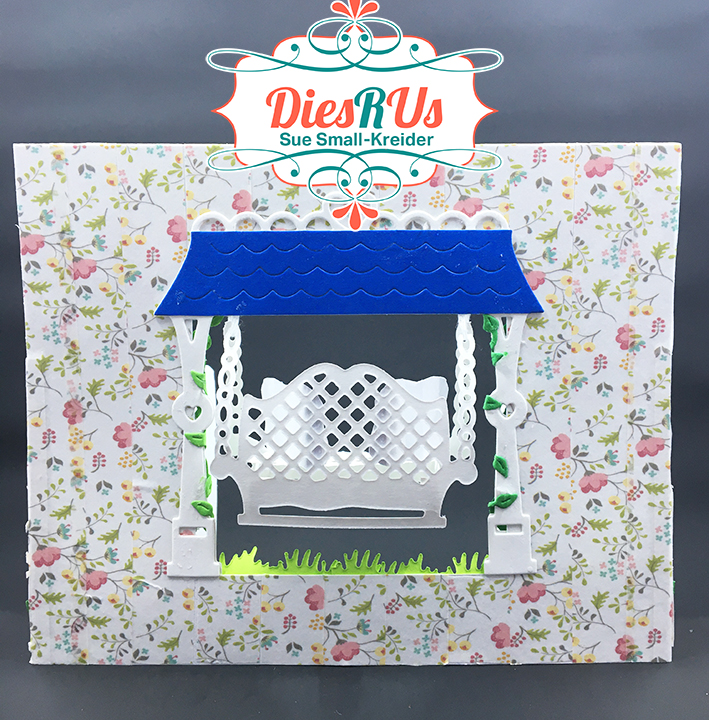
Once the fence and gate pieces are glued to the 3 x 31/2 pieces score and glue the ¼ inch tabs to the back of the 5 x 6 inch base. Cover the back of the base card with washi tape/patterned paper.

Next glue the swing posts and roof over the cut-out 3 inch square blue inked side. To decorate the posts, glue on more of the leafy vines. Make the bench swing as described in last weeks blog. Attach with tape the threaded chains to the back side of the roof, making sure the bench is hanging even. With the swing in place, glue the second post and roof piece over the 3 inch cut square, matching up the post and roof edges. Glue on dark blue roof pieces to front and back of card.

Back of card

Decorate the scene with trees, birds, squirrels and grass. The swing pillows are cut using the pillow dies from a sofa die set.

You can write a message inside the gates or on the back of the card.

Hope this fun card has put a smile on your face and provided some inspiration for your crafting.

SUPPLIES Used from Dies R Us:

Dies

Inks

Miscellaneous

Other Supplies:

  • Flowered washi tape
  • White embroidery floss
  • Striped and colored paper scraps
  • Black fine tip pen

Don’t forget to come join in the fun at the Dies R Us Challenge Blog. There’s a new challenge theme offered on the 1st and 15th of each month and one lucky randomly drawn winner will receive a gift voucher prize to the Dies R Us Store.  

 For your convenience, all the important Dies R Us links are provided below.

click below for:
STORE

CHALLENGE BLOG

FACEBOOK

INSPIRATION BLOG

FRIENDS OF DIES R US PINTEREST PAGE

A Swinging Anniversary

Today we are making a 3-dimensional swing card using Karen Burniston dies from Dies R Us.

1. Cut two of each color using the swing die. Save the off-cut pieces for bench supports (I find the best piece is right below the bench , about 3/8 inches tall x 2 inches)

2. Trim off two roofs from darkest colour and the four posts from the lightest color. Cut the chains off the middle color. Cut bench support into two strips. (I save all the parts that I’m not using on this card to use on other cards.)

3. Cut words from each of the three colors.

4. Cut four stems from green and ten small flowers and center circles from flower dies.

5. Cut a 5 inch square and four small strips ¼ inches X 1 ¼ inches from sturdy green cardstock for the card base and post tabs.

6. Trim heart and scallop off one of the roof pieces. Glue roofs to yellow bases.

7. Glue heart and scallop trim together, being careful not to glue roofs.

8. Glue white posts ton fronts of yellow base posts.

9. Take one of yellow benches, snip the back at sides and fold down back to become bench seat. Trim of top of the bench as shown.

10. Cut the bench support strip into two side strips Fold ¼ on either end to form two tabs.

11. Trim tabs to fit the bench cut-outs. Glue tabs to lower side of back of seat piece as shown. Then glue other tabs to back bench piece.

12. Take 5 inches green square and fold in half, fold down one side to make a mountain fold, repeat on other side. Base should have two mountain folds in the shape of a “M.”

13. Glue small green support strips to inside of posts. Let dry and then glue posts to inside valley of base as shown in red circles.

14. Trim off top two loops on bench chains.

15. Cut two lengths of thread or embroidery floss. Thread one piece through the two chains on one side of bench. Repeat with other thread on opposite side of bench.

16. Tape threads to underside of roof making sure bench hangs evenly. (Red circles) Trim off tails of thread. Test swinging your bench. Smile.

17.Glue your words together offsetting at least one or both of the back colors. (Off-setting all three gives a blurred effect as shown, but off-setting just one makes the letters look 3D.)

18. Glue your flowers together and then onto the stems/bushes. Glue to base.

Hope this fun card has put a smile on your face and provided some inspiration for your crafting.

Want to see other swing cards I’ve made? Click here.

Thank you for reading this blog post. Please like and leave a comment. 😊

SUPPLIES Used from Dies R Us:

Additional Supplies Used:

  • Stampin’ Up Classic Stampin’ Pads – Early Espresso and Emerald Envy
  • Summer meadow stamp set from Cardmaking & Papercraft Issue 198, August 2019
  • Square envelope from my stash

Don’t forget to come join in the fun at the Dies R Us Challenge Blog. There’s a new challenge theme offered on the 1st and 15th of each month and one lucky randomly drawn winner will receive a gift voucher prize to the Dies R Us Store.  

 For your convenience, all the important Dies R Us links are provided below.

click below for:

STORE

CHALLENGE BLOG

FACEBOOK

INSPIRATION BLOG

FRIENDS OF DIES R US PINTEREST PAGE

A Birthday with Swirls

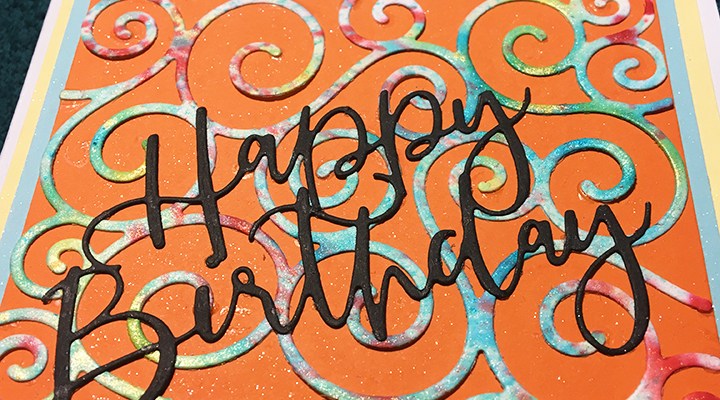
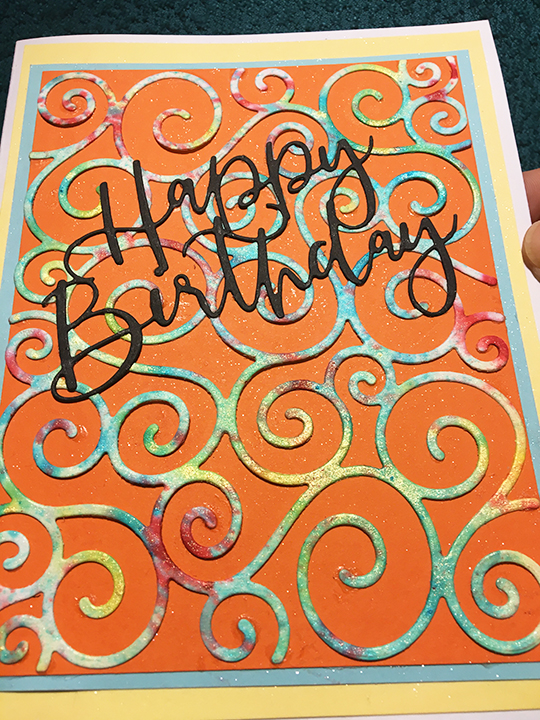
I really like using this Karen Burniston Swirls pattern plate die with background papers that I made with Nuvo Shimmer Powders.

A thin cursive “Happy Birthday” in black doesn’t overpower the swirls.

The swirls die-cut is 4 ¼ inches x 5 ½ inches. So I cut rectangles of orange (4 ¼ inches x 5 ½ inches), blue (4 ½ inches x5 ¾ inches) and yellow (4 ¾ inches x 6 ¼ inches) to back and mat the swirls. Glue was used to adhere all pieces of this card together.

To add additional interest to the card, I covered the orange, blue and yellow paper with Aqua Shimmer Glitter Gloss.

Thank you for reading this blog post. Please like and leave a comment. 😊

SUPPLIES:
Dies

Papers

Color Pigments

Miscellaneous

Heart Hands

Having just discovered i-crafter dies, I had to try out their Heart Hands, Wiper Insert die set.

For this quick card I used a printed card base designed by April Comell from my stash. Because it is a heavy cardstock, I decorated with thin papers, but used a lightweight dark blue scrap of cardstock for the main wiper mechanism and a medium weight cardstock scrap for the hands.

I watched Lynda Kanase’s assembly video a few times before making the card. The mechanism is a simple one that could be used with other things that wave or move. The hand dies have slight embossing for fingernails that you could paint red for nail polish.

After deciding to make this a Valentine’s card, I used my favorite Karen Burniston die for “Happy Valentine’s Day” cut once in white and again in red and off set for the inside.  I used the “Love” sentiment die that is part of the Heart Hands set for the front of the card.

The lacy white trim is an older Joanna Sheen die used whole on the front and cut in half for inside the card.

As is my style, I stamped the back of the envelope with a BoBunny hearts stamp in a red ink to hint as to what is inside.

You can view more Valentines by clicking here.

Thank you for reading this blog post. Please like and leave comments 😊

Materials Used:

Dies

Stamps/Ink

  • BoBunny – Clear Acrylic Stamps – I Heart Stars – 12105444
  • Stampin’ Up – Classic Stampin’ Pad – Real Red

Papers

  • Printed card 4 ¼ in x 5 ½ in card and envelope by April Comell
  • Green printed paper from stash
  • White and red scrap papers from stash

Miscellaneous

Valentine Swing

Garden swings have played a role in the courtship of the lovely couple for whom this card was made. So, an interactive card to reminded them of their early days getting to know one another is appropriate.

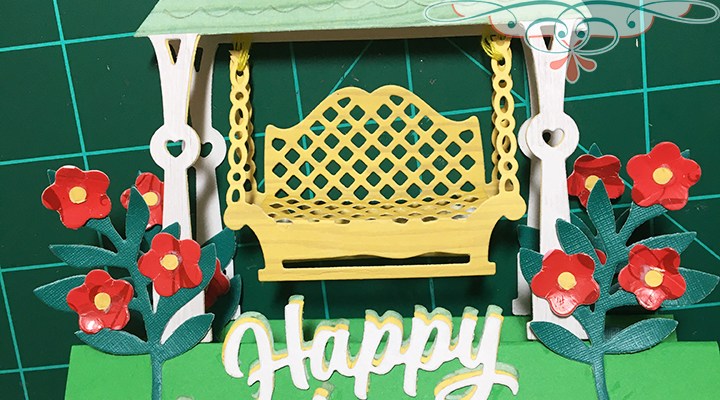
The starting point for this card is a new Tutti Designs swinging bench die and a “M” fold stepper base.

Die-cut:  Cut the whole swing die out six times – 2 green, 2 pink wood, 2 white wood. From these six designate one of each color to be the front section and one of each color to be the back section. The pink wood pieces will be used as the section bases. The chain with the bench attached should be trimmed from the roof of the pink pieces. Cut the rounded bench arms with the chain attached off the pink bench pieces and discard the bench remains.

Front Section:  Trimmed off the green roof from the front section and glue the two green posts to the back of the pink wood piece. From the white wood piece, trim off the roof from the chain with bench attached and posts. Then trim down the post pieces to the circles. These shortened white posts glue to the front of the pink wood posts.

Back Section:  Trim off the chain with bench attached from the green piece. Glue the green piece to the back of the pink piece to strengthen it. From the white wood piece, trim off the roof from the chain with bench attached and posts. Then trim down the post pieces to the circles. These shortened white posts glue to the front of the pink wood posts. Save the white roof for later.

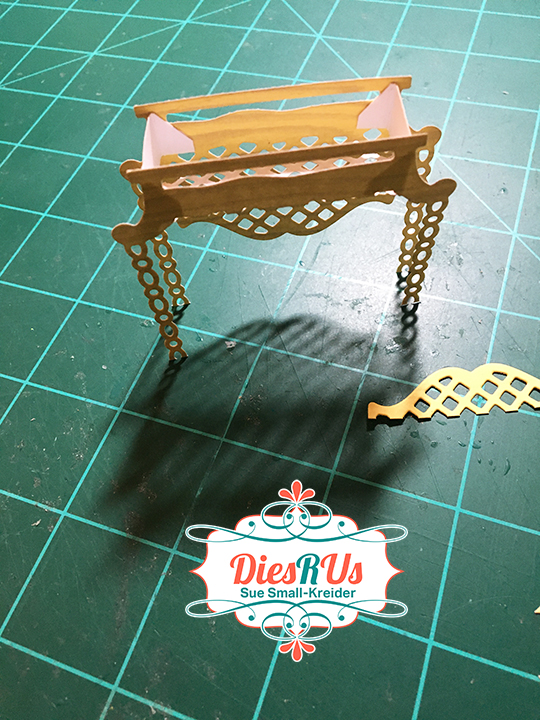
Bench:  Trim off the chains from both white bench pieces and discard the chains. On the front bench piece snip the two connecting lattice bars from the arms. (See first photo) Bend down the lattice seat and trim the curved portion off so that the seat is ½ inch deep. (See second photo) From white scrap, cut two strips 1 inch by ¼ inch. Fold ¼ inch tabs at each side of the strips. (See third photo) Glue strips to the back side of front bench under the bend for the seat. Glue the remaining tabs to the front of the back white bench piece. The bench now should have a rectangular frame once which the lattice seat will rest on. (See fourth photo and photo below)

Glue the pink chains to the back sides of the bench arms, keeping the chains perpendicular to the bench seat. Cut two pieces of white embroidery floss at least 5 inches long. Thread a piece of floss through the top chain link and then through the other top chain link. Repeat with second piece of floss on opposite bench side.

Stepper Base:  Cut a piece of green cardstock 5 inches by 5 ½ inches. With the 5 ½ side of card vertical, score the shorter side at the middle (2 ½ inches) and at the quarter marks (1 ¼ Inches and 3 ¾ inches). Fold the middle as a valley fold and the quarters as mountain folds. Your folded base should resemble a “M.”

Assembly of Card:  Lay the back pink-roof-with-posts piece on your work surface and position the bench and its floss threads as it would hang from the roof. Flatten the bench to see where the chains will move to and adjust bench so threads with reach roof. Tape only the back two threads to front of pink roof. Trim tails off the two taped threads. Glue the white roof piece over the taped threads.

Place the front pink-roof-with-posts piece on top of the back piece aligning the posts. Glue only the top heart and scalloped roof trim of the front and back pieces together.  Position the front chain threads over the front pink rood and tape to roof. Open glued front and back to a tent-like shape. Reposition front taped threads to make bench level and free to swing. Glue green roof over the taped threads.

Glue the back posts to the back ‘mountain’ of card base and front posts to front “mountain” of base. Decorate with as desired with flowers and sentiment. Add a white strip of cardstock to back side of base to write a personal message.

The card will fold flat to fit into an envelope, by flipping up bench seat and flatten bench frame.

I decorated my card with some tiny flowers made from a Spellbinders die set and the sentiment (Karen Burniston die) was cut once from red and once from white and then glued slightly askew to give highlights.

As is my style, I stamped the back of the envelope with a BoBunny hearts stamp three times in a cherry red ink to hint as to what is inside.

You can view more Valentines by clicking here.

Thank you for reading this blog post. Please like and leave comments 😊

Materials Used:

Dies

Stamps/Ink

Papers

Miscellaneous