A Candy Winter Card

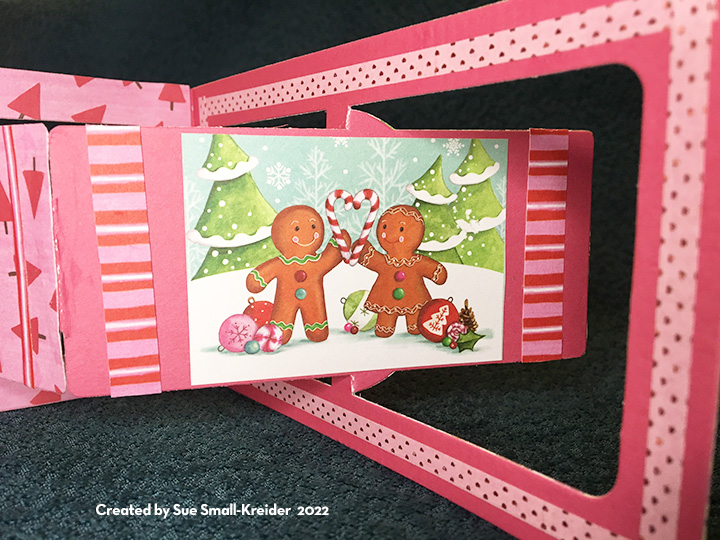
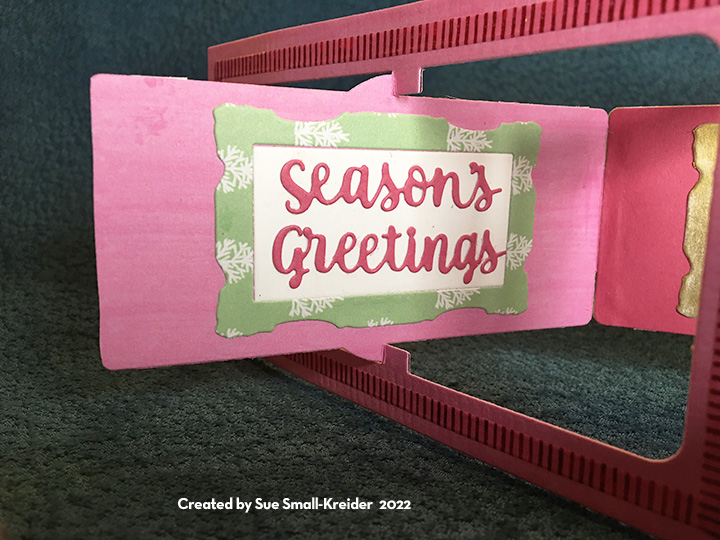
Gingerbread, candy canes and snowmen make this accordion card a treat for the eyes and imagination. The papers are all by Heitz Cuppleditch for Craft Consortium. The accordion-fold card base dies, words and frame dies are all by Karen Burniston.

I followed the assembly video for the accordion fold card. (I found it useful to layout the card and its decorative pieces before gluing as sometimes a tab that connects the various panels needs to be hidden by a decorative piece so the order of gluing all the tabs together needs to be thought through before assembly.) The base is cut twice – once from solid pink cardstock and again from decorative papers and glued together.

Leftover striped pieces and decorative frames are the finishing touches along with narrow washi tape make the accordion frames standout. The one fancy frame was gilded using Distress Foundry Wax which requires a heat tool to set the gilding.

The card fits into a A7 envelope which has been stamped on the back with a stamp of the gingerbread train in pink ink. The stamp is also from the Candy Christmas Collection by Heitz Cuppleditch for Craft Consortium.

Thank you for reading this blog post. Please like and leave comments 😊

Here is a sneak peak of the August 2022 Release of Karen Burniston dies.

Materials Used:

Dies

Stamps

Inks

  • Simon Says Stamp – Pawsitively Saturated Ink – Sweets
  • Ranger – Tim Holtz – Distress- Foundry Wax – Gilded

Papers

Miscellaneous

  • Die cutting Machine
  • Neutral PH Adhesive by LINECO
  • Fine-tipped Bottle
  • Tim Holtz – Tonic Studios – Stamping Platform
  • LDRS Creative – Stampendable Stamping Tool
  • Stamp Cleaning Cloth
  • Poking Tool
  • Scissors
  • Small Paint Brush
  • Craft Mat
  • Heat Tool
  • Narrow pink and red washi tapes from my stash

Winter mail

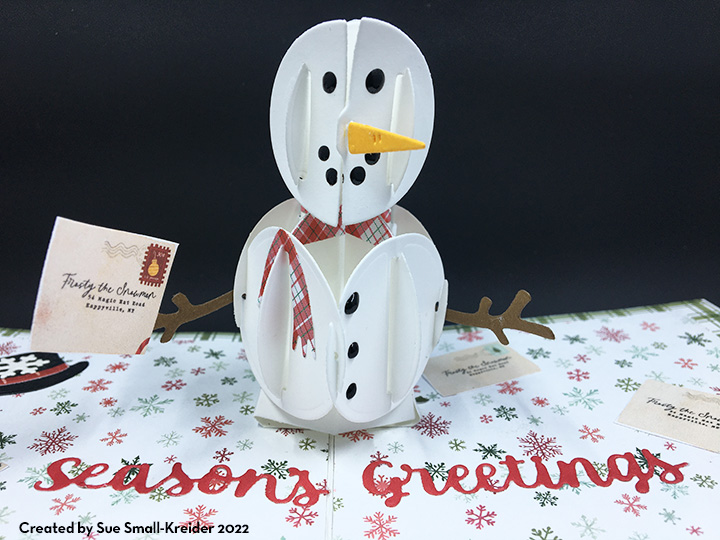
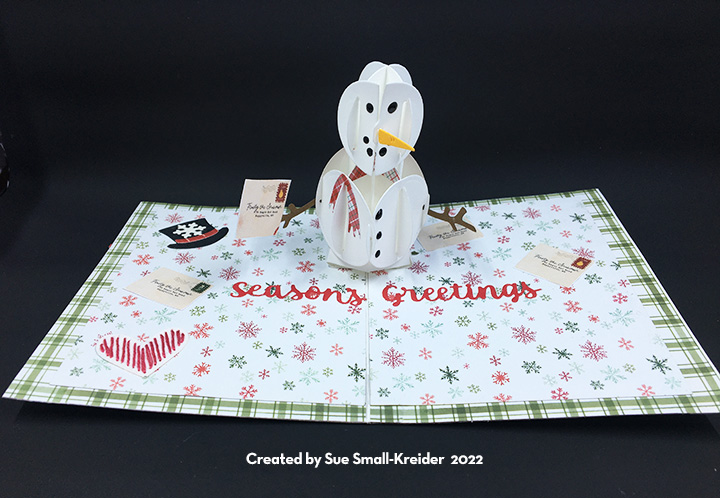
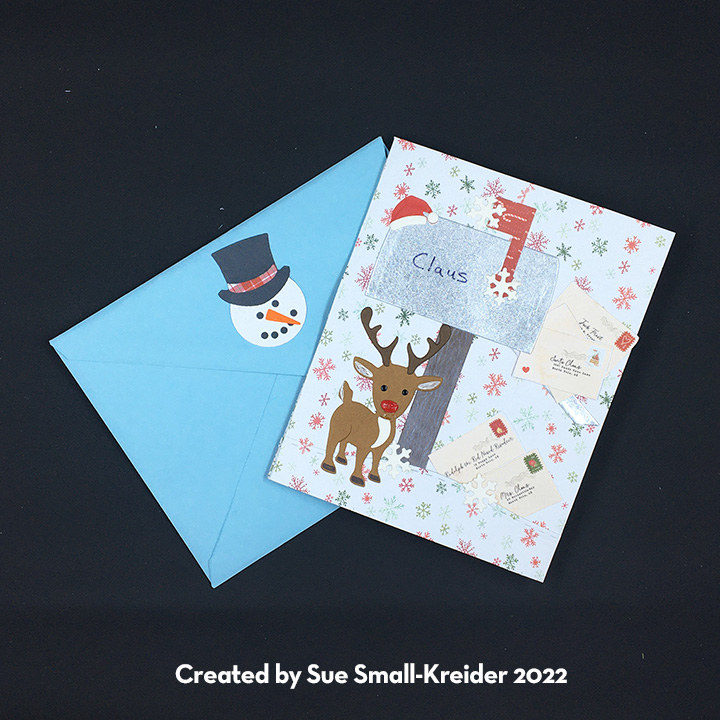
Who doesn’t love getting mail! The most famous snowman, Frosty sure does enjoy his mail in this card celebrating wintertime mail. It uses dies by Karen Burniston to create a delightful pop-up card.

The main die sets used were the Mailbox Pop-Up and the Snowman Pop-Up. Watch the two assembly videos for tips on how to construct the pop-up snowman and mailbox by clicking on the links above before starting your card. (If I had been smart and followed my advice of watching the assembly videos before starting the card, I would have known I needed at least 5 inches from the card fold to have Frosty in his top hat and should have done a top fold card instead of a side fold vertical card.)

Because I constructed my card base before I watched the assembly videos, I had to make the snowman without his hat to fit in the card. I used the top hat and snowflake from another snowman die set by Karen Burniston.

My inspiration for this card was the Carta Bella paper pad that has a page of envelopes addressed to various North Pole and winter characters. I cut out several of the envelopes from the paper and scattered them throughout the card. The other patterned papers are from this paper pad as well.

I like creating an outer frame for my card bases covered in patterned papers. I used the medium sized crosshatched rectangle to cut the frames in the inside green plaid paper panels and I used one of these rectangles on the back of the card over a border made from paper leftovers from the inside of the card.

For the card front I constructed a background from three leftover pieces of the snowflake print. The snow in the foreground was cut using a nature edge die that cuts a stitched rolling hill with trees. The trees I cut off.

While the mailbox is designed to be inside the card as an interactive element, it can be simplified down to a flat element. I used the main mailbox, lid, flag and wood grained post dies. The brown wooden post I inked the dies with white ink to get it into the wood grain and then gently rubbed the piece over the ink cube to get a snowy effect. I added the Santa hat and snowflakes to give some hints, if the name on the mail box didn’t clue the viewer that it is Santa Claus’ mailbox. I leave it up to the viewer to decide if the small Rudolf is the real one or a winter decoration.

Using the die as a stencil, I colored with a white gel pen to shade Rudolph’s ears and tail and a black fine-tipped marker for his hooves. I used Glossy Accents over his red paper nose to look more like a light. For Rudolph’s eyes and the snowman’s coal eyes and buttons, I used Nuvo Drops. With both these products be sure to allow 12-24 hours for them to dry. (I swished Rudolph’s nose and didn’t notice until the glossy accents had almost set.)

Inside the card, the finishing touches include: a snowflake, a stitched heart, and the sentiment of “Season’s Greetings” from the Karen Burniston Word Set 3.  (I’ve been experimenting with various dies by Karen Burniston with the dotted outlines because they are easy to make stitched or embroidered charms and embellishments for cards. This heart is from the Circle Charm Pop-Up set.)

For the envelope, I made a snowman face with top hat from Karen Burniston’s Snowman set and glued all its pieces and back securely to the back flap of the envelope. Sometimes for thick cards to fit into a standard size envelope (A2 for this card) you need to trim a total of 1/4 of an inch off the non-fold sides of the card.

Thank you for reading. If you enjoyed this blog post, please like it and follow the blog. 😊

Dies:

stamps & Ink

  • Craft Smart – Ink Pad – White
  • Ink
  • Stamp
  • Sakura – Gelly Roll Pen– 08 -White
  • Sharpie – Ultra Fine-Tipped Marker – Black

Papers

  • Carta Bella – 6×6 Paper Pad of Double-Sided cardstock – Letters to Santa
  • Lightweight 8.5×11 inch white cardstock
  • Matte silver foil cardstock scrap
  • Colored cardstock scraps
  • A2 Envelope

Additional Supplies Used:

Do What Brings You Joy

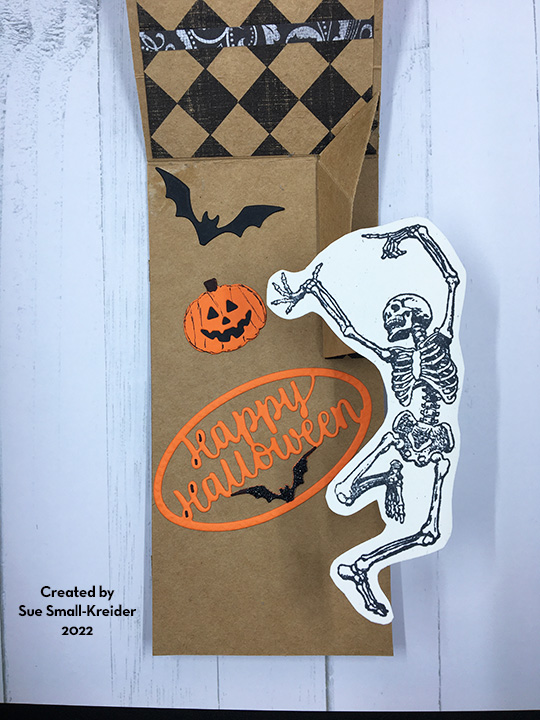
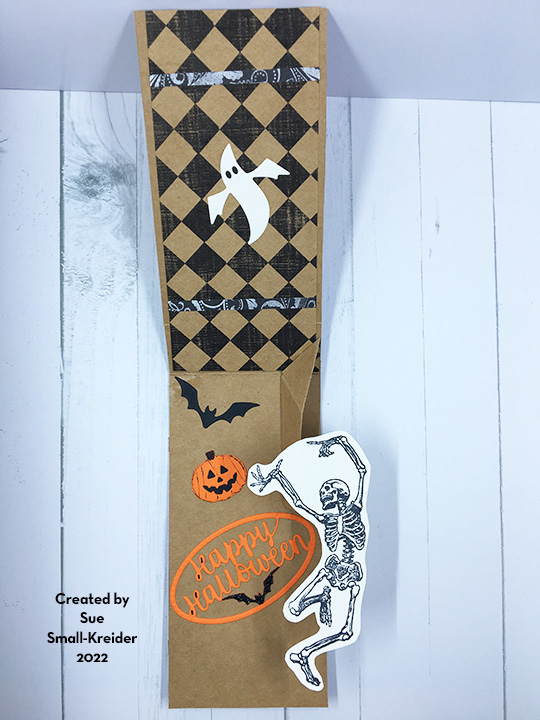
Sometimes you just have to do what brings you joy and the dancing skeleton stamp by Riley and Company’s Funny Bones Collection brings me joy.

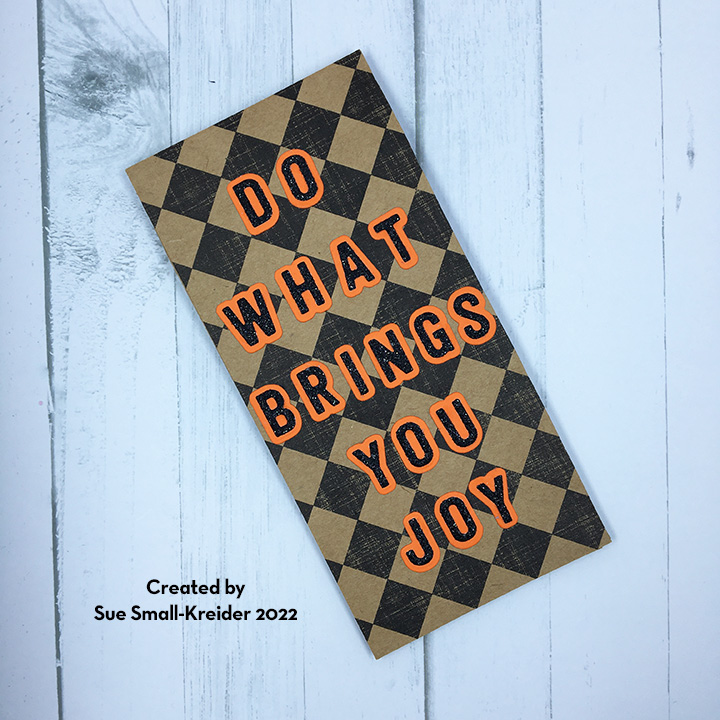
I designed this mini slimline card to measure 3×6 inches to fit inside a 3.5×6.5-inch coin-style envelope using scraps from other Christmas and Halloween card makes.

The pop-up mechanism is from the previously released Katherine Label Pop-Up die set by Karen Burniston (assembly video) and works well inside a top-fold mini slimline as long as the label or stamped image fits within the dimensions of the card. I practiced laying out the card elements with removable tape to get the best placement before gluing in place.

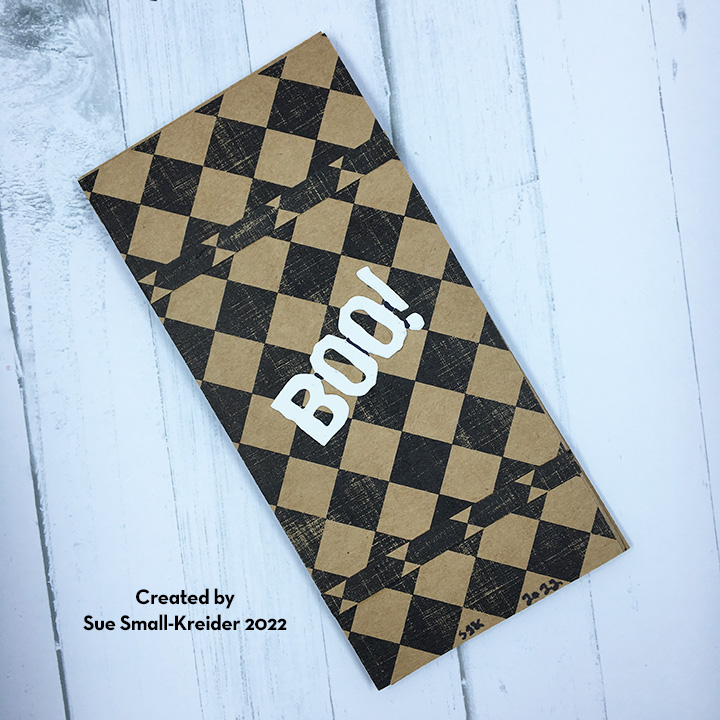
Because I felt the card was joyful inside, it needed just a tiny scary element, so the back of the card has the word “BOO!” in white. The lettering on the front has the base letters cut from black glitter cardstock with orange shadows behind. They are cut using Karen Burniston’s mini alphabet set.

All of the die-cuts are designed by Karen Burniston. The skeleton was stamped on creamy white cardstock and fussy cut around it.

Thank you for reading this blog post. Please like and leave comments 😊

Materials Used:

Dies

Papers

  • Hot off the Press – Paper Pizazz – Heart Flourish Black – HOTP-10407
  • Hot off the Press – Black Glitter Cardstock
  • The Paper Studio – Everyday Kraft 12×12 paper pad
  • Brazzill – 12×12 sheet of cardstock – Beach Dunes – 300142/PS1067
  • Orange and black cardstock scraps
  • American Crafts – 5 x7 Kraft card
  • Simon Says Stamp – Mini Slimline envelope – Grocery Gag

Pens, Crayons, Inks & Coatings

  • Sharpie – Permanent Marker – Ultra Fine Point – Black
  • Sakura – Gelly Roll Pen– 06 -Black
  • Memento – Fade-Resistant Dye Ink – Tuxedo Black

Stamps

  • Riley & company – Funny Bones – RWD-492

Miscellaneous

You’re the G.O.A.T.

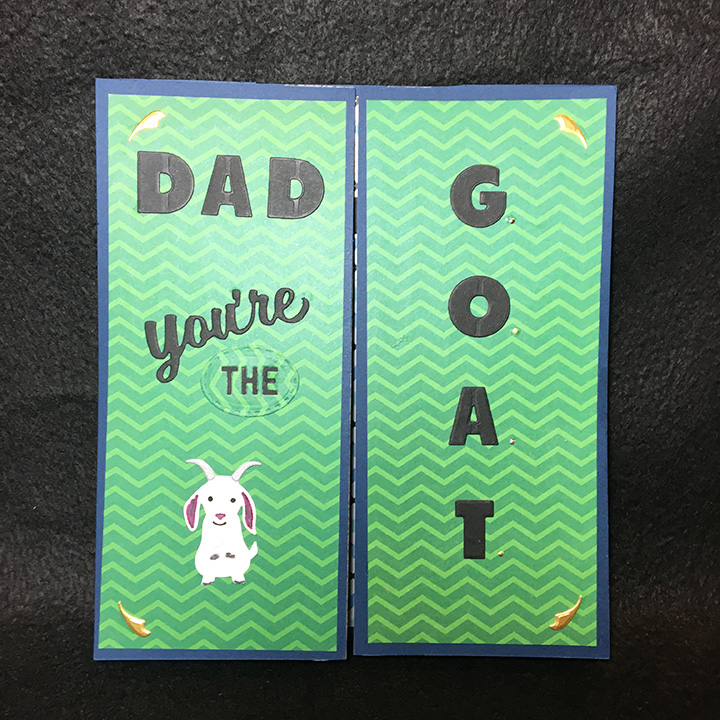
While being told that you’re the G.O.A.T. may sound bad, it really means You’re the Greatest Of All Time. In my family of sports players, being told you’re the G.O.A.T. after a game is common, so letting Dad know he’s the G.O.A.T. is a fun thing. This card could be used for birthdays or Father’s Day.

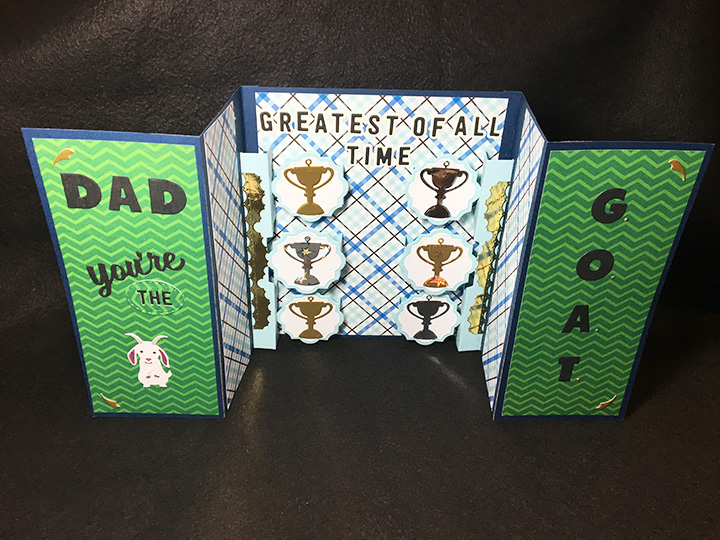
In challenging myself to use Karen Burniston’s Little Labels Pop-up in a vertical position, I saw the labels as shelves for trophies. Some of my inspiration comes from Sam Calcott of Mixed Up Crafts when she makes her tower cards.

I started with a 7 x 8 inches rectangle of dark blue heavy cardstock.  The side panels are made up of two panels per side. Because of my limited amount of the dark blue cardstock, I cut two panels of 3.5 x 8 inches and two more panels 4 x 8 inches. (I recommend cutting four panels of 4 x8 inches rather than having to use washi tape to attach the front panels.) Score the 4 x 8 panels at 3.5 inches to make a long tab.

Cut decorative panels ¼ inches smaller thane the base panels. Glue side panels to large base. Adhere decorative panels to card base inside panels.

If you haven’t already die-cut your inside decorative labels and trophies do so now. (I find some of the best, thick foiled silvers and golds are on personal care and food packaging such as cookie/biscuit packets.)

Also, cut and assemble all letters need for the inside sentiment. (I sort mine in a tiny bag, so I don’t lose any letters.) Die cut two of the Little Labels Pop-ups. Space out the placement of the pop-up labels and sentiment. (While I adhered my sentiment after I installed the pop-up labels, it might be easier to add the letters first and then the pop-ups.)

To adhere the letters, line them up on a grid background and place removable tape over them. (I used Post-it Note yellow tape.) I trimmed the tape down to make it easy to line up the bottom edge with the pencil line I drew on the card. I added glue to the back of one word’s letters and then placed them onto the card, pressed down to adhere and then peeling off the tape.

I watched Karen Burniston’s assembly video before I glued in my pop-up labels. (I find reviewing the videos help me before I make a mistake using my special papers.) You need at least 3.5 inches of width to close one pop-up labels panel, unless you stager the panels, you will need at least 7 inches width to close the card.  Add decorations to pop-up labels.

If you cut all the side panels at 4 x 8 inches, then fold the ½ inch tab and glue panel to other side panels. If you end up needing to tape your front panels, use the widest washi tape you have. Mine was 2 inches wide.

I used Karen Burniston’s Mini Alphabet for the inside sentiment and her original alphabet for the larger outside letters as well as parts taken from two other sentiment dies – “You’re Sweet” and “Enjoy the Ride.” I saved the tiny circles and scraps from the arms and lid of the trophies to decorate the front of the card. The goat is also a Karen Burniston die.

The belly band or belt that holds the card closed is made from scrapes and leftover pieces from other projects. This is intended as a presentation card to be hand delivered as it is too big for most standard size envelopes.

Label on back is a place to add a personal message.

Thank you for reading this blog post. Please like and leave comments 😊

Materials Used:

Dies

Papers

  • Heavy weight dark blue and pale blue cardstock
  • Patterned papers from my stash
  • Silver and gold packaging
  • Holographic silver and gold scraps
  • Black and white cardstock scraps
  • White gold shimmer cardstock

Miscellaneous

Squeeze The Day!

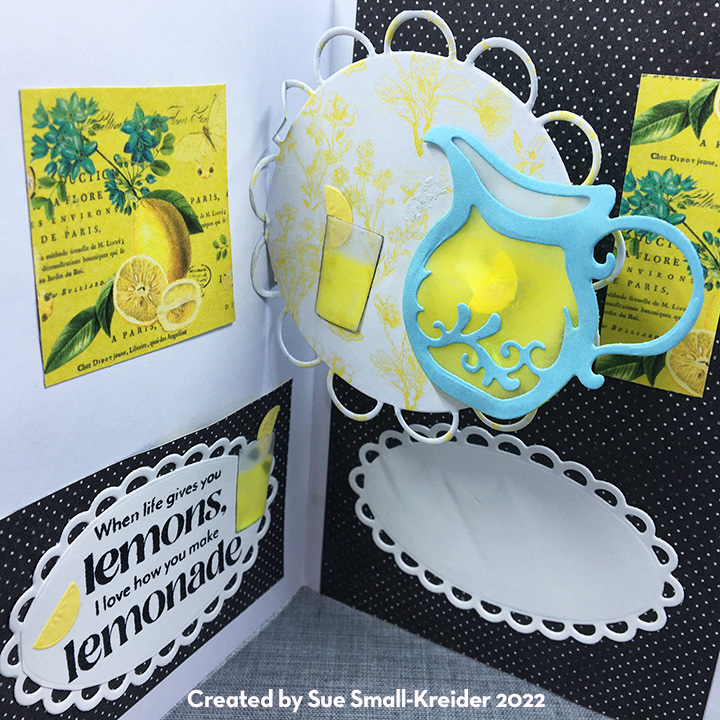
Sometimes life keeps throwing lemons at people. I am always amazed at how individuals keep smiling through it all and even find time to do kind things for others as well. This is a card for those smiling individuals that know how to make lemonade out of what life throws at them.

Using the Vintage Lemon Twist papers by Simple Stories and the You Shine stamp set both in the Simon Says Stamp! July 2022 Card Kit of the Month, I crafted this card with dies from Karen Burniston, Divinity Designs, Crafter’s Companion, Made to Surprise and Oriental Trading.

The front of the card is made from the paper collection with Nuvo Drops, buttons and a tiny ribbon bow from my stash. A symmetry is a theme for this card. The back of the card is a collage of leftover pieces from making the rest of the card. (I decorated both the inside and outside of the card base because the card base was thin cardstock. I adhered the papers with double side tape and an occasional drop of glue.

I had the idea of a pitcher of lemonade pouring into a glass with a lemon slice as the inside interactive mechanism of the card. After looking at a number of Karen Burniston pop-up/interactive dies, I settled on the Mailbox Pop-Up after watching a video by Karen using the mechanism for a double spinner card which I adapted into a tilting pitcher. I cut from scrap cardstock, a template of the mailbox to know where to cut the square opening in my decorative scalloped circle (Made to Surprise). After trimming the lower lever mechanism off, I folded the piece as directed in the video and trimmed the small section off one edge that would not be covered by the scalloped circle.

Using clear vellum to resemble glass, I die cut two tumblers (Divinity Designs) and fitted a scrap of vellum behind the die-cut pale blue pitcher (Crafter’s Companion). Using a bright yellow marker, I colored the back side of the vellum as the lemonade. I always color the edges of exposed vellum with a black marker to make them more defined. From the backing paper from some adhesive sheets that I had saved because the paper had a shiny yellow surface, I cut some lemon slices (Divinity Designs) for the tumblers and pitcher.

The lemonade sentiment is from the You Shine stamp set and is heat embossed with black ink and clear embossing powder. Once heat embossed, I die cut the sentiment out with a wave oval die from oriental Trading. I cut a second oval of plain white cardstock as the sentiment for a personal message to be added.

Black backgrounds inside the card make the white scalloped circle and ovals pop. Small scraps of the yellow printed paper were used to balance out the inside decorations.

The card fits into an A2 size envelope which has been stamped on the front with a lemon slice and back flap with a whole lemon. the back flap image is colored with markers. All the stamps are from the Simon Says Stamp You Shine stamp set.

Thank you for reading this blog post. Please like and leave comments 😊

Materials Used:

Dies

Stamps

Inks

Papers

  • Pattern papers by Simple Stories – Vintage Lemon Twist
  • Clear vellum scraps
  • White cardstock scraps
  • Shiny yellow paper scraps
  • A2 white card base and envelope

Miscellaneous

An Autumn Day in the Park

Sometimes spending a holiday alone in a place far from home means that one must adapt and make new traditions, friends and feasts.

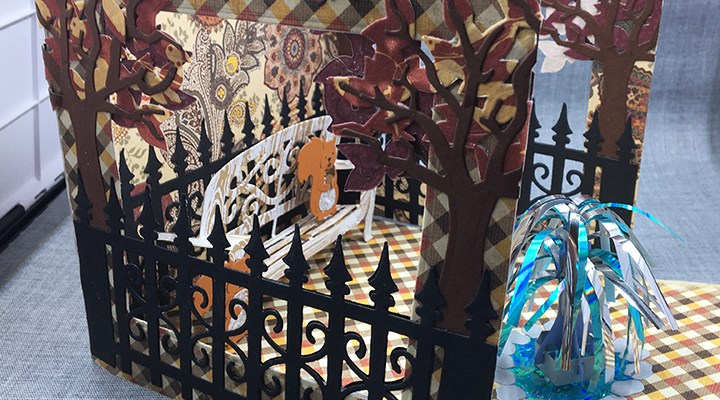
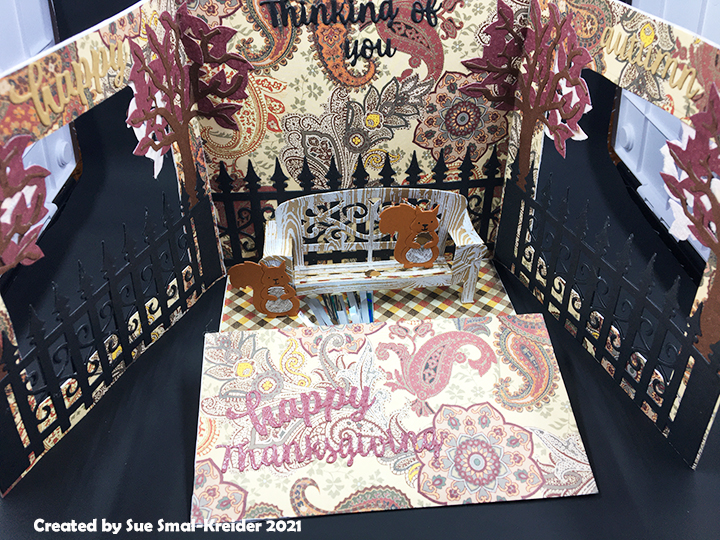
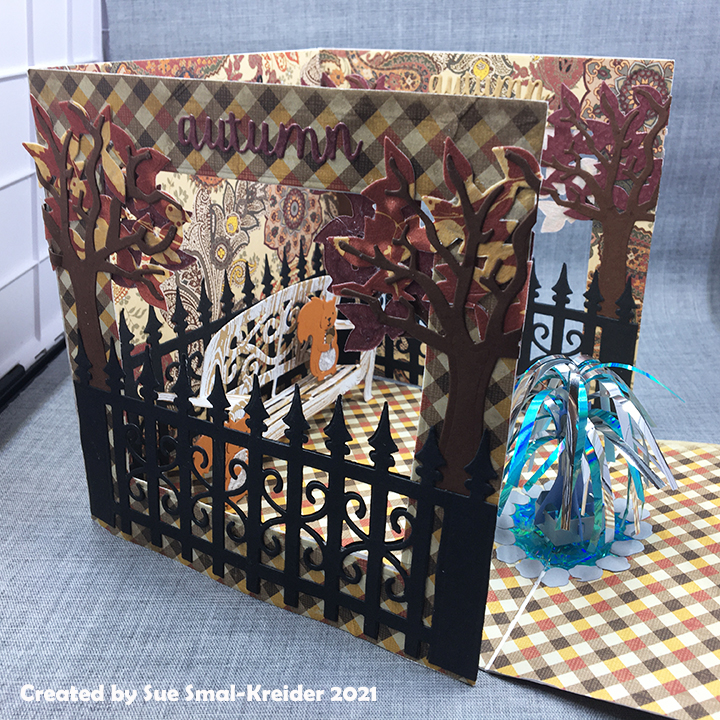
This penta-fold aperture card opens out to form a park scene complete with a water fountain and squirrels sharing acorns. Karen Burniston dies are used for all but the 4 inch square apertures.

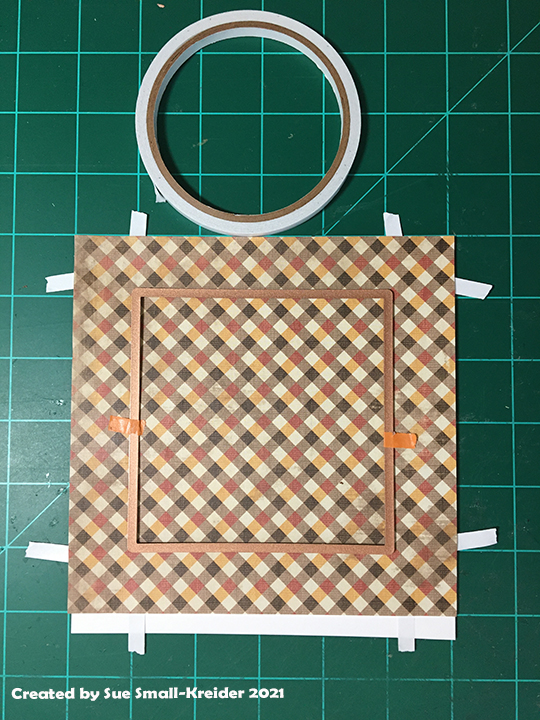
Card base: Cut four pieces of heavy weight cardstock 6 inches x 6 ¼ inches and one piece 6 inches by 3 inches. Score and fold all the 6 ¼ inches sides at ¼ inch to form tabs.

Adhere decorative papers to the front and back of two of the tabbed squares. (I used double-sided tape at the outer edges of paper.) Center a 4-inch square die over the patterned paper and secure with removable tape. (Remember if you are using different papers for the inside and outside of your card to test that you have the papers on the correct sides of your tabbed card base panels before you cut the apertures.) 

Glue the aperture side panels to the 6-inch sides of the back panel whose tab is glued to the floor panel. The floor panel’s tab is glued to the 6-inch side of the 6 inch x 3inch piece. Adhere decorative paper onto all panels on the card base.

Trees: Cut four tree trunks using Tree Pop-Up die set.  Cut four leaves dies. Glue trunks to leaves. Use a fence piece to position each tree trunk on the sides of the apertures, gluing the overlapping leaves together in the aperture opening. Repeat all steps for other aperture panel.

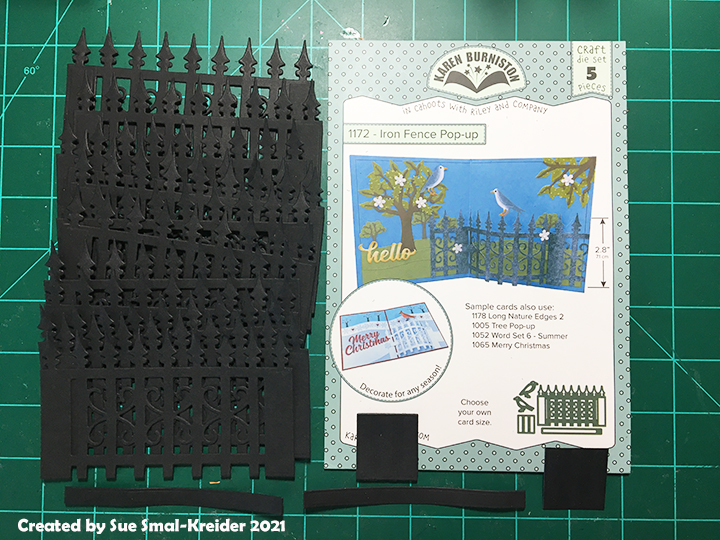
Fence: Cut ten fence panels from the Iron Fence Pop-Up die set. (I cut twelve fence piece incase I made a mistake in cutting, which I did.) Trim five fence panels at the sixth post from the left. Trim the remaining fence panels at the sixth post from the right. Trim off sixth post tip and scrolls at the right of post on left panel as shown in photo. Glue right panel over left panel. Take one elongated fence panel and adhere to the back panel. Glue fences over aperture panels front and back matching up fence tips. 

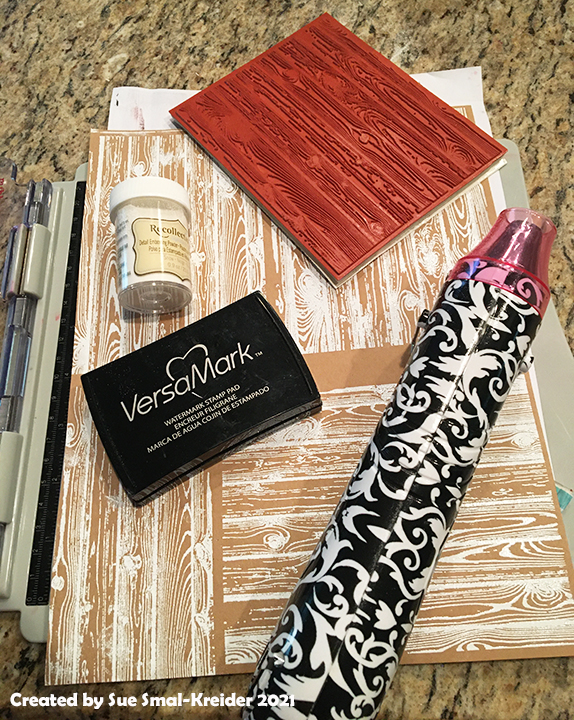
Bench: Stamp with woodgrain stamp onto brown kraft card stock and heat emboss with white embossing powder.

Die cut one whole bench using the Garden Bench Pop-Up die set. Cut the seat section again with the woodgrain going with the seat planks. Save two of the scrolling out-cuts from the bench back to glue onto the front of bench arms. Glue seat onto bench matching up planks. Follow package directions to attach the bench to the back and floor panels.

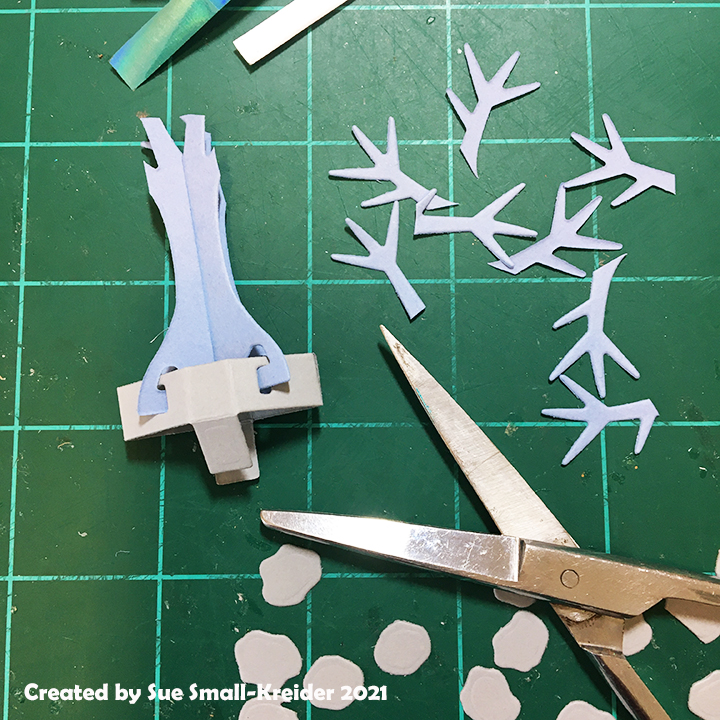
Fountain: Cut one of each of the two pieces of tree trunk from Tiny Trees Pop-Up die set of blue card stock. Cut tree base from gray card stock.  Cut two sets of rocks from Tent Pop Up die set.

Assemble tree as per package directions. Trim the tips of branches off

Trim two colors of mylar foil into 1/8 inch wide strips. (I used the Spellbinders Quick Trimmer) Glue two color strips to each side of the trimmed tree trunk.

Cut a circle of blue foil and glue to fold made by the floor panel and the 6×3 inch panel. Cover edges with gray rocks. Attach the tiny tree foundation per directions on package.

Squirrels: Cut two squirrels and the tummy fur from two different colors. Cut two acorns from a light brown and two acorn tops from a dark brown. Assemble squirrels and acorns per package directions.  Cut one of the long pop-up platforms from the bench pop-up die set. Attach to bench per directions on package. Glue squirrel to platform.

Sentiments: “autumn colors”, “happy autumn” , “Happy Thanksgiving” and “Thinking of you” are sentiments from two of Karen Burniston Word die sets – Greetings and Autumn Word Set.

Thank you for reading. If you enjoyed this blog post, please like it and follow the blog. 😊

Other Bench Cards

VALENTINE SWING

A SWINGING ANNIVERSARY

SWING GATE FOLD

The Secret Garden

Dies:

Stamps & Heat Embossing

  • VersaMark – Watermark Stamp Pad
  • Stampin’ Pad – Rubber Stamp – Hardwood
  • Recollections – Detail Embossing Powder – Snow

Papers

  • Heavy weight white card stock
  • The Paper Studio – traditions Floral paisley – 112094
  • Authentique – Pioneer Plaid – THA005
  • Brown kraft cardstock
  • Colored cardstock and specialty paper scraps from my stash

Additional Supplies:

Sweet Christmas Greetings

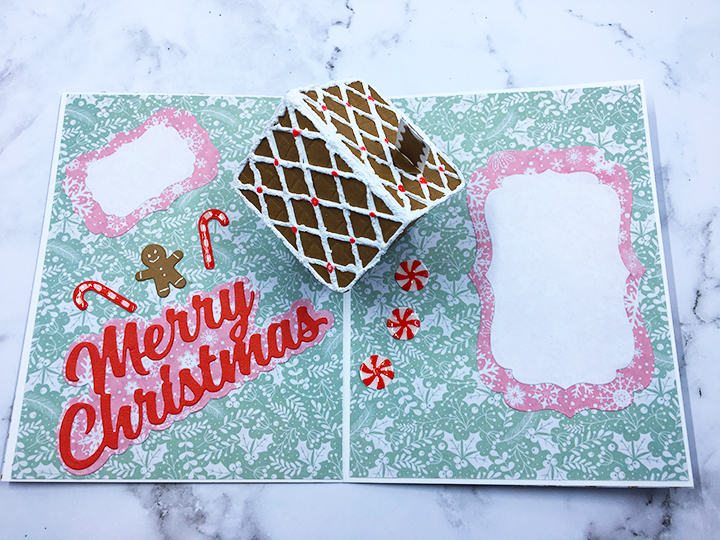
Can you smell the fresh baked gingerbread straight from the oven?  This card is made for a child’s Christmas and depicts a gingerbread house complete with white sugar icing, cinnamon drops, peppermint drops and candy canes.

This was my first attempt making Karen Burniston’s Tiny House Pop-Up and I made some mistakes that created a catch point on a roof corner. (I highly recommend watching the assembly video to avoid some of my mistakes such as making the front door of the house on the end with the bottom attachment flaps and gluing the roof unevenly on top of the house.)

Overall, the Gingerbread Tiny House Add-ons set is easy to use with the Tiny House set. The cane canes and peppermint drops are tiny and may require tweezers to assemble. (I added Glossy Accents to the tops of the candy canes and peppermint drops to give them a shiny coating.) There are other decorative die pieces for gum drops and tiny dots in the set, but I opted to use some Nellie’s Effect Snow media for dimensional icing and Nuvo Drops for red cinnamon drops. (The Effect Snow made the roof curl up some creating more of a catchpoint on the roof corner.)

The card base is an A2 size card (5 ½ x 4 ¼ inches) made of heavy white cardstock and covered with patterned papers for smooth surfaces for the house to slide over. The sweets decorations are placed so that they don’t hinder the house mechanism opening.

Merry Christmas has a shadow die cut background of patterned paper and all the sentiments are cut from red paper so there are less chances of creating catchpoints. (I used some fancy nested label dies to create areas for a personal message.)

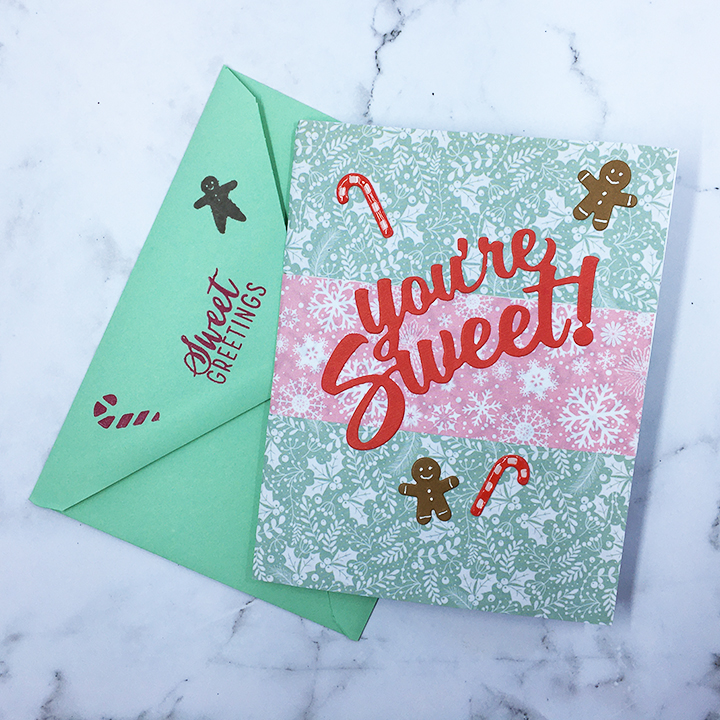
As is my style, I stamped the back of the envelope with hints of what’s inside using two colors of ink and a gingerbread house stamp set from Hero Arts.

Thank you for reading. If you enjoyed this blog post, please like it and follow the blog. 😊

Other cards that use the Tiny House Pop-up die Set

Dies:

Stamps & Ink

  • Memento -Fade-resistant Dye Ink – Rich Cocoa
  • Stampin’ Up Classic Stampin’ Pad – Melon Mambo
  • Hero Arts – Clear Stamp Set – Color Layering Gingerbread House -CM462

Papers

  • Heavy white card stock
  • Brown cardstock
  • Patterned papers from Carnation Crafts – Merry & Bright
  • Colored papers from my stash
  • A2 green envelope

Additional Supplies Used:

Snowy Good Morning

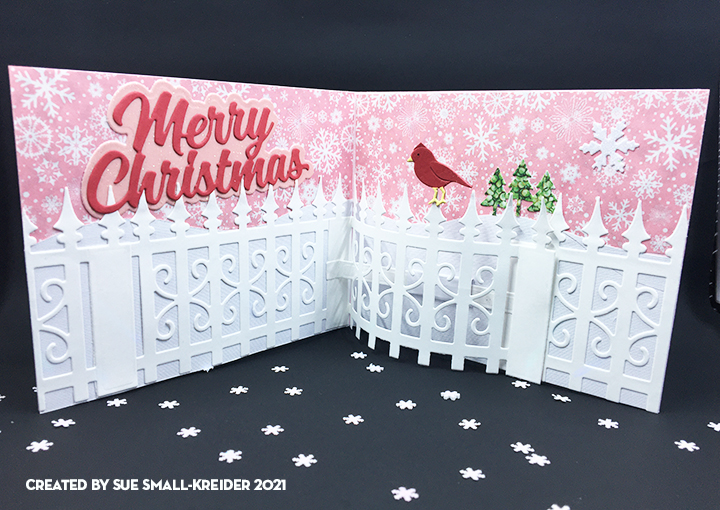
I love a crisp winter morning where tiny snow crystals fill the air and sparkle in the sunlight.  This is a card celebrating such a morning in lighthearted pastels. Karen Burniston dies are used for the card focusing on the Iron Fence Pop-Up die set.

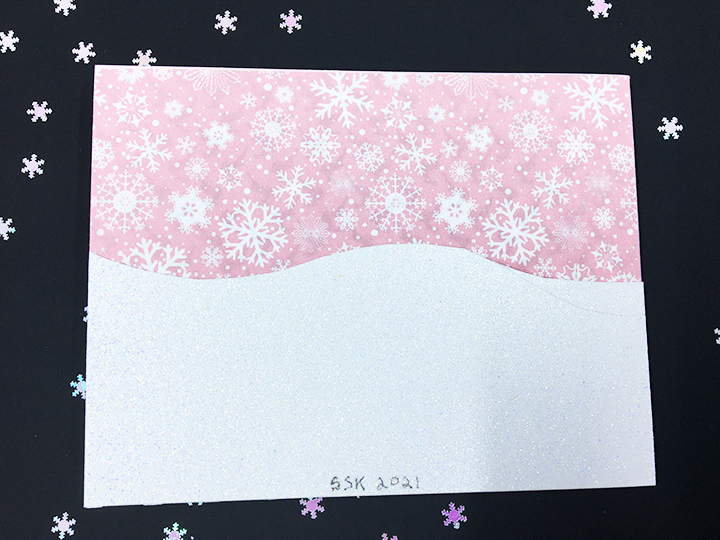
To make this A2 size card, cut a rectangle 4 1/4 x 11 inches of pink heavy cardstock and fold in in the middle to make a 4 ½ inches tall by 5 1/2 inches wide card base.  Cut four decorative snowflake paper panels at 2 1/4 x 5 1/4 inches. Adhere these panels to the top of front, back and insides of the card base. Using one of the hillside edging dies, cut four hills that are 5 1/2 inches long and the lowest point is 2 1/4 inches tall. (I used white glitter card stock on the front and back sides and a textured white inside.) Glue the snowy hills to bottom of each panel of card base.

It is easiest to die cut all the pieces you will need to make both the inside and outside fences at the same time so that they are similar in colors and papers used. (I cut four fences, but I really should have cut six fences so I could have finished the back of the card with a fence too.) Cut one of the slider fence arm and one of the arm sleeve from the same paper you used for the inside snowy hills.  Cut at least six green fir trees from the Long Nature Edges set to decorate in odd numbers on the front and inside of the card.

After watching the assembly video on the re-released inside pop-up fence, assemble as directed. (I found that the best way to decorate the hills and fence is to not glue the fence tops down. You can do this latter if needed using a fine tipped glue bottle.)

The birds in the fence die set are designed as crows so they are larger than a cardinal would be. There are smaller birds in the Frame Pull Pop-Up die set that are better sized as songbirds. This assembly video also has a tip on how to make the cardinal or chickadee crest on the head of the birds.

There are different snowflakes in the three snowmen die sets by Karen Burniston. They make wonderful filler decorations for the card.

Decorate card as desired, lifting fence pikes up to slide trees under or sandwich two bird die cuts around the fence top.

The Merry Christmas inside sentiment has a shadow cut from pink glitter card which adds to the crisp sparkling snow crystals effect.

I stamped the back of the envelope with a hint as to the card’s theme using one of by favorite winter themed stamp sets designed by Sheena Douglass.

Thank you for reading. If you enjoyed this blog post, please like it and follow the blog. 😊

Dies:

Stamps & Ink

Papers

  • Carnation Crafts – Merry and Bright from PaperCrafter issue 40
  • Pink card base – Bazzill -Pink Icing – PS1 – 102
  • DCWV – The Spooky Time cardstock matstack – white glitter and textured white
  • Glitter paper – pink from my stash
  • Colored cardstock from my stash
  • A2 Envelope

Additional Supplies Used:

Snow Days

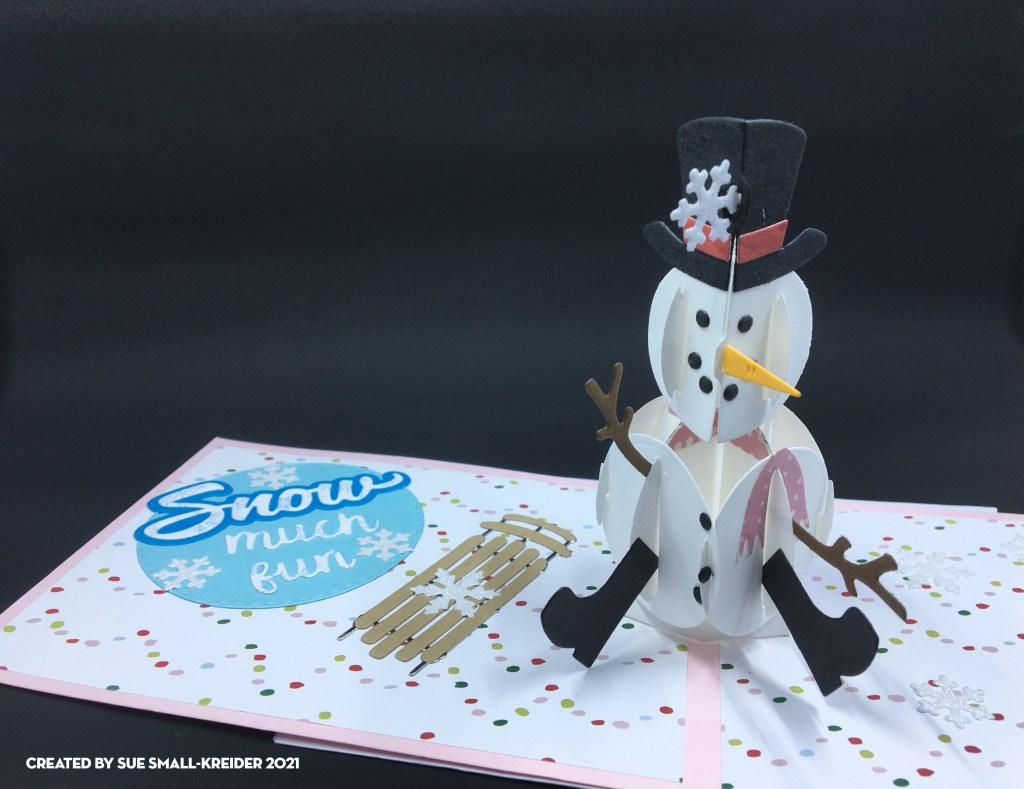
What North American children hasn’t hoped for a school closing day due to a snowstorm.  This is a card celebrating a snowy day in lighthearted pastels. Karen Burniston dies are used for the card.

To make this A2 size card, cut a rectangle 4 ¼ x 11 inches of pink heavy cardstock and fold in in the middle to make a 4 ½ inches tall by 5 ½ inches wide card base.  Cut four decorative paper panels at 4 x 5 ¼ inches. Adhere these panels to front, back and insides of the card base.

It is easiest to die cut all the pieces you will need to make both the inside and outside snowmen at the same time so that they are similar in colors and papers used. Also cut three circles or other label shapes on which to mount your sentiments. (For the personalized message circle, I added a smaller white circle.) Think about using contrasting colors for your words and their backgrounds. (I used blue to make the mostly white with snowflake paper I used for the words standout.)

After watching the assembly video on the inside snowman assemble as directed. Once the snowman is adhered to the card base, you can begin to decorate the card. (I used a sled die-cut from Memory Box to add to the snow time activities.) Remember to balance out the position of decorations from one side of the card to the other. There are two different snowflakes in the two snowmen die sets by Karen Burniston. They make wonderful filler decorations for the card.

Because I could not make up my mind on which stamp to use on the back of the envelope, I stamped two envelopes with hints as to the card’s theme. The word cloud is from Stampendous while the snowman is from Art Impressions.

Thank you for reading. If you enjoyed this blog post, please like it and follow the blog. 😊

Dies:

Stamps & Ink

  • Stampin’ Up Classic Stampin’ Pad – Dapper Denim
  • Stampendous – Winter Stags stamp set from Creative Stamping issue 90, Dec 2020
  • Art Impressions – Unmounted Rubber Stamp – Scrapbook.com exclusive Snowman – 5084

Papers

  • American Crafts – 348953
  • Pink card base – Bazzill -Pink Icing – PS1 – 102
  • Glitter paper – white from my stash
  • Colored cardstock from my stash
  • A2 Envelope

Additional Supplies Used:

Fineline 20 Gauge Applicator & Bottle