Welcome to the Horse Farm

Greetings it’s Sue here from the Dies R Us design team with another barn pop-up card.

The barn pop-up is Karen Burniston’ Barn Pop Stand as are the Farm Edges fence and hills. The horses are cut and stenciled using Karen Burniston’s Horse, Unicorn and Zebra set and the hat and pitchfork come from her Tiny Accessories 3 set. “Howdy!” sentiment is also by Karen Burniston.

Cut:

2 – largest barn die out of red card stock -Cut doors out of one

1 – small “X” window from white

2 – doors “X” die out of white

1 – door railing out of white

2 – roof trim die out of white

2 – weathervanes at same time by placing silver mirror card back-to-back

3 – hay bales -color with Distress Ink

1 – pitchfork – color with markers

2 – fence out of white

3 – horse bodies

3 – horse manes and tails

1 – cowboy hat from yellow – color with distress inks and markers

2 – Howdy! – one from white and one from yellow

Cut horses and color using stencils on dies and Distress Oxide inks using large Pink & Main blender brush. (This was my first time using this larger inking brush and I was delighted with the ease of inking up the large horse pieces.  The ink blending went smoothly unlike when I use sponge inking tools.)

Glue white “X” frames to window cut outs to form a hay loft door. Using clear tape hinge door onto loft. Glue on roof trim to front and back barn pieces. Glue weather vane to inside back piece.

To assemble the sliding doors, weave the top bar end of the red door piece through the white door railing piece fold the red bar over the railing where indicated and glue bar onto top of door making sure no glue is on the railing. Glue white “X” frame over door. Repeat with second door.

The card base is a 10 x7 inch white heavy weight card stock folded in half to form a 5 x 7 inches card. Panels of printed paper were cut to cover the front and back panels (5 x 7 inches, front and 5 ½ x 7 inches, back).

The inside panels are 4 ¾ x 6 ¾ inches. I positioned and taped the inside panels with clear removable tape so that I could die cut the pop-up flaps to anchor the barn to. Using Scor-tape, I adhered the paper panels to the card base removing the clear tape once all panels were adhered.

Glue barn pieces to pop-up tabs. Cut a 1-inch strip of paper fold in half and fold to create tabs on both bottom edges. Glue two hay bales and pitchfork to one side and glue tabs down inside barn, over the card fold. This will be seen when the barn doors are opened. Glue remaining hay bale behind barn hay loft door.

Glue matching printed papers to cover over tabs inside barn. Using only a small dot of glue at inside top of barn glue barn pieces together. Fold fences in half and glue ends inside barn. Glue decorated horses to fence.

Decorate the inside and outside of card with grass and hills cut using Farm Edges die set. (I trimmed off the tractor from my hills and had to cut and move the die to get a longer hill for my 7-inch card.)

The front sentiment is cut twice and slightly off set. I used Distress Oxide ink to color the yellow layer.

Stamped a vintage stamp of a horse on the back flap of envelope.

Hope this fun card has provided some inspiration for your crafting. 😊

SUPPLIES Used from Dies R Us:

Other Supplies:

  • Red, yellow, green and white cardstock
  • Printed papers from The Paper Studio’s Beach House pad and Graphic 45’s Fruit & Floral pad
  • Clear tape
  • Crayola Signature Brush & Detail Dual-ended Markers
  • Pigma Micron 05 archival ink pen
  • Vintage horse stamp
  • Stampin’ Up – Early Espresso ink pad
  • Ranger – Distress Ink – Fossilized Amber
  • Ranger – Distress Oxide – Ground Expresso
  • Sponge dauber
  • Stamping platform
  • Scissors
  • Tweezers

Don’t forget to come join in the fun at the Dies R Us Challenge Blog. There’s a new challenge theme offered on the 1st and 15th of each month and one lucky randomly drawn winner will receive a gift voucher prize to the Dies R Us Store.  

 For your convenience, all the important Dies R Us links are provided below.

click below for:

STORE

CHALLENGE BLOG

FACEBOOK

INSPIRATION BLOG

FRIENDS OF DIES R US PINTEREST PAGE

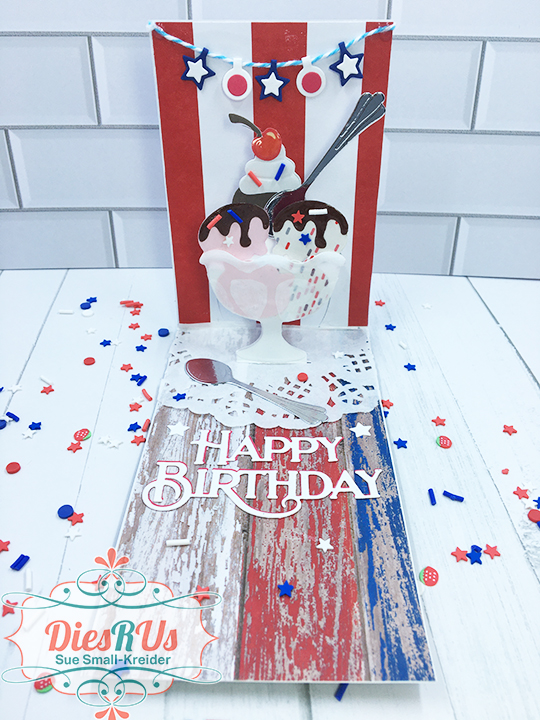
A July 4th Birthday

Today we are making a 3-dimensional ice cream sundae card to fit in a mini slimline envelope using dies from Dies R Us.

1. You will need:

  • One card base 11 inches x 3 3/8 inches from heavy white cardstock
  • One outside star paper 11 inches x 3 3/8 inches
  • One red and white strip inside back paper 4 3/4 inches x 3 3/8 inches
  • One wood-grained inside base paper 6 1/4 inches x 3 3/8 inches
  • One ice cream dish cut from vellum with details colored with white ink
  • Five ice cream scoops (I used 2 pinks, two white confetti and one chocolate)
  • Two chocolate toppings (I coated mine with a clear glaze to make it shiny)
  • One whipped cream topping (I used a shiny coated white scrap)
  • One red cherry (I cut from red card stock, added white gel pen accent, brown cardstock stem and coated with a clear glaze to make it shiny)
  • Two spoons (I cut mine from silver mirror cardstock)
  • Two sets of “You’re Sweet” sentiment – one red and one black or navy blue
  • Two sets of “Happy Birthday” sentiment – one white and one red
  • Stars and circles for hanging banner and decorations
  • One paper doily cut in half, 6 inches baker’s twine and clay red, white and blue confetti pieces

2. Fold the card base at 6 ¼ inches and place pop-up sundae die on fold per package instructions.

3. Follow the photos on working the folds. Start with bottom tier, then second tier and finally the two angled fold on first tier.

4. Glue narrow support piece to back of dish stem as marked in photo.

5. Glue white scrap to fill in rectangular hole in pop-up dish base, if covering with a vellum dish.

6. Place striped inside back and base papers behind/under card base and trace opening with pencil and cut out as shown in photo.

7. Adhere star paper to outside of card base.

8. Adhere inside striped papers to inside of card. Attach the cut-out sections as well.

9. Glue two scoops to pop-up dish and then add glue to back side of vellum dish where white inked decorations are so glue won’t show through vellum. Position vellum dish over pop-up dish base.

10. Attach ice cream scoops, toppings, cherry and one spoon to tiers, making sure that the movement of pop-up is not impaired by these decorations. Add clay confetti sprinkles.

11. Trim and fit a half paper doily under dish. Secure to base with dots of glue at three points.

12.Position and trim the other half of doily to front of card.

13. Glue the two sentiments together off-setting the darker shade in back to create a shadow effect.

14. Position and attach sentiments on front and inside card base.

15. Glue-up stars and circles banner on baker’s twine and glue in the corners over ice cream. Decorate with additional spoon, clay confetti sprinkles and paper stars.

Hope this sweet card has put a smile on your face and provided some inspiration for your crafting.

For another Ice Cream Sundae card I’ve made click here

Thank you for reading this blog post. Please like and leave a comment. 😊

SUPPLIES Used from Dies R Us:

Additional supplies used:

  • Ranger’s Glossy Accents
  • The Paper Studio – Crackled Stars 665976, Patriotic Woodgrain 847111 and XXl Stripe-Red/White 690587
  • The Paper Studio – Printable Vellum Paper – 8 1/2″ x 11″
  • Buttons Galore & More – Star Spangled Sprinkletez – NK114
  • BoBunny -I Heart Stars Stamp set – 121054444
  • Stampin’ Up Classic Stampin’ Pad – Dapper Denim ink
  • Taylored Expressions – Mini Slim Envelopes

Don’t forget to come join in the fun at the Dies R Us Challenge Blog. There’s a new challenge theme offered on the 1st and 15th of each month and one lucky randomly drawn winner will receive a gift voucher prize to the Dies R Us Store.  

 For your convenience, all the important Dies R Us links are provided below.

click below for:
STORE

CHALLENGE BLOG

FACEBOOK

INSPIRATION BLOG

FRIENDS OF DIES R US PINTEREST PAGE

64th Anniversary Wishes

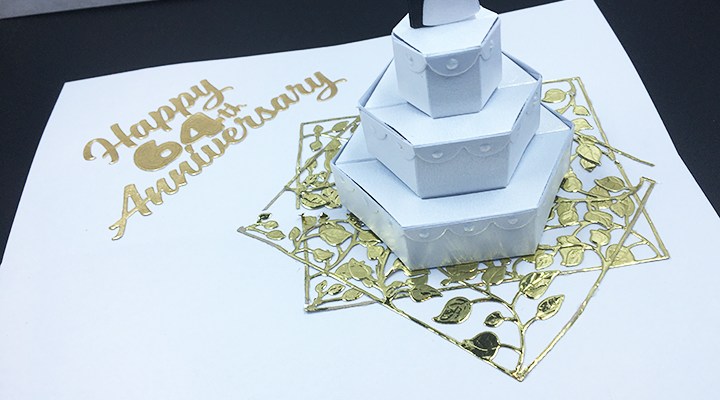
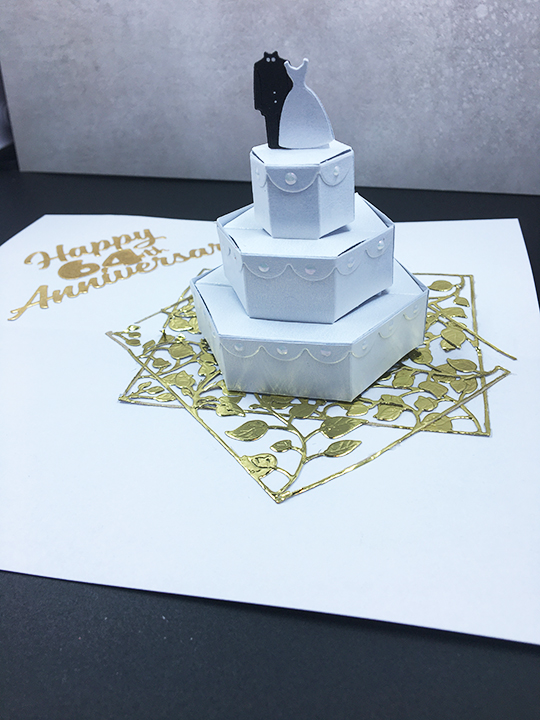
It is wonderful when people get to celebrate 64 years of marriage, so a special card is needed.

This card is primarily made with Karen Burniston dies focusing on the Cake Pop-Up in a 3 3/4 inch x 8 3/4 inch card base. (I used a green leafy coated card stock for the base.)

Cut out two of each of the cake tier pieces, two of the three scalloped edging pieces and two of the bride and groom piece. (I used shimmer cardstock for all but the groom pieces.) Fold tier pieces on scored lines as shown in the photos. Glue each tier together following the video photos.

It is easier to decorate the cake before attaching it to the card. (I added some embellishment drops to the scalloped edges that needed to dry overnight.) Glue one set of bride and groom together on to tab at cake top. Glue the second set on to back side of cake top. Adhere the scalloped edging on to each tier of cake, starting and stopping each scalloped piece at the center fold of each tier.

Use two rectangular foiled gold leaf die-cuts for the cake platter, cutting them in half where they go over the fold. Glued each layer down.

Align the cake center fold with the card base fold on top of the platter+. Place glue on the lowest tier’s folded tabs and glue in place. Fold card closed and firmly press cake to card base. Wait until glue has set to open.

The sentiments for the card front are Karen Burniston’s Word Set 12 -Anniversary and Happily ever after. The heart on the front with “Happily Ever After” is covered with Nuvo Glitter Drops in red. The “64th”was cut using a numbers die from The Greetery and the “th” was cut from one of the word dies in a Hunkydory-Moonstone die set.

Thank you for reading this blog. Please like and follow Ully Cat’s World blog. 😊

Other Anniversary cards I’ve blogged about:

SUPPLIES Used:

Dies

Miscellaneous:

Other Supplies:

  • Papers by BoBunny and Recollections’ Shimmer Cardstock
  • Colored and mirror cardstock scraps
  • Nuvo Dream Drops – Cloud 9
  • Nuvo Glitter Drops – Red Sunstone
  • Stampin’ Up – Crumb Cake ink pad
  • Neenah Social – A7 envelope – Bare white techweave
  • Heart dies & stamp set from Papercraft Inspirations, issue 176, April 2018

Luscious Wedding Wishes

Hi, it’s Sue here from the Dies R Us Design Team with an interactive wedding card.

This card is primarily made with Karen Burniston dies focusing on the Cake Pop-Up in a 3 3/4 inch x 8 3/4 inch card base. (I used a green leafy coated card stock for the base and coordinating mosaic tile cardstock inside.)

Cut out two of each of the cake tier pieces, two of the three scalloped edging pieces and two of the bride and groom piece. (I used shimmer cardstock for all but the groom pieces.) Fold tier pieces on scored lines as shown in the photos. Glue each tier together following the photos.

It is easier to decorate the cake before attaching it to the card. (I added some embellishment drops to the scalloped edges that needed to dry overnight.) Glue one set of bride and groom together on to tab at cake top. Glue the second set on to back side of cake top. Adhere the scalloped edging on to each tier of cake, starting and stopping each scalloped piece at the center fold of each tier.

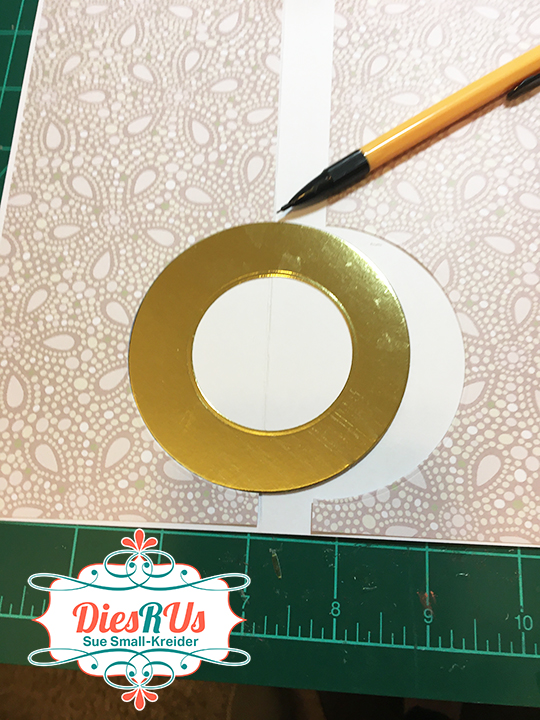
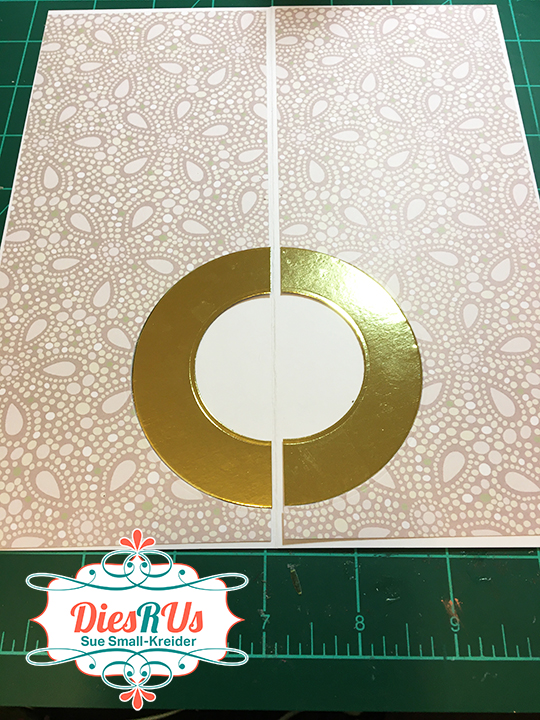
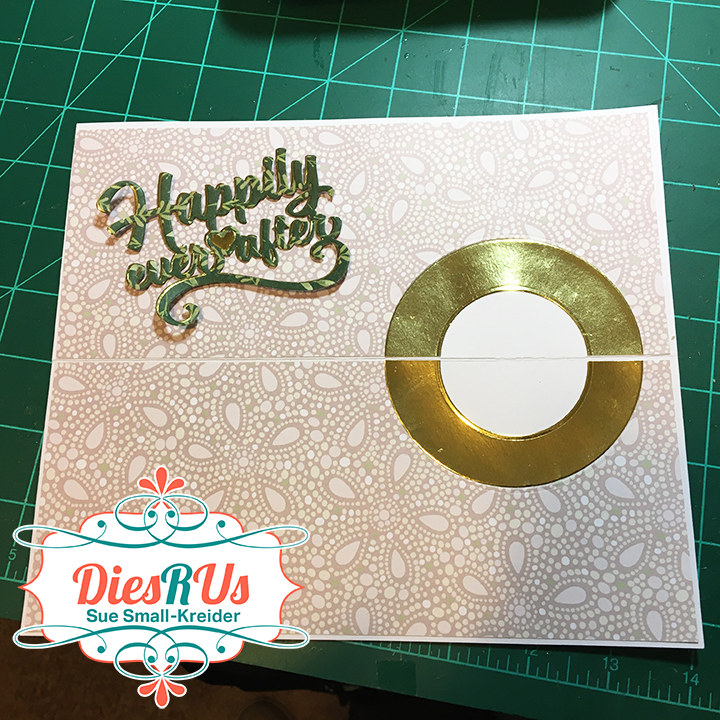
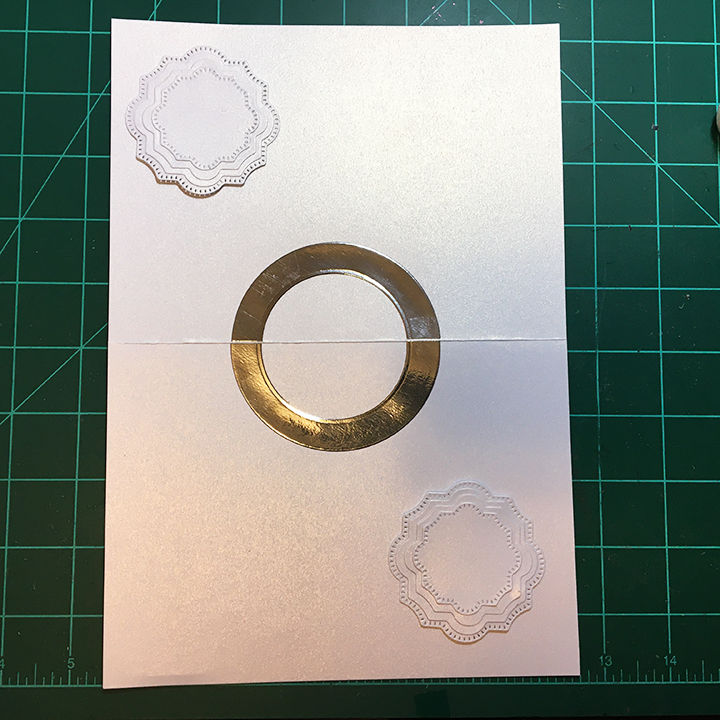
Cut a 3 1/2 inch circle from gold mirror and then cut a 2 inch circle from the center of the larger circle. Cut in half and glue on either side of the card base fold. (Because I used inside decorative panels, I cut out the 3 1/3 circle from my panels so the card would have no catch points and lessen the bulk of the card.) Play with the layout of your decorative pieces before gluing the cake to the gold circle. Align the cake center fold with the card base fold. Place glue on the lowest tier’s folded tabs and glue in place. Fold card closed and firmly press cake to card base. Wait until glue has set to open.

The sentiments for the card front are Karen Burniston’s Word Set 12 -Anniversary and Happily ever after that I cut twice so that I could off-set the gold and green letters and to be able paper piece the gold heart into the green words. The gold borders on the card front are from another Karen Burniston dies set of Party Border Blends.

Hope this fun card has provided some inspiration for your crafting. 😊

SUPPLIES Used from Dies R Us:

Dies

Miscellaneous

Other Supplies:

  • Papers by BoBunny and Recollections’ Shimmer Cardstock
  • Colored and mirror cardstock scraps
  • Nuvo Dream Drops – Cloud 9
  • Stampin’ Up – Crumb Cake ink pad
  • Neenah Social – A7 envelope – Bare white techweave

A Toolbox Father’s Day

Hi, it’s Sue from the Dies R Us Design Team with an interactive Father’s Day card.

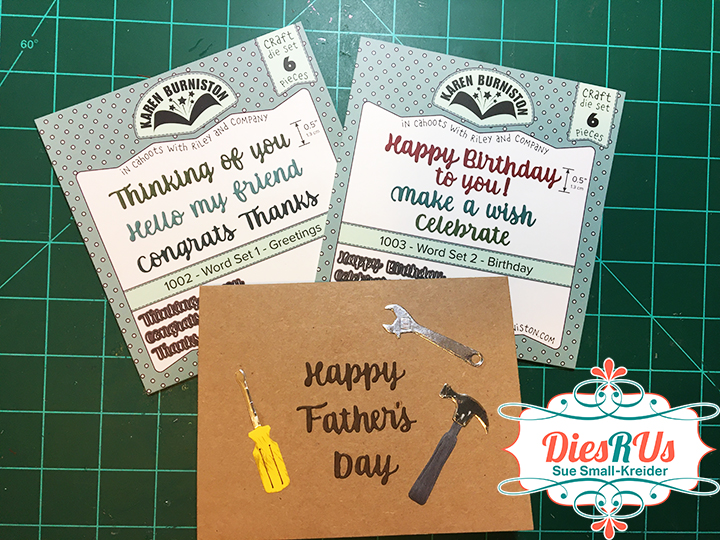
This card is made with Karen Burniston dies focusing on the Tool Charms and Tiny House Pop-Up dies in a 5 1/2 inch x 4 1/4 inch card base. (I used a kraft paper card base and its matching envelope.) My inspiration for this card comes from Sandy Diller.

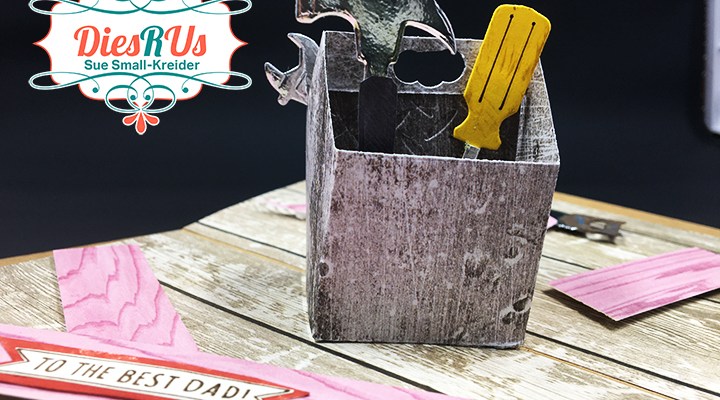
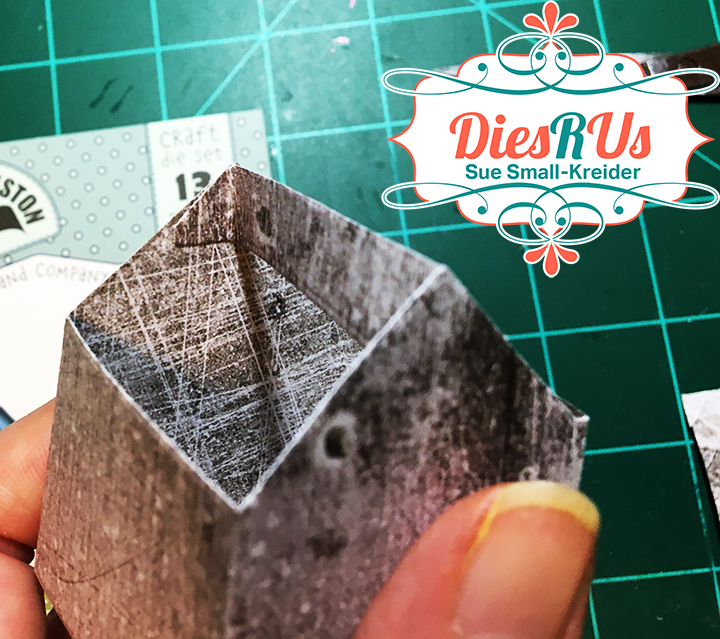
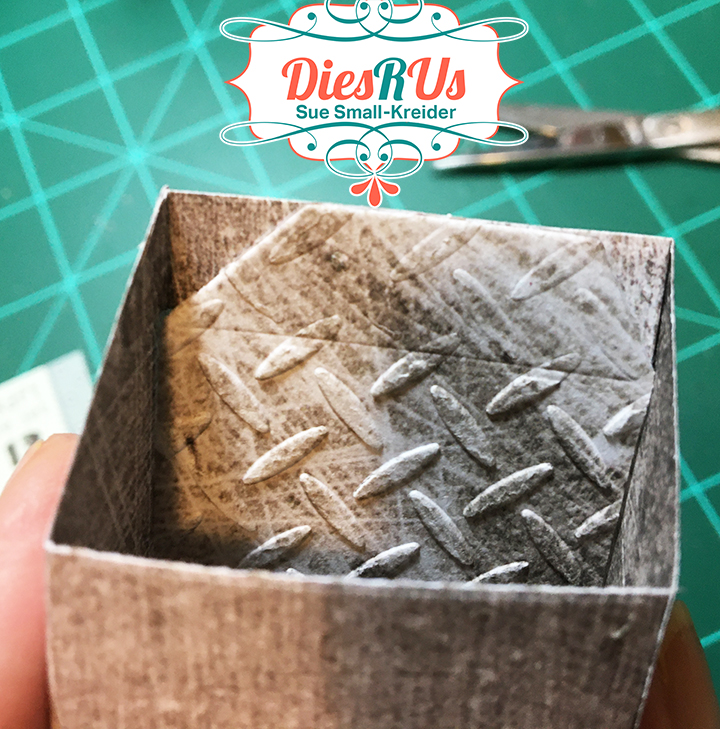
It is simple to alter the tiny house into a toolbox by not attaching the roof and adding a side panel cut from the house die cut and then adding it to the crossbar. I used a hole punch to create the handle on the crossbar.

The tool charms are great for using up your tiny scraps. You don’t have to cut the full piece if you are piecing handles on to the silver mirror cardstock. Just cut enough beyond the piece to glue the other half onto. (I used white and brown ink to “age” my tools.)

Once you adhere the toolbox to the card’s inside fold, following the directions on the packaging, you can decorate the card as you want. (I used some woodgrain cardstock cut into planks as well a scrap that looked like a wooden candle holder and the pieces are on foam squares to add some dimension to the card.)

The “Happy Father’s Day” was cut from the words in Karen Burniston’s Word Set 1 – Greetings and Word Set 2 – Birthdays. Piecing Father and Day together from letters from various words in both sets. You could also use the new “Happy Father’s Day” sentiment by Karen Burniston.

Hope this fun card has provided some inspiration for your crafting. 😊

Other Father’s Day cards on my blog

A Tool Box Father’s Day

A Fishing Father’s Day

A Father’s Day Waterfall Pop-Up

A Work Bench Father’s Day Card

In-Vested Father’s Day Card

SUPPLIES Used from Dies R Us:

Other Supplies:

  • Wood grain and scratched medal cardstock
  • Colored and silver mirror cardstock scraps
  • Black fine tipped pen
  • Hampton Art ink pads
  • Stampin’ Up – Early Espresso ink pad
  • Sizzix World’s Best Dad stamp set
  • A2 sized kraft card base and matching envelope

Don’t forget to come join in the fun at the Dies R Us Challenge Blog. There’s a new challenge theme offered on the 1st and 15th of each month and one lucky randomly drawn winner will receive a gift voucher prize to the Dies R Us Store.  

 For your convenience, all the important Dies R Us links are provided below.

click below for:

STORE

CHALLENGE BLOG

FACEBOOK

INSPIRATION BLOG

FRIENDS OF DIES R US PINTEREST PAGE

A Fishing Father’s Day

Hi, it’s Sue here from the Dies R Us Design Team with an interactive Father’s Day card.

This card is made with Karen Burniston dies focusing on the Tiny Trees Pop-Up in a 3 3/4 inch x 8 3/4 inch card base. (I used a thin white card base cut 8 3/4 inch by 7 1 /2 inch folded in half and covered with four panels of 3 3/4 inch x 8 3/4 inch decorative papers.)

Cut the number of trees you plan to use and assemble using the packaging directions. Decide on placement of trees based on where they will be in the folder position. (For slimline cards the trees must be place on the center fold rather than using the offset piece which allows for trees to be added off the center card fold.) Glue down tree frames and wait until glue has set to attach trees.

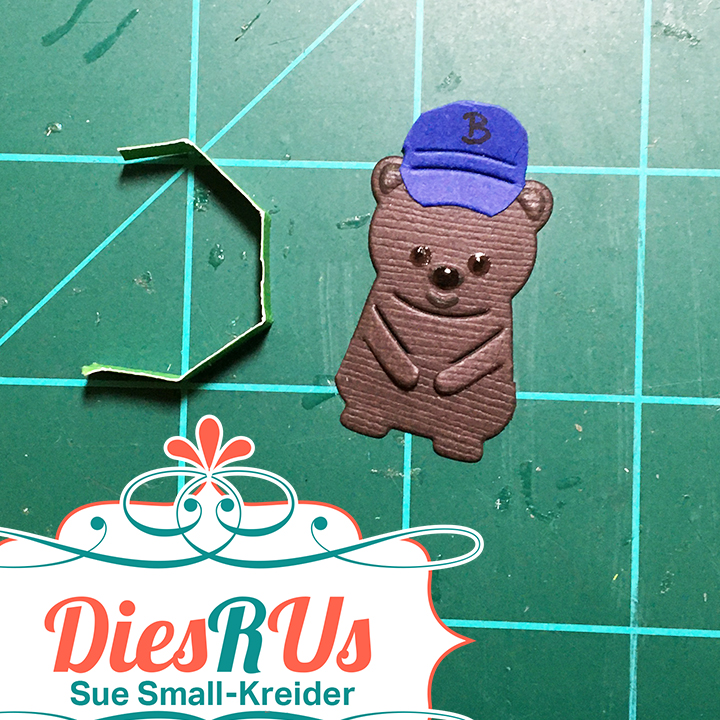
Die-cut four bears (Winter Animals) stenciling through the die with a black fine tip pen the eyes, nose and mouth. Run the stenciled bears back through the machine with the embossing mat and plate for your die-cutting machine to emboss the face and bottom feet. To make a baby bear, cut the bear just below its paws and then slide the bottom piece up under the arms and trim off excess edges. Glue together. The baseball caps are made by die-cutting the engineer’s cap from the Tiny Accessories 3 die set and rounding off the puffy crown and bill of the cap. (I tried to make the logo of the recipient’s favorite baseball team on the caps.) The fishing poles are described below. Drops of Glossy Accents were added to the bears’ eyes and nose to made them standout on the dark brown cardstock.

The stream is made with a long scrap of shiny spray painted paper in blue, gold and silver that was die-cut several times using the hill die from the Long Nature Edges die set. These wavey pieces were then glued to a strip of blue cardstock and fish cut from the Camping Charms die set, were added to the stream flow. The same fish were embossed, and their eyes stenciled in black ink and then glued to a piece of string or cording which was glued to the stick charm from the same die set. The rings were all cut off of the charms.

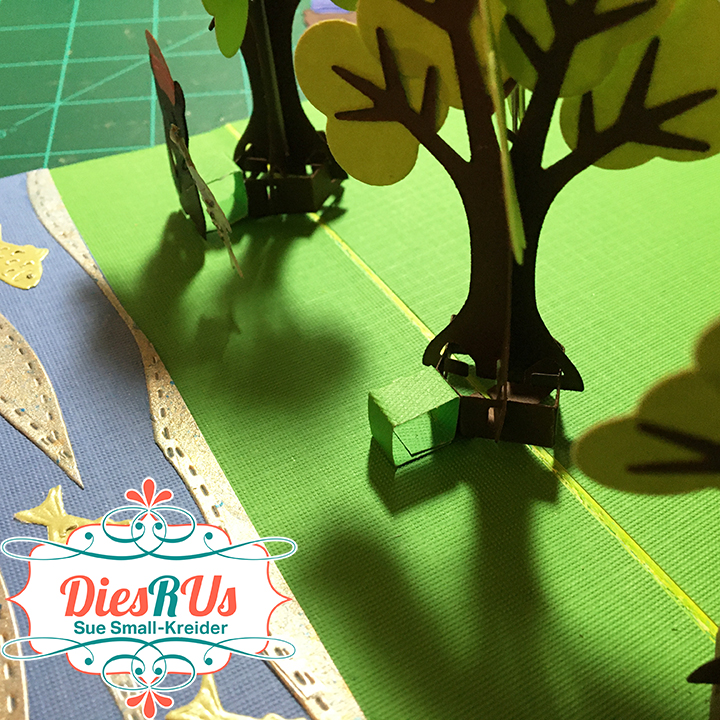
To make the bears stand under the trees inside, a small strip of green cardstock was cut and scored to form a cube. The cube is glued to both the card base and the tree frame and then the bear is glued to the font of the cube.

Decorations to the card include one tree front with leaves and three birds cut using the dies from the Tiny Trees set, two apples from the Tree Fruit set, and a white blanket from the Picnic Elements set. The blanket could be used to write a personal message on.

The “Happy Father’s Day” was cut three times from thin cardstock using Karen Burniston’s Alphabet dies. The layers were glued together and then glued to the front of the card using a T-ruler to keep the letters in a straight alignment.

Hope this fun card has provided some inspiration for your crafting. 😊

A

Other Father’s Day cards on my blog

A Tool Box Father’s Day

A Fishing Father’s Day

A Father’s Day Waterfall Pop-Up

A Work Bench Father’s Day Card

In-Vested Father’s Day Card

SUPPLIES Used from Dies R Us:

Other Supplies Used:

  • Textured green and blue cardstock
  • Trees and sky printed paper from Die-Cutting Essentials issue 32
  • Colored and shimmer cardstock scraps
  • Ranger Glossy Accents
  • Natural colored cording
  • Black fine tipped pen
  • Stampin’ Up – Early Espresso ink pad
  • Stampin’ Up Best Catch stamp set
  • Neenah Social –No. 10 envelope – Natural kraft

Don’t forget to come join in the fun at the Dies R Us Challenge Blog. There’s a new challenge theme offered on the 1st and 15th of each month and one lucky randomly drawn winner will receive a gift voucher prize to the Dies R Us Store.  

 For your convenience, all the important Dies R Us links are provided below.

click below for:

STORE

CHALLENGE BLOG

FACEBOOK

INSPIRATION BLOG

FRIENDS OF DIES R US PINTEREST PAGE

Happily Ever After

Hi, it’s Sue here from the Dies R Us Design Team with an interactive wedding card.

This card is primarily made with Karen Burniston dies focusing on the Cake Pop-Up in a 7 inch x 5 inch card base. (I used an off-white shimmer card stock for the inside of the card and took mica spray-painted shimmer card panels for the front and back of the card.)

Cut out two of each of the cake tier pieces, two of the three scalloped edging pieces and two of the bride and groom piece. (I used shimmer cardstock for all but the groom pieces.) Fold tier pieces on scored lines as shown in the video. Glue each tier together following the video.

It is easier to decorate the cake before attaching it to the card. (I added some embellishment drops to the scalloped edges that needed to dry overnight.) Glue one set of bride and groom together on to tab at cake top. Glue the second set on to back side of cake top. Adhere the scalloped edging on to each tier of cake, starting and stopping each scalloped piece at the center fold of each tier.

Cut a 3 1/4 inch circle from silver mirror and then cut a 2 1/4 inch circle from the center of the larger circle. Cut in half and glue on either side of the card base fold. Play with the layout of your decorative pieces before gluing the cake to the silver circle. Align the cake center fold with the card base fold. Place glue on the lowest tier’s folded tabs and glue in place. Fold card closed and firmly press cake to card base. Wait until glue has set to open.

I used the fancy layered label and tiny hearts dies from the Paper Frames Pop-Up set to decorate the inside of the card. (To make the tiny hearts be visible I coated them in a peachy translucent embellishment drops that had to dry overnight.)

The sentiments for the card front are dies from my stash and the “Happily ever after” is a Karen Burniston die that I cut twice so that I could paper piece the red heart into the blue words. The gold swags on the card front are from another Karen Burniston dies set of Party Border Blends.

Hope this fun card has provided some inspiration for your crafting. 😊

SUPPLIES Used from Dies R Us:

Dies

Miscellaneous

Other Supplies:

  • Simply Creative Mr & Mrs steel cutting die
  • Momenta Firefly’s Celebrate Happy Birthday die set 35516 R7
  • Papers by BoBunny and Recollections’ Shimmer Cardstock
  • Colored and mirror cardstock scraps
  • Nuvo Dream Drops – Cloud 9
  • Nuvo Jewel Drops – Peach Sobert
  • “Congratulations” stamp by Jennifer Ellory from Cardmaking & Papercraft issue 178
  • Stampin’ Up – Crumb Cake ink pad
  • Neenah Social – A7 envelope – Bare white techweave
  • Nuvo Mica Mists – Pecan Peach, Nebula Blue, Silver Smoke and Antique Gold

Don’t forget to come join in the fun at the Dies R Us Challenge Blog. There’s a new challenge theme offered on the 1st and 15th of each month and one lucky randomly drawn winner will receive a gift voucher prize to the Dies R Us Store.  

 For your convenience, all the important Dies R Us links are provided below.

click below for:

STORE

CHALLENGE BLOG

FACEBOOK

INSPIRATION BLOG

FRIENDS OF DIES R US PINTEREST PAGE

Vintage Christmas

What fun to be a child with a new toy or two to play with on Christmas morning. This card takes its inspiration from a BoBunny paper pad and matching die-cut pieces as well as a recent release of Karen Burniston’s Flip Frame Pop-up die set.

I found the Flip Frame Pop-Up easy to assemble, but strongly suggest practicing with scrap paper the gluing placement of the mechanism and frame before gluing with your good paper. (Here is the assembly video.)

I cut the flip frame from dark green mirror card and used some scrap green pattern pieces to hide the white side of the mechanism so that the mechanism strip blends into the background.

The cream-colored doily is for writing a personal message, but it does give the feel that the open card is a tabletop with a picture frame of a loved one.

The front is decorated with pictures cut from the paper pad and the little boy is a die-cut from the BoBunny set that is adhered with foam squares. A ribbon was the final dimensional element to tie the little girl to the boy and the opened gift box.

The card base is made entirely from two papers from the BoBunny paper pad. The inside sentiment and snowflake are from the coordinating die cuts set.

As is my style, I stamped the envelope flap with an older Kaisercraft stamp sentiment to set the mood for the card.

Hope this card makes you remember your childhood Christmases.

SUPPLIES

Dies

Stamps

  • Kaisercraft – Clear Stamps – Sentiments -Traditional – CS313

Ink

Paper

Miscellaneous

© Sue Small-Kreider 2020

Naughty or Nice?

What pops down a chimney and out a fireplace? Santa Kitten!

These cute little kittens jumped out at me while in a Tuesday Morning store. They are on cellophane treat bags. I realized that they were the correct size for one of Karen Burniston’s interactive dies – the Pop ‘n Swap.

While I would classify this card as a prototype, what I wanted to share is to show how you can make a shallow box like structure to create a fireplace over the pop ’n swap mechanism. Watch Karen Burniston’s assembly video to learn how to put together this mechanism.

For this slimline card, I cut a piece of heavy black cardstock 8 ½ x 8 inches and scored at 4 inches and folded in half to create the card base. (The card needs to be at least 4 inches wide since the mechanism folded flat is 4 inches wide.) Next, I cut from the front top of the card base a rectangle 2 ½ x 4 inches to allow the Santa kitten to show over the chimney top.

The inside shallow box is a 5 3/4 inches tall by 4 7/8 inches wide rectangle of red cardstock. I scored at ¼ inch, 1 inch and 4 inches. (Because the mechanism is ¾ inches tall, the box side is ¾ inches deep.) All the folds are mountain folds. The narrow tab goes towards the right edge of the card while the wide tab goes towards the inside fold.  I glued my mechanism in first, and then using removable tape, I played with the positioning of the box and marked with pencil its placement before removing the box. I cut the widow to show the kitten inside the fireplace, by laying the fireplace frame over the mechanism and seeing where the kitten would best show. Next, I placed  a loop of removable tape on the fireplace and positioned the box back into place and got the fireplace to stick to the inside of the box. With the fireplace stuck I removed the box and traced the opening of the fireplace onto the back of the box. With a metal ruler and craft knife, I cut the opening slightly larger than the pencil marks. Now the box is ready to be permanently glued in place. Glue the kittens in place next on the mechanism arms, cutting any corners that show beyond the kittens.

For decorating of the fireplace and mantel refer to my An Old-Time Christmas post. The brick is stenciled on the chimney panel before cutting it for the front. The fireplace was stenciled once the opening was cut for the fireplace, but before the box was glued permanently in place.

I tried a new-to-me product from Cosmic Shimmer called Fluffy Stuff. It is a thick paint-like substance that you can add dimension with for snow. You use a heat gun to get it to bubble up. I tried adding it to the front of the card after I assembled the card and in the heating of the card, I ended up heating the cellophane of the top kitten which shrunk a little. My recommendation is to add the Fluffy Stuff to your front panel before it is glued on to the card so that you can heat it and left it dry for 24 hours before gluing in place. (Here is a video that shows Fluffy Stuff being demonstrated on the Beebaab Youtube channel.)

If you have read this far, I’ll let you in on a secret. There is a free down of the “Naughty or Nice” sentiment in the supplies list.

Hope this card makes you smile.

SUPPLIES

Dies

Stamps/Stencils

Inks/Colors

Paper

Miscellaneous

© Sue Small-Kreider 2020