Inspiration for this flowery card with bling came from the LDRS website for the single layer use of coverplate II and a recent workshop with Donna Butler for the sentiment banners layout. My go-to-bling comes from my Buttons Galore & More stash of shaker element mixes. (Many of their mixes are limited – editions, so order early when you browse their website and see a mix you love.)
I choose to cut a yellow and a green flowered coverplate so that I could cut out the yellow flowers and glue them onto the green. Next, I used an orange marker to color the centers of the flowers. (The orange flatback shiny gems do not show up well in the photos, but they do add some sparkle to the card.)
In my stash was a teal-colored card base which I glued the coverplate to using a fine-tipped glue bottle. The back of the card was decorated with left-over strips from die-cutting.
The banner sentiments were ones I had hot foiled during a batch foiling session. The inside sentiment comes from a PoppyStamps clear stamp set and was stamped onto adhesive-backed yellow vellum using Staz-on black ink. (I used a heat tool to speed-up the drying time of the Staz-on ink before I adhered the vellum to the inside of the card.)
The back flap of the envelope is stamped in green ink with a cluster of flowers hinting at what is to come inside the envelope.
Thank you for reading this blog post. Please like and leave comments 😊
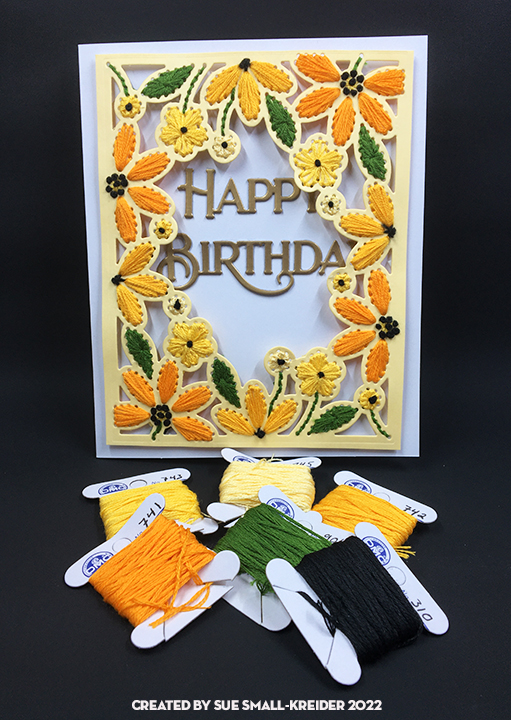
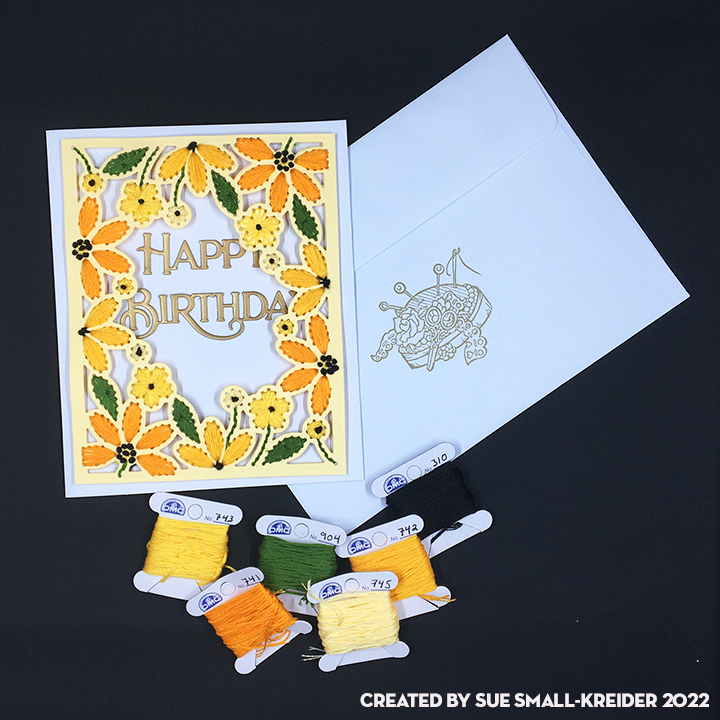
Bright yellow and orange flowers, stitched with shiny embroidery floss hoovering over a raised matte gold Happy Birthday make for a fun and cheery card.
I used a stitched flower die from Spellbinders that originally was part of their Large Die of the Month Club but is now available to everyone via their on-line shop. Initially I die-cut into an 8.5 x 5.5 inches sheet of pale-yellow heavy cardstock that was in my stash. I stitched it completely before trimming it down to the final 4.5 x 5.75 inches to fit on a 5 x 6 inches card base.
The larger flower petals and leaves were outline or chain stitched before filling in the centers of them using three strands of floss. The black stamens are French knots. While I knotted the floss ends when starting, I finished the flowers on the back side by adding dots of glue to seal the thread ends and add dimension to the stitched frame.
The Poppy Stamps “Happy Birthday – Poe Script” sentiment was cut three times from a gold piece of junk mail and glued together. The words were glued directly to the card base after determining the placement with the stitched frame. The frame was attached to the card base with thick foam squares.
For the envelope, I stamped the back with an older rubber stamp from Fun Stampers Journey using my favorite gold-like ink from Stampin’ Up called Crumb Cake.
If you enjoyed this stitched card, there are two more stitched card posts this week as well as pervious stitched cards:
Luscious purple, blue and lavender flowers, stitched with shiny embroidery floss hoovering over a raised matte gold Happy Birthday make for a simple yet elegant card.
I used a stitched flower die from Spellbinders that originally was part of their Large Die of the Month Club but is now available to everyone via their on-line shop. Initially I die-cut into an 8.5 x 5.5 inches sheet of pale blue heavy cardstock that was in my stash. I stitched it completely before trimming it down to the final 4.5 x 5.75 inches to fit on a 5 x 6 inches card base.
The larger flower petals and leaves were outline or chain stitched before filling in the centers of them using three strands of floss. The yellow stamens are French knots. While I knotted the floss ends when starting, I finished the flowers on the back side by adding dots of glue to seal the thread ends and add dimension to the stitched frame.
The Poppy Stamps “Happy Birthday – Poe Script” sentiment was cut three times from a gold piece of junk mail and glued together. The words were glued directly to the card base after determining the placement with the stitched frame. The frame was attached to the card base with thick foam squares.
If you enjoyed this stitched card, there are two more stitched card posts this week as well as pervious stitched cards:
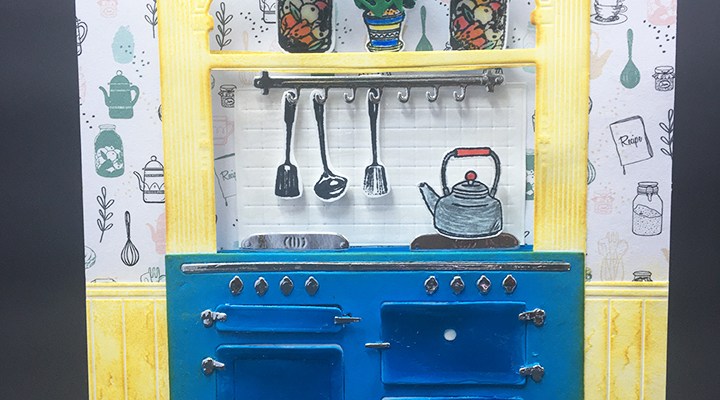
Mary Berry and Paul Hollywood, icons of British baking and favorites of the person this card is made for, have been hosts for The Great British Baking Show from 2010-2016.
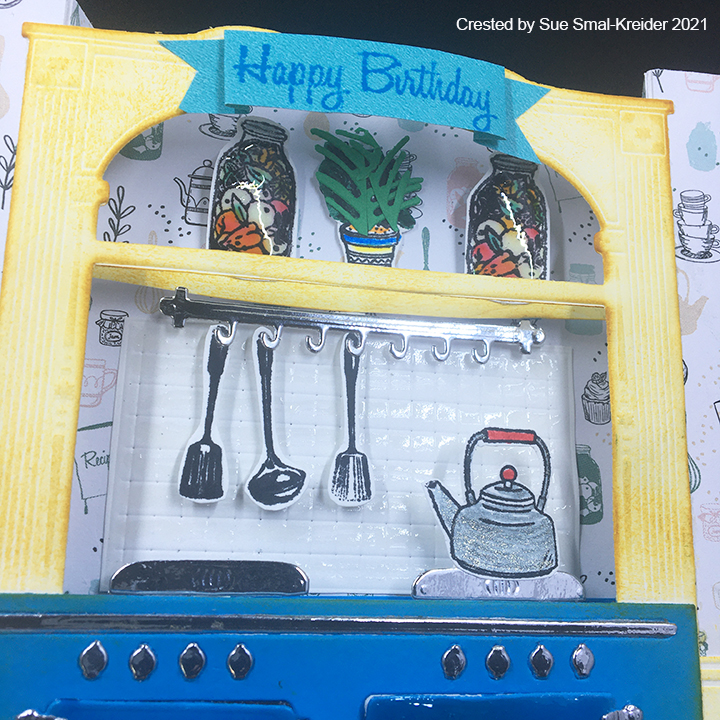
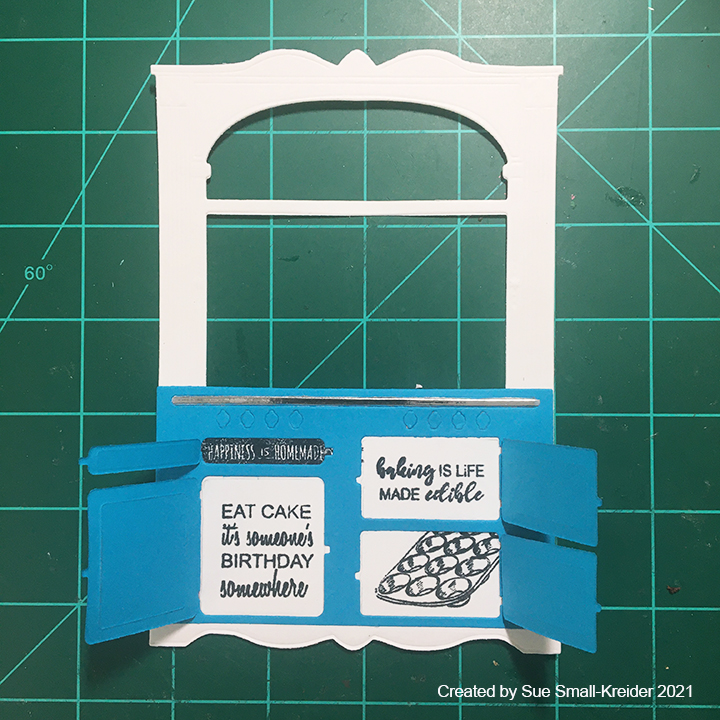
Stove Doors: I wanted the oven doors to have the look of enameled iron, so I cut set of blue doors. (Save the out-cut of door openings for stamping and stove knobs for later) I cut a tiny white circle for the oven gauge and glued it in place on the one door. Next I covered all but the hinges on the doors with Glossy Accents gel and let them dry overnight. Once they were dry, I cut and glued the silver latch and hinges on to them before gluing them on to the doors I had already glued to the stove.
Tile Backsplash: I cut the tiled back splash from white card stock and brushed a light coat of Glossy Accents over the rows of tiles, avoiding the deep embossed grooves between tiles.
Glass Jars of Fruit: To achieve the look of glass, stamp and color on white cardstock using permanent inks when dry cove with a thick layer of Glossy Accents. When dry curve around your finger or pen to create the curved glass effect.
Dresser: Cut one and use an embossing sandwich for your die-cutting machine to emboss the details into the cardstock. Cut a 1/4 inch x 4 1/2 inches strip of white cardstock for the shelve crossbar. Using an ink blending tool color the crossbar and dresser to bring out the embossed details using a yellow ink. (Don’t ink where the stove is as you will be stamping there.)
Oven Stamping: Using the stove out-cut from cutting the stove doors, trace with pencil where the door openings are onto the dresser back. Remove stove out-cut and using a stamping platform stamp sentiments or baking trays in oven openings. (I masked off the other openings that the rolling pin handles and baking pan that would cover with yellow paper tape.)
Stove Assembly: Cut another stove from blue cardstock. Glue all the doors to the backs of the “enameled’ doors from first step. Glue the stove front to dresser matching up stamped images with the door openings. Adhere two layers of the blue stove knob cut-outs to top of stove. (This will add some dimension to make the knobs be raised up from stove front.) Cut from silver mirror cardstock the knobs, thin line trim, door hardware, stove burners and utensil rack. Glue silver hardware onto doors and knobs and silver trim in place. Glue door hinges into place on to stove front being careful not to get glue onto stamped images. Once glue is dry, fold doors back to crease hinges. Cut a 1/2 inch x 4 1/2 inches strip of blue cardstock for the stove burners crossbar. Glue dresser on to card base after the shelf and burners step.
U-Fold Card Base: Cut a 6 3/8 inches x 6 15/16 inches rectangle from heavy white cardstock. Score on a scoreboard at 1 inch, 1 1/2 inches, 5 7/16 inches and 5 15/16 inches and fold the outer folds as mountain folds and the inner folds as valley folds. This should create a U-shaped card base.
Wallpaper: Cut pieces of your decorative “wallpaper” to fit the top half of each of the card base’s sections. Allow for black space over the folds. Glue decorative pieces in place. (Note: It might make the crossbars stronger if you glued the narrow inside strips of decorative paper on after the crossbars are attached, but before the dresser is glued in place.)
Wainscoting: Using the kitchen background embossing folder, emboss the wainscoting and floor from a piece of cardstock that is at least 7 inches x 3 inches. Using an ink blending tool, color the wainscoting and floor with yellow ink to match the dresser. Cut pieces to cover the lower half of the card base (two 1-inch panels of wainscoting and first row of floor tile and one 3 7/8 inches x 3 /4 inch of two rows of floor tile and bottom edge of wainscoting.) Glue the two 1-inch panels to the side sections of card base. Cut a 3 7/8 inches x 2 1/2 inches piece of blue cardstock to be glued in place as the back of the stove. With the card base open in the U-shape, position the dresser with stove over the opening and mark with a pencil where the shelf and stove burner crossbars should go on the narrow inside walls. Adhere the large blue stove back to the card base using the pencil mark for the stove burner crossbar for positioning. Glue remaining strip of flooring with wainscoting at the bottom of the stove back.
Shelf and Burners: Stamp color and cut out herb pot, utensils and kettle. With tiny dots of glue, attach the utensils to the silver rack and add tiny piece of foam squares to the back of the rack and utensils. Attach the kettle to the from of a stove burner. Fold 1/4 inch tabs blue crossbar at each end. Using scraps of blue, attach the burners to the blue crossbar centering them over the stove knobs. Glue the backsplash tile onto the card base above the burners. Adhere the utensil rack above the tile backsplash. Assemble the shelf and its contents in the same manor as the stove burners crossbar. Glue in place to card base using pencil marks.
Birthday Banner: Stamp onto a 3-inch x 5/8-inch paper strip a sentiment from the Simply Food stamp set. Cut notches on ends of strip and fold into a ribbon banner. Glue ends of ribbon to top of dresser.
Envelope: I used a 6 x 9 inches envelope for this card that folds flat into 5 3 /4 inches x 6 3/8 inches. The stamps are from the baking set of stamps.
Thank you for reading. If you enjoyed this blog post, please like it and follow the blog. 😊
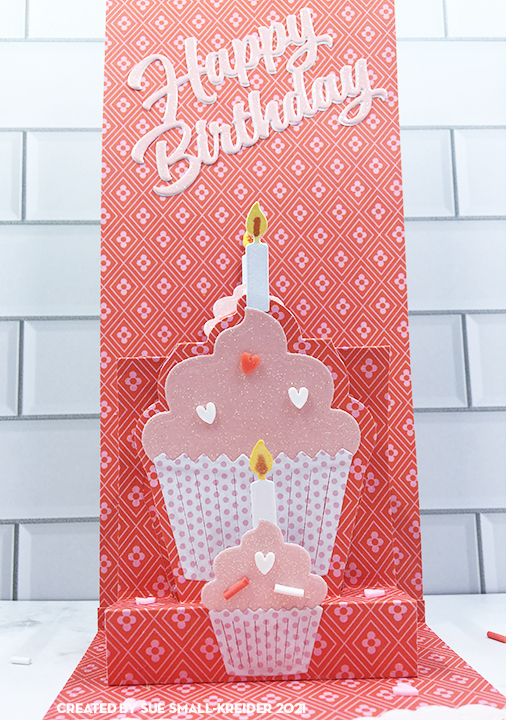
Cards for tiered birthdays (as in 29 again and again) can be fun to make when you add in a pop-up element like a third tiny cupcake.
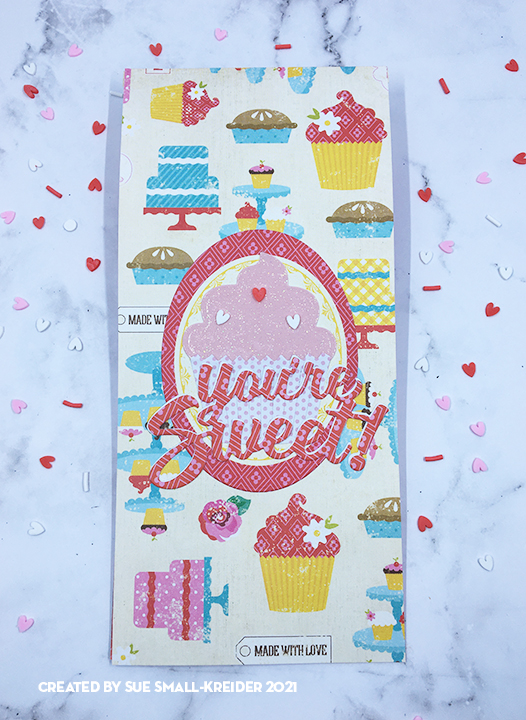
This card was inspired by the Karen Burniston Mission Poppable for August 2021 to use her Parcel Pop-Up die set. In addition to that die set, I used her Cupcake Pop-Up, the sentiments of “You’re Sweet” and “Happy Birthday,” and the candle from the Cake Pop-Up.
The double side paper is from Echo Park which is an older set designed by Lori Whitlock called Happiness is Homemade. Because the heavy cardstock is double-sided, it cut down on heavy layers of decorative papers.
I assembled the parcel pop-up as shown in Karen’s assembly video But I did not put on the decorative square front panel or flap. I also used a longer strip as the pop-up arm so that it would be tall enough to be seen behind the cupcake pop-up which was cut from a scrap piece of card stock and cut with tabs at the top and bottom to attached to card base and the parcel mechanism front.
The sentiments are cut once from pink glitter cardstock and once from glossy white paper (backside of some packaging). The white is just slightly seen so that the red on red stands out on the “You’re Sweet.” I used a topper from the paper set that had an oval design and the used an oval die to cut it out to frame the cupcake.
Because the card is a slimline size card to fit in a No. 10 business envelope, I needed a large white paper doily to fill the bottom half of the card and allow for a space to write a personal message.
The back of the envelope is stamped with a watermelon colored ink using a cupcake and “Made with love” stamps from Simply Made Crafts.
Thank you for reading. If you enjoyed this blog post, please like it and follow the blog. 😊
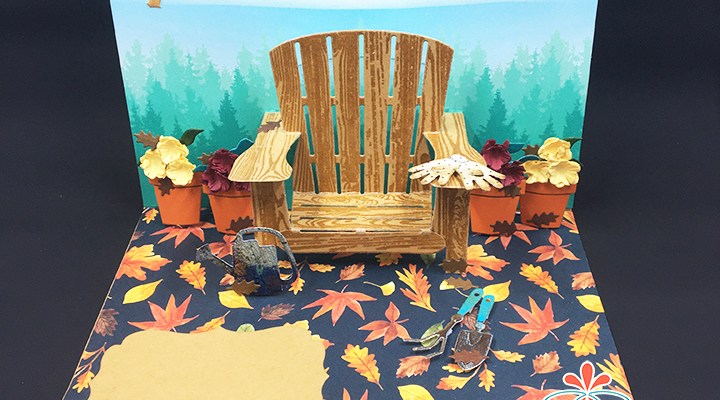
Hello, it’s Sue of Ully Cat’s World and today we are making an autumn birthday pop-up card for a gardener using Karen Burniston dies.
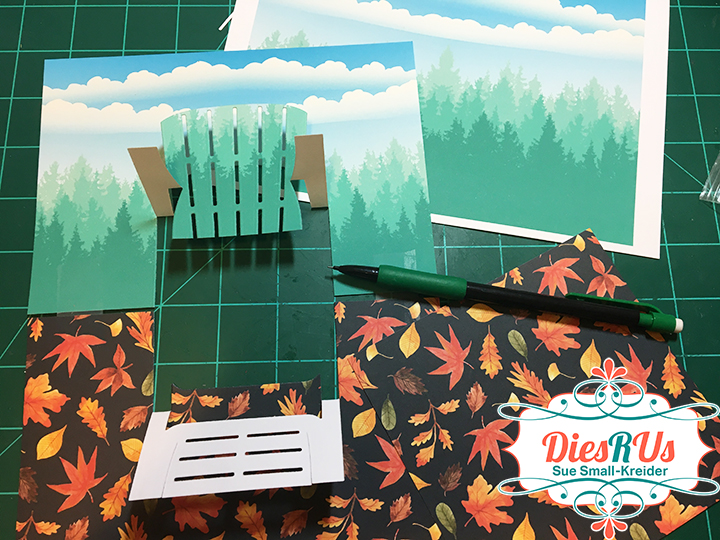
Cut the two printed papers to 4 15/16 inches x 7 inches. Position them inside the card base so that there is a gap between the papers where the fold can be seen. Using removable tape, tape them together and place the chair die with the nibs over the fold.
Run taped papers with die through die-cutting machine.
Glue printed papers inside card base, adding matching scraps of papers to cover the brown spaces let where chair is cut away.
Cut chair, arms and seat from woodgrain paper. (I made my own woodgrain paper using a woodgrain stamp that I heat embossed with watermark ink and clear embossing powder.)
Fold woodgrain chair folds as shown on packaging. Glue wood grain chair to patterned paper chair matching up the seat, back, arms and leg pieces. Train the chair to pop-up by opening and closing card a few times.
Decorate card with the garden charm set cutting off the charm loops. (I dirtied-up the tools and gloves with brown ink.)
The chrysanthemum-like flowers are made with the smallest flower from the Flower Pot Pop-up or Flowers and Bee set cut like fringe around the center circle. Cut two, fringe, push up fringed petals and glue one on top of the other. Glue three flowers onto foliage from charm set. Trim foliage as needed.
Round flowerpots and watering can over a marker or glue bottle. Add oak leaves from Tiny Tree Pop-Up to potted flowers and around card.
Make flowerpots and watering can pop-up taking printed paper cut into strips, fold and glue into squares. Glue pot to square and onto card.
(I used a fine tipped glue bottle to added glue to the die-cut words that worked extremely well. Then I used a fine-tipped brown pen to mark stitches using the die as a stencil.)
Inside, the “Happy Birthday” is another Karen Burniston die that has been colored with Distress Ink. A label die-cut is used for a personal message.
Hope this fun card has put a smile on your face and provided some inspiration for your crafting. 😊
John Next Door by John Lockwood – Clear Stamps – Garden Tools
Stampin’ Up – InkPad – Early Espresso
Don’t forget to come join in the fun at the Dies R Us Challenge Blog. There’s a new challenge theme offered on the 1st and 15th of each month and one lucky randomly drawn winner will receive a gift voucher prize to the Dies R Us Store.
For your convenience, all the important Dies R Us links are provided below.
For the next four days I have a mini chair series focusing on a pop-up chair die by Karen Burniston.
Today’s chair uses the Adirondack Chair Pop-Up with a slip cover to make it into a big overstuffed chair, perfect for cats to nap in! You can access this post and the ones in this week’s seasonal chair posts below as they become live posts.
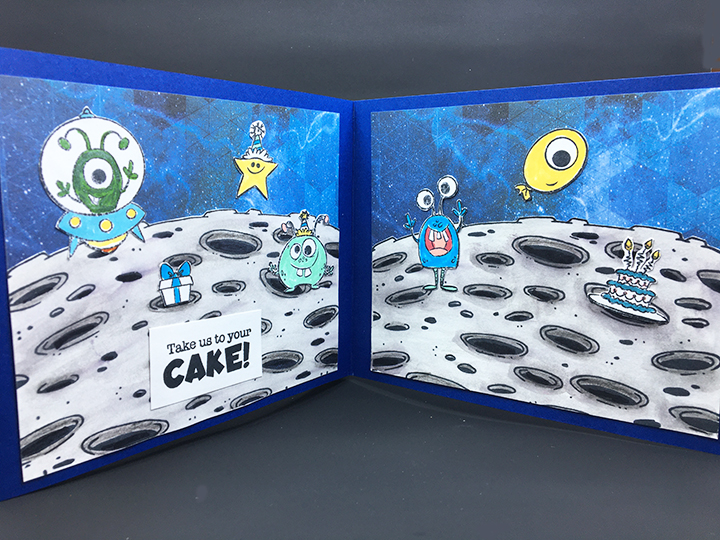
Sometimes we just feel like being out there in space when it comes to celebrating birthdays. This interactive space themed birthday card is made with Whimsy Stamps “Over The Moon” stamp set and kinetic dies.
Having watched Jennifer Dove’s video on Whimsy Stamps kinetic dies, I proceeded in making a similar card to the one she made, but I expanded the card into a tri-fold card letting the viewer find the cake.
Because this was the first time, I had used the kinetic dies, I made a few mistakes – the first being I have the rocket moving backwards when you first pull the strip. My second mistake was that I should have used thicker cardstock or cut two and glued together for the pull strip. And my third mistake was allowing the moon to warp when I watercolored it.
I stamped the images with black Memento Fade-Resistant Dye Ink onto white cardstock. The images are colored with Spectrum Noir Sparkle GlitterBrush-Pens and a Faber-Castell white India ink pen. Once dry, the images were fussy cut and ready to use for decorations.
The moon background was colored using Nuvo Watercolour Pencils in gray and black tones as well as a black Spectrum Noir Sparkle Glitter Brush Pen. I used a heat tool to dry the second and third moon backgrounds which did not warp as badly as the first moon which I let air dry overnight.
I recommend watching the assembly video for all the steps in assembling the No-See Kinetic mechanism. Because I followed the video’s directions forgetting that my rocket image went the opposite direction from the one in the video, my rocket goes backwards. Doubling up the foam tape is a must so that it matches the height of the foam dot.
The navy blue card base is made up of two panels 5 1/2 x 6 1/2 inches with tabs scored and folded at 1/4 inches on the short side. The tabs are then glued to a 5 1/2 x 6 inches panel to create the tri-fold card base.
My card uses all the stamps in the set for the three panels. It would be an ideal card for a child.
The card fits folded into an A7 envelope which is stamped on the back with the last of the three sentiments included in the stamp set – “I’m over the MOON for you!”
Thank you for reading. If you enjoyed this blog post, please like it and follow the blog. 😊