Shake Your Snow Globe

Snow Globe Shaker-Front

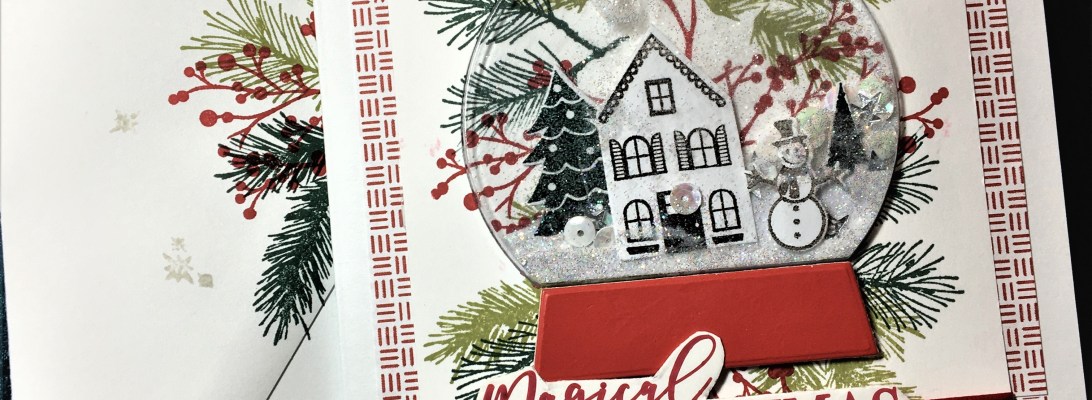
This snow globe is filled with pearlessense sequins and silver star sequins and a hint of snow glitter.  I was inspired by a number of snow globe stamp and die set project cards by a variety of companies, but in the end, I made the card with affordable alternatives that I had on hand.

I stamped the pine boughs and red berry branches on a stamping platform, turning the card four times and then changing color ink and stamp for the next layer and once more for the final color and stamp change.

Next, I cut out the opening for the plastic shaker globe from the stamped card. I then stamped and cut out the house, snow man and trees. Using white glitter paper to cut the two snowy hills, I attached the house, trees and snowman using foam squares.

Assembling the globe: I added a few white and silver sequins and a hint of fine snow glitter. (I find the that glitter clings to most of the surfaces inside the globe and a hint gives a sparkle without fogging up the globe.) Using clear removable tape, I sealed the back of the globe with the house and hills which were attached to the stamped globe cut-out. Once the globe was sealed, it was placed into the stamped card with the globe cut out.

The red and white background paper, heavy white card stock with the red sentiment stamped on it and the red globe base where all recycled from junk mail, and packaging. A ribbon was taped to the back of the pine boughs stamped card before it was adhered with double-sided tape to the card base. The “Magical Christmas wishes” and red globe base were attached using foam squares.

Snow Globe Shaker -inside

The inside sentiment is from an old Kaisercraft clear stamp set that I was unable to find a link for.

SUPPLIES USED:

Dies

Stamps

Paper:

Miscellaneous:

Ride the Birthday Train

train ride- inside

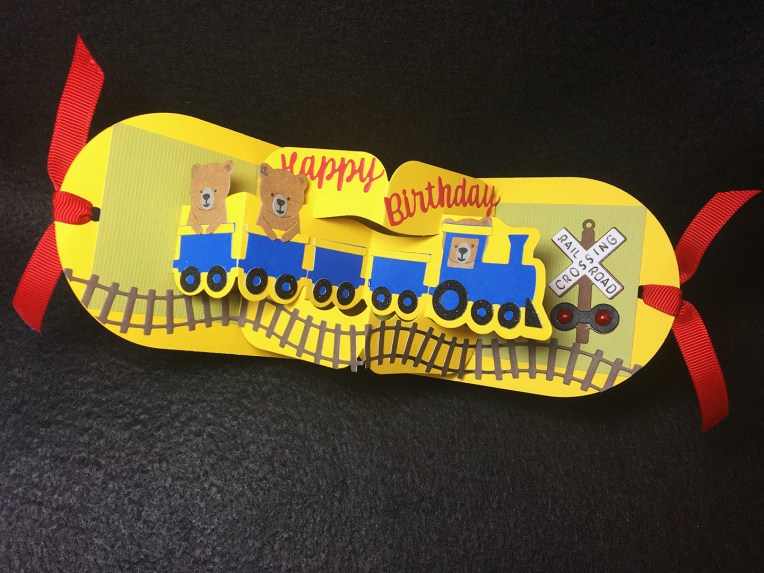
Get on board the Birthday Train!  This was my first attempt at using Karen Burniston’s Train Pivot Panels and companion Train Elements.  Having made other of KB’s pivot panels I found it an easy assembly. (If you haven’t made a pivot panel card before, please look at her assembly videos.)

train ride- front

I used bright primary colors for the card using lots of scraps bits for the words and tiny decoration pieces. “Enjoy” and “ride” are double cut from red and blue papers and off-set to give a shadow effect.  The card base is from Karen Burniston’s Circle Tag Book Pop-up.  The red grosgrain ribbon hides the tiny portion of train’s “cow catcher” and tracks that show beyond the rounded edge.

train ride- inside wide

Two pearl-like domed dots were used for the railroad crossing sign.(I removed these dots and replaced with red circles of cardstock when I sent the card to a two year old because of the fear he would try to eat them.) Bears are from KB’s Winter Animals die set.

Watch a Video of card

SUPPLIES USED:

Dies

Paper:

  • Cardstock scraps from my stash including black glitter cardstock for wheels

Miscellaneous:

Give Thanks

Pumkin-frontAutumn leaves are falling.  This simple shadow box card is made using Hunkydory -Moonstone Shadow Box Frame Die Set -MSTONE076, LDRS creative’s Happy Fall Sentiments stamp set, Fiskars Oak Leaf punch and Spellbinders Jack-O-Lantern die set. The finished size is 3 inches x 4 inches by 1 inch.Pumkin-side
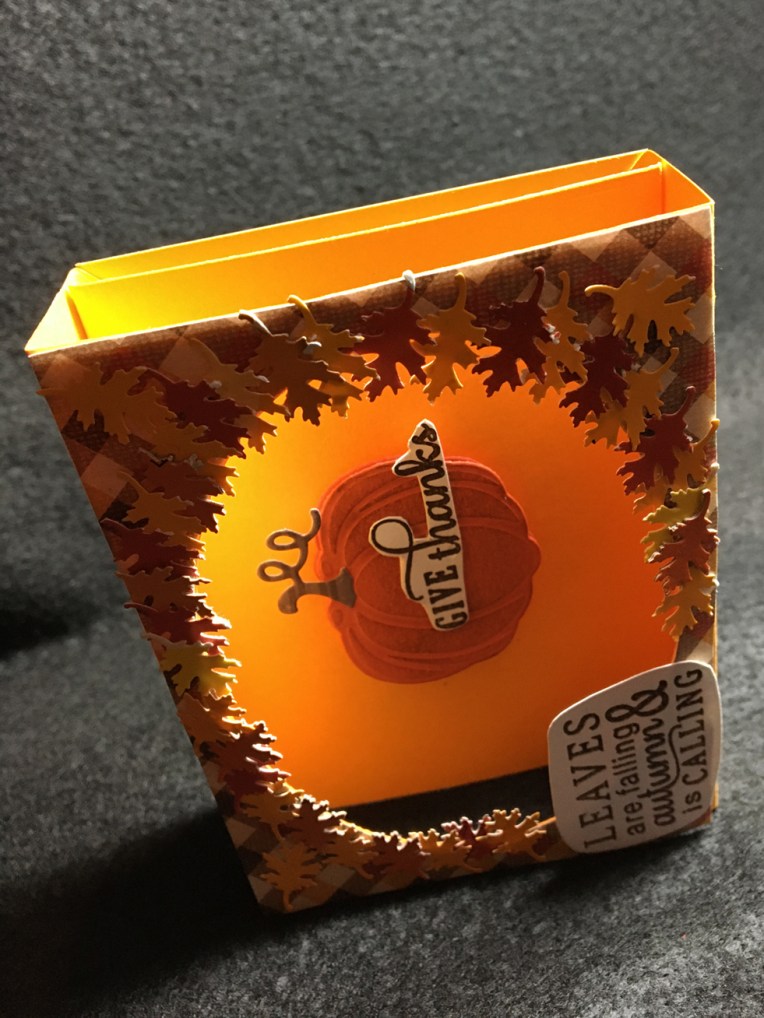
Using only one panel in the shadow box with the pumpkin cut twice from heavy cardstock and adhered with a strip of foam tape between each pumpkin to create dimension, makes for a simple decoration. The top pumpkin was lightly rubbed with Ranger Distress Ink -Vintage Photo and a the stem and vine cut from brown paper. The tiny oak leaves create a wreath on the front of the card. (Oak Leaves were cut from scrap paper using a Fiskars tiny punch.) A plaid paper from Authentique – Pioneer-Plaid THA005-355057 completes the front. The sentiments are stamped on white cardstock with Stampin’ Up Chocolate Chip Ink Pad. American Crafts’ Sticky Thumb Double-sided Super Sticky Red Tape – 1/8 inch was used to assemble the shadow box while Tombow Multi Mono Liquid Glue wasused to adhere leaves and sentiments.

12 Days of Christmas Trees – Day 11

Each day for 12 days, I have been showing card variations made with Karen Burniston’s Christmas Tree Pop-up die.  I recommend watching her assembly video before attempting to cut and assemble the pop-up tree.

For all of these cards I started with an A7 size card base (10 x 6 ½ inches), but because my die cutting machine can only accommodate 6-inch-wide pieces of paper, I had to trim the cards down to 10 x 6 inches.

Day 11 – White Christmas

White Christmas front

This card was inspired by my memories of the movie “White Christmas” with Bing Crosby and Rosemary Clooney and Danny Kaye (Yes, I had to look that one up and sure it wasn’t Bob Hope.) Every time I watch it, I keep wishing it would snow during certain scenes, but (SPOILER ALERT) it doesn’t really snow until the end of the last scene.

So this card is bit like the old inn with it’s wooden rustic floors, cold New England nights, and a bit sentimental. The tree may have the allusion of blurred tiny lights, but it is really a Bo Bunny paper of succulent plants.

White Christmas inside

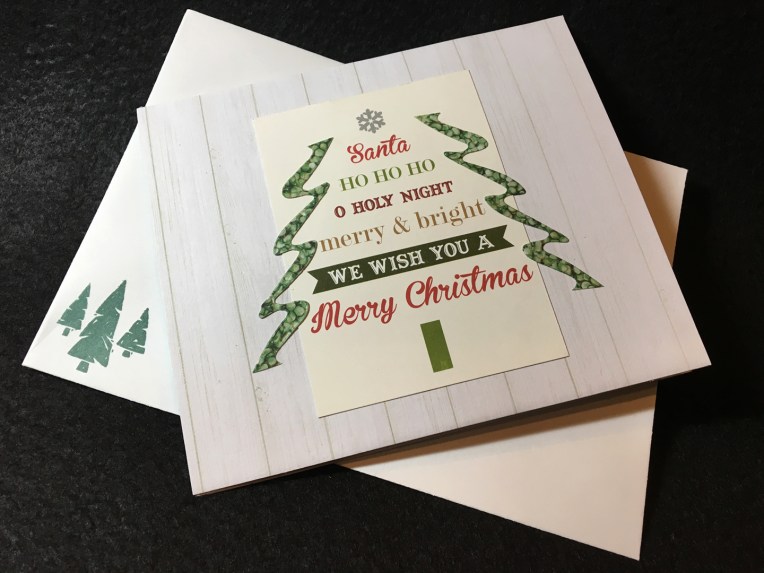
For the embossed tree skirt, used an older Karen Burniston die set from her Elizabeth Craft Designs time called Cup Pop Stand. I embossed the card base and then cut the circle in the wood grained paper (from the same Bo Bunny Garden Party Collection as the succulent paper). The die cut “Merry Christmas” and tree squiggles on the front of the card are also cut from the succulent paper. The mittens sticker and the front sentiment topper came from the Echo Park Home for the Holidays Collection.

White Christmas inside cu

Read the past posts of the 12 Days of Christmas Trees by clicking below on the list. Don’t miss the 12th post tomorrow.

Day 1 – Give Joy -Plaid

Day 2 – Home for the Holidays-Village

Day 3 – Holly Joy

Day 4 – Snowy Day

Day 5 – Give Joy – Holly

Day 6 – Gingerbread Joy

Day 7 – Home for the Holidays-Joy to the World

Day 8 – Nutcracker Greetings

Day 9 – Plaid Joy

Day 10 – Home for the Holidays-Let It Snow

Day 11 – White Christmas

Day 12 – Home for the Holidays-Peace and Joy

Bonus Day – Tropical Christmas

Click Here for video of all 12 trees

SUPPLIES USED:

Dies

Stamps & Ink (on envelope)

Paper

Miscellaneous

CRX – Card Recipient Experience

You create the most delightful card that moves went you pull a slider or you create a box card that folds flat, and the recipient of the card gets it in the mail and has no idea how to make it work.  This is not the ideal card recipient experience (CRX) you want.

In the web designers world, they talk about User Experience (UX). For us in the not so digital field of card designers, we need to think about CRX or how we let our users know how to operate the card if the recipient is not use to receiving interactive cards.

Arrows indicating direction to pull a slider tab are common.  Including a diagram of how a box card should look when completed is simple enough. Or you can get creative and string a “pull here” tag on a thread that can be removed once used.

A great card is both beautiful to the eye of the beholder and easily explained if it involves moving parts.

Dies/Stamps Used:

You’re In My Thoughts Box of Flowers

Lawn Fawn Scalloped Box Card Pop-Up

Build -A-Bouquet Stamp Collection for Papercrafter magazine issue 118 

Stamped in black ink and colored with Crayola Signature Brush & Detail Dual-ended Markers

Tea and Tulips Box of Flowers

Lawn Fawn Scalloped Box Card Pop-Up

Stampin’ Up’s Tearoom Copper Vinyl Stickers

Stampin’ Up’s Tea Room Specialty Designer Series Paper

Tea Room Memories & More Card Pack.

Shaded Tulip Stamp & Layer set by Susan Bates for Papercraft Inspirations magazine, issue 182

CraftSmart and Hampton Art mini ink pads.

Paris Easel Card

Paris in the Springtime Die set from Die Cutting essentials  issue 49

Karen Burniston’s Pop It Ups for Elizabeth Craft Designs 1104-Hanging Charm Pull Tab die set

“Pull Here” stamp from Concord and Ninth’s Mail Drop Stamp Collection

Two Fish, One Fish

Fish bowl 4

Two fish, one fish, is that a cat I see?

This is meant as a fun card. Ever since I saw the Die-cutting essentials magazine issue 36 Underwater Friends die set, I have been planning to make some sort of interactive card with it.

Fish bowl 2 - Copy

Finding the Karen Burniston Pop It Ups’ Oval landscape Accordion -1108 die set by Elizabeth Craft Designs gave me the idea on how to proceed to tell a story through a card.

Fish bowl 1 - Copy

First there are two fish. Then there is one fish. then there is a cat’s face watching intently.

Fish bowl 5 - Copy

Did the cat do anything beyond watching? What do you think happened?

Fishbowl-envelope

The cat’s face has a slit at the top and bottom so that it can slip off the pivot points and be signed or a greeting added.  I used Grafix Dura-Lar .005 Clear Film, an archival polyester film to die cut 3 of the accordion sections. I then die cut 6 of the blue cardstock accordion sections and then all the fish and greenery pieces. I used a combination of Tombow Aqua Mono Liquid Glue for around the blue oval frames because I could easily clean-up any messes with a damp paper towel. I used Tombow Multi Mono Liquid Glue for adhering the blue frames to the clear film because it needed to be a strong adherence for a sturdy frame.


Stampin’ Up Cards – Easter

img_5706.jpg

I went to a workshop this past week with Donna Butler, a Stampin’ Up demonstrator. I really enjoyed learning more about the proper way to stamp. I loved the feel of the cling stamps. They were soft and required a lighter touch than some of the stamps I have used before.

IMG_5707

Here is one of the cards we made using Donna’s designs. Each card is designed with an interior panel that can be removed if the card needs to be repurposed. Note the envelope is also stamped on the back flap.

IMG_5704-Risen 1

Donna’s list of supplies:

Stamp sets:

Cardstock:

Inks:

Stampin’ Write Markers/Blends:

Accessories:


Stampin’ Up Cards – Get Well

I went to a workshop this past week with Donna Butler, a Stampin’ Up demonstrator. I really enjoyed learning more about the proper way to stamp. I loved the feel of the cling stamps. They were soft and required a lighter touch than some of the stamps I have used before.

IMG_5697

Here is one of the cards we made using Donna’s designs. Note that each card is designed with an interior panel that can be removed if the card needs to be repurposed, and each card’s envelope has a stamped envelope with coordinating images.

IMG_5699

Stamp sets:

Cardstock:

Inks:

Accessories:

Stampin’ Up Cards – Sympathy

Sympathy-2

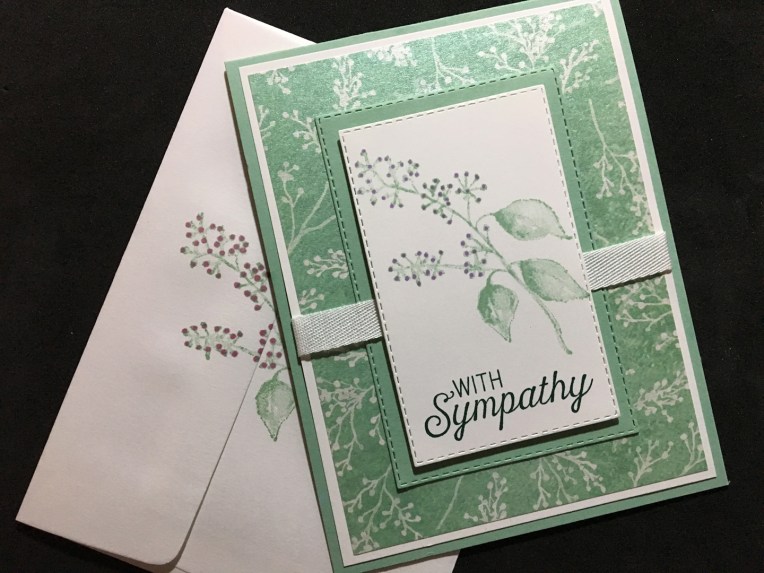
I went to a workshop this past week with Donna Butler, a Stampin’ Up demonstrator.       I really enjoyed learning more about the proper way to stamp. And, I loved the feel of the cling stamps. They were soft and required a lighter touch than some of the clear polymer stamps I have been using.

Here is one of the cards we made using a design of Donna’s. Note that each of her cards are designed with an interior panel that can be removed if the card needs to be repurposed.

Sympathy inside

Donna’s list of supplies:

Stamp sets:

Cardstock:

Inks:

Blends:

Accessories: