Shine Bright

Sometimes simple is best. This embroidery floss filled-tree card has a simple message and design – Shine!

This is a first try at the new Spellbinder’s Large -Die-of-the-Month for November 2020 which has three designs to cut the holes and then using needle and thread to fill-in the designs. I used the full six strands of embroidery floss but think next time I might try three or four strands for the light circles. I followed the assembly video for the die set taping off my loose ends of threads.

Once the tree was stitched, I cut down the blue scrap piece I had die-cut the tree onto 3 7/8 x 3 5/8 inches. Using foam adhesive strips, I adhered the tree onto a green piece of mirror car that was 4 3/8 x 4 1/8 inches. These layers were then placed on a 6 x 5 inches sheet of patterned paper by Craft Consortium that had been adhered to a 6 ½ x 5 inches white card base.

Using a foiled sentiment, I had in my sentiments stash, I set the theme of shing bright for the card. (I like to do my foiling of sentiments in large groups to save time later.)

The inside sentiment is one my favorites from an old Kaisercraft stamp set. I tried a new tinsel embossing powder with it.

For the envelope flap, I used a new embossing folder that has big round dots, much like the candle glow circles stitched on the card.

Hope this card makes you smile.

SUPPLIES

Dies/Foiling Plates/Embossing Folders

Stamps

  • Kaisercraft – Clear Stamps – Sentiments -Traditional – CS313

Ink/Embossing Powder

Paper

Miscellaneous

© Sue Small-Kreider 2020

Christmas Nativity Pageant Pop-up Cards

Children’s Christmas pageants that re-enact the birth of the Christ child are the theme of these quickly made decoupaged pop-up cards.

In less than two hours I was able to make these cute cards using Craft Consortium’s Nativity collection designed by Hetz Cuppleditch. Using the 10 sheets of the pre-cut decoupaged scenes which are labeled with the layer number for each piece it is super simple to glue up these scenes matching pieces to the layer below. (You could use foam pads, but if you plan to mail these cards in the USA, you will pay extra postage because of the thickness.)

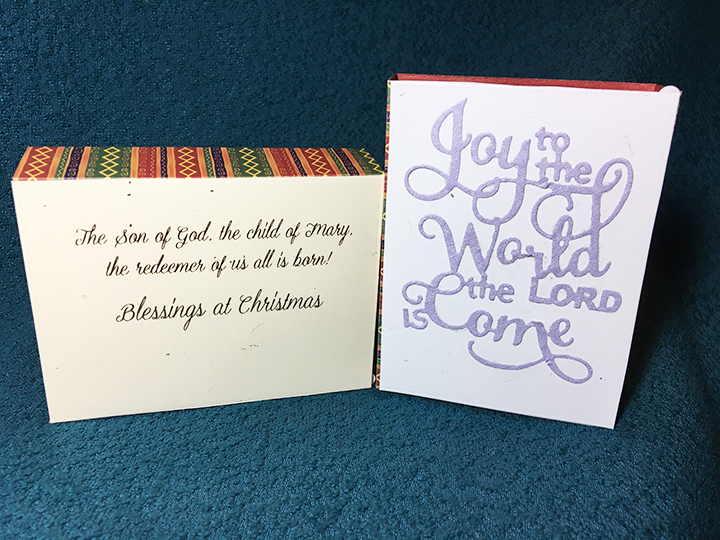
The box-like stage is created by using the Hunkydory Final Shadow Box die set using the largest of the rectangular window dies to cut from the double-sided paper also from the Craft Consortium Nativity collection. The back of the stage is cut from scrap packaging with the “Joy to the World” die cut from a purple scrap envelope (or sentiments from old Christmas cards).

An old Kaisercraft sentiment stamp set was used to stamp the back flaps of the envelopes for these cards to foretell what is inside.

Thank you for reading about these cards. Please hit the like button or leave a comment.

See the more Christmas cards for 2020 including the series of “A Week of Christmas Houses”

Day 1 – From Our House to Your House

Day 2 – Santa is Coming

Day 3 – A Baby is Coming

Day 4 –Keeping the Home Fires Burning

Day 5 – Red Four-Square

Day 6 – Santa Delivers to the Tropics

Day 7 – House Luminary

2019 – 12 Days of Christmas Trees

SUPPLIES

Paper

Dies

Stamps

  • Kaisercraft – Clear Stamps – Sentiments -Traditional – CS313

Ink/Nuvo Drops

Miscellaneous

© Sue Small-Kreider 2020

A Small Triptych Card

Angels announced the coming of the newborn babe and in centuries old tradition of iconic triptychs this little card does similar with its gatefold doors opening to the simple stable under some palm trees on a starry night.

This is the second in a series of blogs about Christmas cards made from the 2020 Hunkydory paper collection entitled The Miracle of Christmas.

To create this card, I played with scrap paper cute to the size of the heavy colored card stock I was using. After deciding on a simple gate fold with the inside top and bottom folds cut and inverted, I fussy cut out all the printed paper elements. Knowing that the palm trees were going to be adhered with tiny foam squares cut to fit, I added the foam at one step in my preparations before assembly.

The measurements of the outer adorable scorable card is 5 ½ inches (140 mm) tall by 8 ¼ inches (252 mm) wide. It was scored at 2 1/8 inches (55 mm) and at 6 1/8 inches (158 mm).

The inside, light weight, navy blue cardstock is also 5 ½ inches (140 mm) tall by 8 ¼ inches (252 mm) wide. And scored at scored at a hair more than 2 1/8 inches (55 mm) and at a hair less than 6 1/8 inches (155 mm). The inside card needs to have a slightly smaller center than the outside card to fold properly at the two folds.  Using a T-topped ruler, I marked where the four cut lines should go (see downloadable template) and cut using a metal straight edge and craft knife. (You could use a sliding trimmer if you have one.)

To fold the inside piece, I first folded the card as a gatefold and then carefully aligning the inverted strips edges with card edges and made the inverted folds.

Decorating the inside of the card Involved cutting two strips of starry paper at 4 x 2 inches (100 x50 mm) and one 4 x 3 15/16 inches (100 x 98m) and gluing them so that the card fold were left exposed. The stable was glued down, and the foam padded palm trees adhered so as not to impede the card folds. Two stars were cut from the papers and the top on adhered with a foam square.

The outside decorations involved some reinforcement of the angels’ trumpets by gluing them onto scraps of the same paper. Once the paper decorations were added, Nuvo drops were added as stars by opening the card flat and allowing to dry flat.

The final sentiment was cut using an Impression Obsession die from an old cream envelope and glued to the back of the card.

I stamped the A2 envelope back with the Little Town of Bethlehem stamp using Crumb Cake Stampin’ Up ink which almost matches the gold Nuvo drops used on the card.

Thank you for reading about these cards.

The Miracle of Christmas Series

Post 1 – The Miracle of Christmas Papers

Post 2 – A Small Triptych Card

SUPPLIES

Paper

Dies

Stamps

Ink/Nuvo Drops

Miscellaneous

© Sue Small-Kreider 2020

The Miracle of Christmas Papers

Silent Night is humming in the background as the card recipient opens this gold stamp envelope and pulls out a card with a gold embossed “Silent Night” on it’s front.

This is the first in a series of blogs about Christmas cards made from the 2020 Hunkydory paper collection entitled The Miracle of Christmas.

These were my first two cards made from the collection and I was able to make two from each of the Adorable Scorable cardstock and insert papers. All have a gold heat embossed sentiment on vellum and adhered to the front with foam squares. I used double-sided tape to adhere all the papers to the card base. The red nativity also has a gold heat embossed inside sentiment from an older Kaisercraft stamp set while the Little Town of Bethlehem scene uses a sentiment cut from the paper pad.

I stamped all of the A2 envelope backs with the Little Town of Bethlehem stamp using Crumb Cake Stampin’ Up ink which almost matches the gold heat embossing powder used on the cards.

Thank you for reading about these cards.

The Miracle Of Christmas Series

Post 1 – The Miracle of Christmas Papers

Post 2 – A Small Triptych Card

SUPPLIES

Paper

Stamps

Ink

Miscellaneous

© Sue Small-Kreider 2020

Vintage Christmas

What fun to be a child with a new toy or two to play with on Christmas morning. This card takes its inspiration from a BoBunny paper pad and matching die-cut pieces as well as a recent release of Karen Burniston’s Flip Frame Pop-up die set.

I found the Flip Frame Pop-Up easy to assemble, but strongly suggest practicing with scrap paper the gluing placement of the mechanism and frame before gluing with your good paper. (Here is the assembly video.)

I cut the flip frame from dark green mirror card and used some scrap green pattern pieces to hide the white side of the mechanism so that the mechanism strip blends into the background.

The cream-colored doily is for writing a personal message, but it does give the feel that the open card is a tabletop with a picture frame of a loved one.

The front is decorated with pictures cut from the paper pad and the little boy is a die-cut from the BoBunny set that is adhered with foam squares. A ribbon was the final dimensional element to tie the little girl to the boy and the opened gift box.

The card base is made entirely from two papers from the BoBunny paper pad. The inside sentiment and snowflake are from the coordinating die cuts set.

As is my style, I stamped the envelope flap with an older Kaisercraft stamp sentiment to set the mood for the card.

Hope this card makes you remember your childhood Christmases.

SUPPLIES

Dies

Stamps

  • Kaisercraft – Clear Stamps – Sentiments -Traditional – CS313

Ink

Paper

Miscellaneous

© Sue Small-Kreider 2020
Naughty or Nice?

What pops down a chimney and out a fireplace? Santa Kitten!

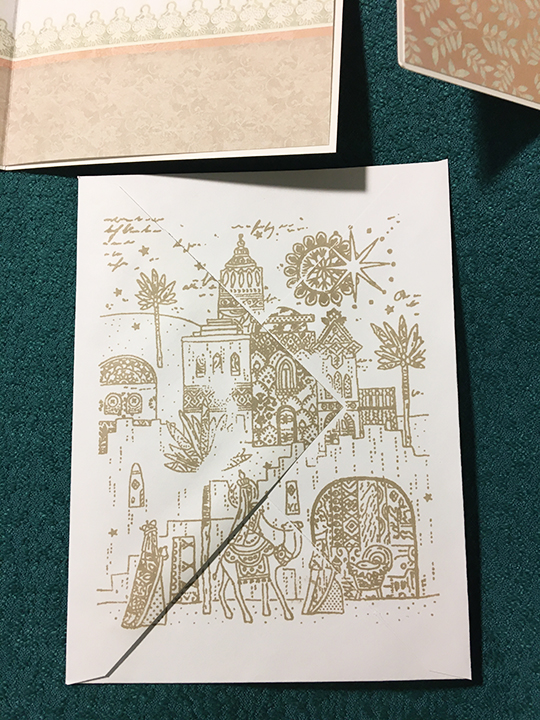
These cute little kittens jumped out at me while in a Tuesday Morning store. They are on cellophane treat bags. I realized that they were the correct size for one of Karen Burniston’s interactive dies – the Pop ‘n Swap.

While I would classify this card as a prototype, what I wanted to share is to show how you can make a shallow box like structure to create a fireplace over the pop ’n swap mechanism. Watch Karen Burniston’s assembly video to learn how to put together this mechanism.

For this slimline card, I cut a piece of heavy black cardstock 8 ½ x 8 inches and scored at 4 inches and folded in half to create the card base. (The card needs to be at least 4 inches wide since the mechanism folded flat is 4 inches wide.) Next, I cut from the front top of the card base a rectangle 2 ½ x 4 inches to allow the Santa kitten to show over the chimney top.

The inside shallow box is a 5 3/4 inches tall by 4 7/8 inches wide rectangle of red cardstock. I scored at ¼ inch, 1 inch and 4 inches. (Because the mechanism is ¾ inches tall, the box side is ¾ inches deep.) All the folds are mountain folds. The narrow tab goes towards the right edge of the card while the wide tab goes towards the inside fold.  I glued my mechanism in first, and then using removable tape, I played with the positioning of the box and marked with pencil its placement before removing the box. I cut the widow to show the kitten inside the fireplace, by laying the fireplace frame over the mechanism and seeing where the kitten would best show. Next, I placed  a loop of removable tape on the fireplace and positioned the box back into place and got the fireplace to stick to the inside of the box. With the fireplace stuck I removed the box and traced the opening of the fireplace onto the back of the box. With a metal ruler and craft knife, I cut the opening slightly larger than the pencil marks. Now the box is ready to be permanently glued in place. Glue the kittens in place next on the mechanism arms, cutting any corners that show beyond the kittens.

For decorating of the fireplace and mantel refer to my An Old-Time Christmas post. The brick is stenciled on the chimney panel before cutting it for the front. The fireplace was stenciled once the opening was cut for the fireplace, but before the box was glued permanently in place.

I tried a new-to-me product from Cosmic Shimmer called Fluffy Stuff. It is a thick paint-like substance that you can add dimension with for snow. You use a heat gun to get it to bubble up. I tried adding it to the front of the card after I assembled the card and in the heating of the card, I ended up heating the cellophane of the top kitten which shrunk a little. My recommendation is to add the Fluffy Stuff to your front panel before it is glued on to the card so that you can heat it and left it dry for 24 hours before gluing in place. (Here is a video that shows Fluffy Stuff being demonstrated on the Beebaab Youtube channel.)

If you have read this far, I’ll let you in on a secret. There is a free down of the “Naughty or Nice” sentiment in the supplies list.

Hope this card makes you smile.

SUPPLIES

Dies

Stamps/Stencils

Inks/Colors

Paper

Miscellaneous

© Sue Small-Kreider 2020
Warmish Winter Wishes

Sending warm wishes for the holiday season is what this card is all about.

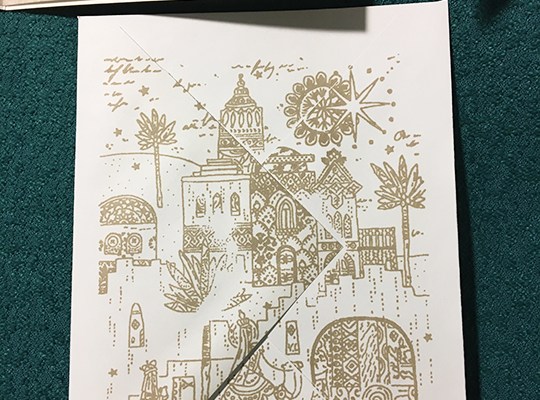
It is a simple card made with pre-printed white snowflakes on brown kraft paper card, holographic snowflake glitter and red stamped images adhered with foam squares.

I made 24 of these cards in one day. The stamping was done first using a Tim Holtz stamping platform by Tonic Studios. I had cut 8 ½ x11 inch white cardstock into 4 ¼ x 5 ½ inch pieces to make it easy to stamp two sets of images per piece and never have to move the stamps, except to stamp the two sentiments and the fox on the envelope flaps.

I fussy cut the images and placed tiny and large foam squares from my stash on the backs of the images.

Once the cut images were adhered to the card fronts, I glued the snowflake glitter to the cards matching up with the centers of the printed snowflakes.

SUPPLIES

Stamps

Ink

Paper

Miscellaneous

Day 1 of Mini Challenge – Winter Joys

I set myself a challenge to make five cards with the Autumn Days stamp set from the most recent Simply Cards and Papercrafts magazine. I made a number of backgrounds using fall colors, but I also did two with the pine branches and berries in greens and red for the winter holidays.

I did a design that I’ve used in the past of positioning the pine branches in a circular wreath-like fashion with the red berries as accents. The vertical card I inadvertently turned two of the branches in opposing direction in the corners and had to cover the stem bases with red berries. The “Joy” toppers are circular scraps from my greens scrap bin that where gold heat embossed and adhered with foam pads.

The inside sentiment comes from an older Kaisercraft stamp set, while the “Joy” came from a Love Cardmaking magazine stamp set.  I stamped the pinecone stamp from Autumn Days on the envelope flap in brown ink.

I thank Mandy78 from Craftworld.com for the idea of a mini challenge for myself.

DAY 1 – Winter Joys

DAY 2 – Looking Up and Letting Go

DAY 3 – N is for Nuts

DAY 4 – Autumn Leaves and Letting Go

Supplies:

Stamps

Dies

Papers

Inks/Embossing Powder

Miscellaneous

House Luminary

Building off of the red four-square house, this four-panel card becomes a wrap-around screen for a battery powered candle. This is the seventh house card in my series of “A Week of Christmas Houses” using Poppy Stamps 2020 Winter House Pop-Up Easel die set.

The house goes together easily by looking at the photos on the Poppy Stamps packaging. It does involve a lot of die cutting as there is only one die of each window type.  (I cut lots of the small pieces and store the extras in a tiny plastic bags that I keep with the die set.) To add depth to the porch and dormer windows I cut those pieces four times and glued together. The snowy pieces are cut from glitter paper.

Papers Used: The house is cut from a dark red cardstock with the windows and porch posts cut from cream. Note that two matting layers to each house panel – one pale yellow and one on heavy weight white cardstock. The red, cream and pale yellow come from monotone color packs of cardstock by Recollections.

Once again, peach organza ribbon to create some sparkly interest at the windows of the house. I masked off the front door with sticky notes and used Walnut Stain Distress ink to darken the door and frame. A wreath cut with a Tonic Studios die set to complete the door. (See Day 2 for details.)

Once the four houses were assembled, I glued together the pale yellow and white matting layers and then used the solid house die to trace where the windows needed to be cut out on to the pale yellow with a pencil. Because the tracing was inside the window, I had to cut 1/8 inch away from the outer edge of the pencil lines to make the window opening as large or slightly larger than the die cut window openings. I used a metal ruler and a craft knife to do this.

Once all the window openings were cut, I could glue the house fronts on to their matting layer panels. Lining the four completed panels up, I then used clear tape to hinge the panels together.

The panels can accordion fold to fit in an A2 envelope which I stamped with a greeting since the card has no greeting on it. I expect this will be a hand delivered card with a boxed candle.

Free PDF of display instructions.

See more house luminaria:

Victorian Trim House Luminaria

Holiday House Luminaria

See the more the series of “A Week of Christmas Houses”

Day 1 – From Our House to Your House

Day 2 – Santa is Coming

Day 3 – A Baby is Coming

Day 4 –Keeping the Home Fires Burning

Day 5 – Red Four-Square

Day 6 – Santa Delivers to the Tropics

Day 7 – House Luminary

An Old-Time Christmas Parlor

2019 – 12 Days of Christmas Trees

Supplies

Dies

Stamps

  • Kaisercraft – Clear Stamps – Sentiments -Traditional – CS313

Paper

Ink

Miscellaneous