Be Spontaneous!

BDay Party Ulta closeup-pop-up

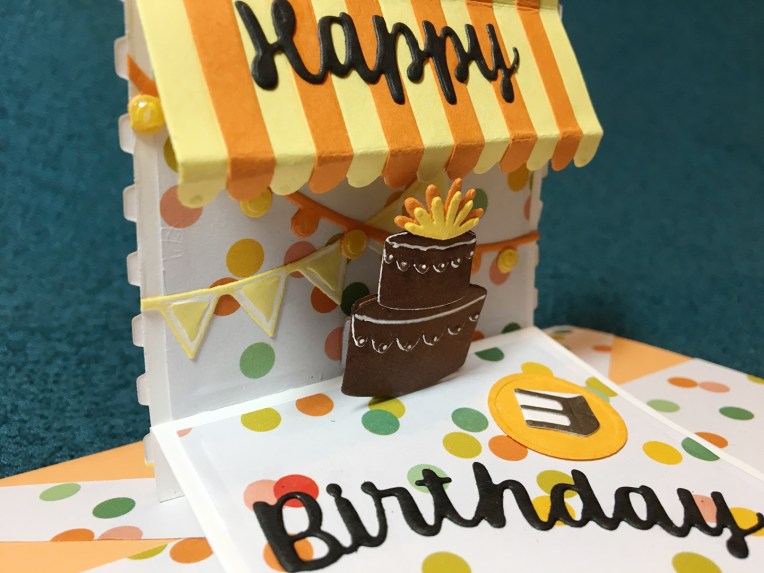
Spontaneous birthday parties are wonderful, especially pop-up ones. This card’s inspiration came from experimenting with cutting multiple square wave frames and playing with shadow boxes. Once I realized the square wave frames fit the Karen Burniston Frame Pull Pop-Up top square, I knew I had to create a mini pop-up version of Courtney Chilson’s Birthday Shadow Box card.

BDay Party closeup-Front

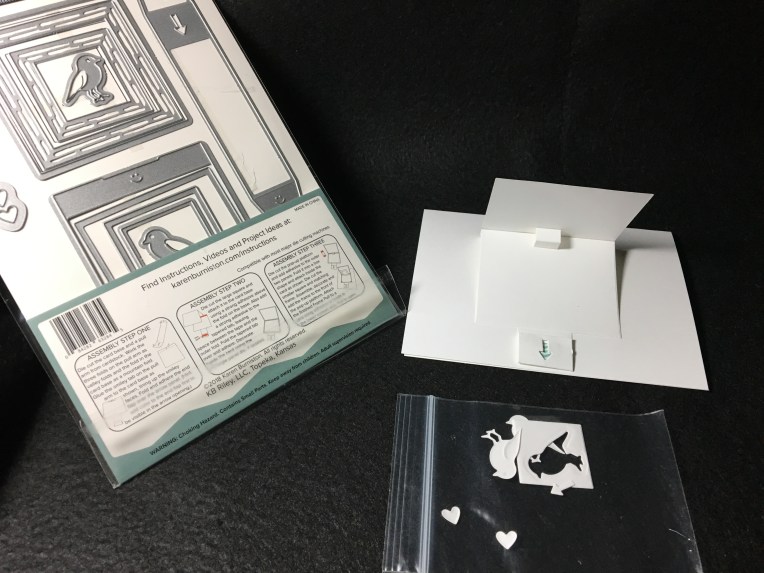
Having made the Frame Pull Pop-up card before, I studied my practice card to make sure I remembered the assembly. (You can access the assembly video at here.) I remembered her advice to keep the top square flexible and not over decorated with stiff layers and used papers rather than cardstock to lay the background of colorful wave frames. I made sure the top edge did not have any overhanging edges of the frames that would catch when the card popped open.

IMG_5856

I had cut and assembled several sets of decorations from the Birthday Shadow Box card die set the last time I had made the card, so I only had to cut the cake and frosting and a circle for a plate from scrap cardstock in my stash. I found two shades of browns for the cake and used a white gel pen to added accents to the frosting. After gluing the cake together, I gently rounded the cake with my fingers to add depth to it as well as a Mini Dimensional foam dot to adhere it to the pop-up cube on the card. Double-sided red tape was used to attach the awning to the top of the pop-up.

BDay Party closeup-pop-up right

Decorations for the inside of the card all came from the Birthday Shadow Box set. The sentiment banner is a strip of thin cardstock stamped and embossed using Stampin’ Up Blow Out the Candles stamp set, VersaMark Watermark Stamp Pad and Ranger Black Sparkle Embossing Powder. The balloons stamped on the envelope flap are also from the Blow Out the Candles set. The die cut words on the pop-up come from Karen Burniston Word-Set-2-Birthday.

BDay Party -inside

SUPPLIES USED:

Dies

Stamps:

Paper:

Miscellaneous:

TZXT2727[1]

Bee Sweet

BEE SWEET Front extended

Summer holidays are wonderful for their lazy days to be creative.

I had picked up several BoBunny paper pads at my Tuesday Morning store which included the BEE_UTIFUL YOU 6 x 8 paper pad. The collection features bees. I also picked up at the same time Stampers Anonymous Tim Holtz Collection Little Things Cling Stamps set which has a bee about to land.  Needless to say, I felt the need to get BEE-zy and created something from all this inspiration.

BEE SWEET inside detail

This simple Oval Landscape Accordion fold card was created using the Elizabeth Craft Designs Karen Burniston Pop It Ups die set 1108. I cut six frames with the inner oval taped to cut a narrow frame around the pivot oval.

BEE SWEETBack extended

Once all six frames were cut, I mixed the inner ovals patterned paper and taped them into the oval frames on the back side using white paper backed double-sided tape.  I left the backing paper on the tape until I was ready to adhere two frames together.  Once I had decided on the fronts and back of the frames and the order of the patterned paper on the frames, I placed double-sided tape on the backside frames (only the three patterned paper for the backside of the card.) Starting with my last frame on the right, I peeled off the backing paper on the two oval sections and carefully matched them up. I did not press the ovals together as I wanted wiggle room to remove the backing paper from a side of the outer frame, one-at-a-time, matching the sides together as best I could.  I did not put tape on the two tabs that would attach to the next frame.  I snipped off the two tabs of the back frame. Next I folded back the backing paper off just on the tape on the back frame of the middle section where the two tabs would adhere. I lined up the tabs and pressed them onto the tape of the middle section and started the process again to adhere the ovals first and then the outer frames of the middle frame section. Finally, I cut off the tabs on the first section before adhering the middle section tabs to the first frame as described before.

BEE SWEET inside wide

The ovals tabs were inserted between the sticky sections, aligned and firmly pressed together to adhere.  (See Karen Burniston accordion assembly video which shows a different shape, but the principles for accordion assembly are similar.)

BEE SWEET Front extended above

I decorated the ovals after I had assembled the frames so that I would not over embellish them.  To mail this card, I needed it to lie flat, but I wanted some dimension to the panels. Using small flower shapes cut from colored food boxes, I assembled six small flowers and two large flowers (see Supplies Used list for specific dies). On the Thinking of You frame, the flower and bee come from a Burts Bee’s box I had saved in my stash.

The last oval has a lacy oval of cream colored card stock to write a personal note on.

SUPPLIES USED:

Dies

Stamps:

Paper:

Miscellaneous:

The Urge to Create

Finished inside Autumn pop-up

When does a cupcake become a bushel of apples with a gift card? When rain cancelled my afternoon plans and the idea, I had been tossing around for a few days with a new die beckoned.

cupcake package

I started with Karen Burniston’s Cupcake Pop-Up die and since the cupcake liner dies cut slits in the design, I cut a liner and some thin strips from brown paper and embossed the liner using Stampin’ Up’s Sizzix Big Shot Basket Weave Dynamic Textured Impressions Embossing Folder to give texture to the bushel basket. Next, I wove three strips alternating between liner slots with each strip.  For the smaller liners I texture embossed and wove two thinner strips to form the woven baskets.

Back cupcake pop-up

Next, I cut a sheet of glittered craft cardstock 6 inches x 10 inches scoring in half at 5 inches. I folded with the glitter side inside and opened it again centered the Pop-Up cupcake die following Karen Burniston’s directions on the package and assembly video. After measuring a gift card and the width of the frosting on the cupcake, I knew there was just enough space to cut a slot in the frosting for a gift card slider. I also had to cut small extension slots at the base of the cupcake liner. (The yellow pencil and silver scissors point to the two slots cut with an X-Acto knife.)  I traced the outline of the cupcake on the back of a piece of the glitter craft cardstock as well as the outline of the gift card overlapping it with the frosting and finally cut the card outline with some of the frosting on top. The gift card slider resembles a tag shape with straight sides and a decorative top.

Square added with basket

I found I needed to reinforce the cupcake shape by backing the shape with another cupcake cut from the craft cardstock. Next, I cut a square the width of the frosting and traced where the slot needed to be cut.  Once the slot was cut, I glued it to the front of the cupcake.  I tested the gift card slider moving it up and down with the gift card taped to it.  I found that I needed to clean-up the slot cuts to get a smooth slide. Once satisfied with the slider slots I glued the large basket to the square over the cupcake liner leaving the top edge unglued so I could tuck corn stalks and apples under it.

To decorate the Pop-Up, I used the large cherry die from the cupcake set and cut approximately 20 with short stems from thick red Hero Arts cardstock. A black Sharpie marker and a white gel pen were used to color the apple stems and shiny patches. I cut four corn stalks using the leaf dies from Karen Burniston’ Flowers and Bee die set. And I cut eight of the tiny flowers from the same set in a maroon cardstock and another eight in a bright yellow cardstock. I fringe cut around four each color flower and pushed the fringe up and glued them to the center of the remaining cut flowers.

flower die

Test arranging the four corn stocks to hide the slider slot and act as the backing to glue the pile of apples, I then glued the base stem and first two leaves to the square, tucking the stems under the edge of the basket. Starting from the top edge of the basket I put a dot of glue on the back of each apple and then placed them as one would when stacking real apples in a basket. The top few apples I rounded between my fingers to add dimension and glued the edges, but not the centers down.

CU Autumn Pop-up

The small baskets of chrysanthemums use the fringed flowers glued to a scrape of craft cardstock adhered to the basket. The leaves are scrape green cardstock from my stash. I used Stampin’ Up Mini Stampin’ Dimensionals to adhere the three loose apples which were rounded between my fingers.

Using red double-sided-sticky tape, I adhered on side of the glitter craft cardstock Pop-Up to an A7 size heavy craft card (5in x7in) and then the other side of the pop-up as recommended by Karen Burniston in her assembly videos.

To have good CRX (card recipient experience), I used the arrow tab from Karen Burniston’s Frame Pull Pop-Up Die and cut it from brown paper, adding a part of a yellow sticky note for the arrow color and folding it over the tip of the gift card slider tag and adhering with glue. I trimmed the excess of the brown tab off.

I found two stripes of red and white gingham-checked paper in my scrapes and pasted them onto the card. Because I didn’t have a specific person in mind to give this card to, I’ll leave it unfinished until autumn when I can finish it up for a wedding card or a birthday card.
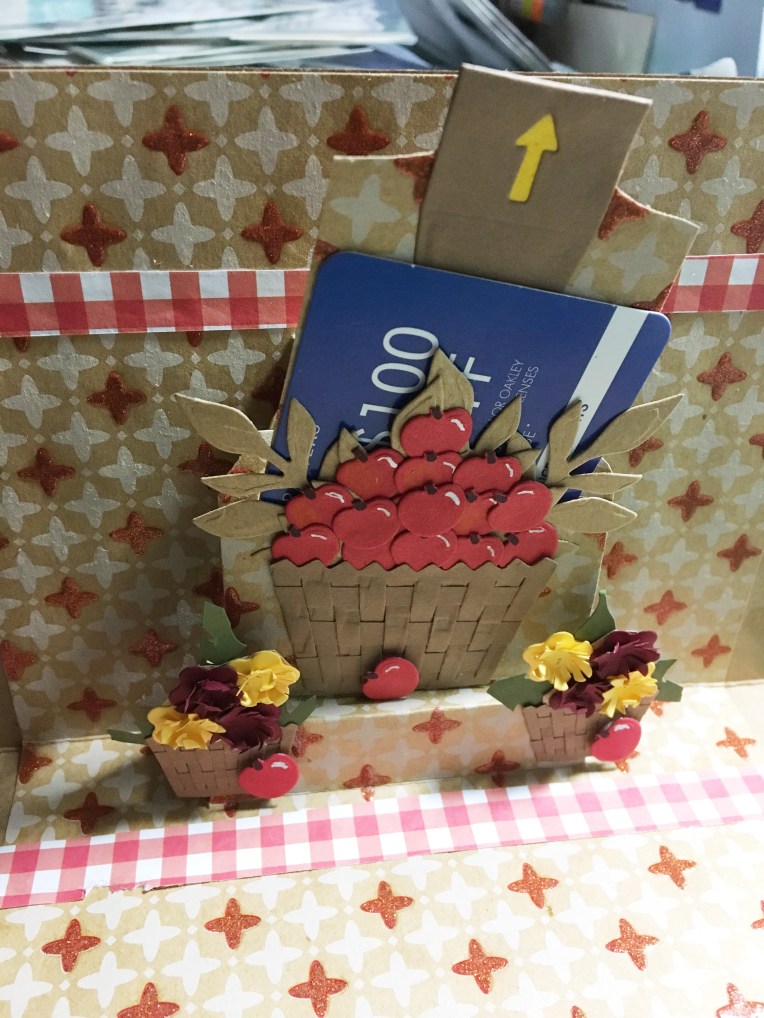
Gift card pulled Autmn pop-up

SUPPLIES USED:

Dies

Embossing Folder:

Paper:


Miscellaneous:

Be Adventurous!

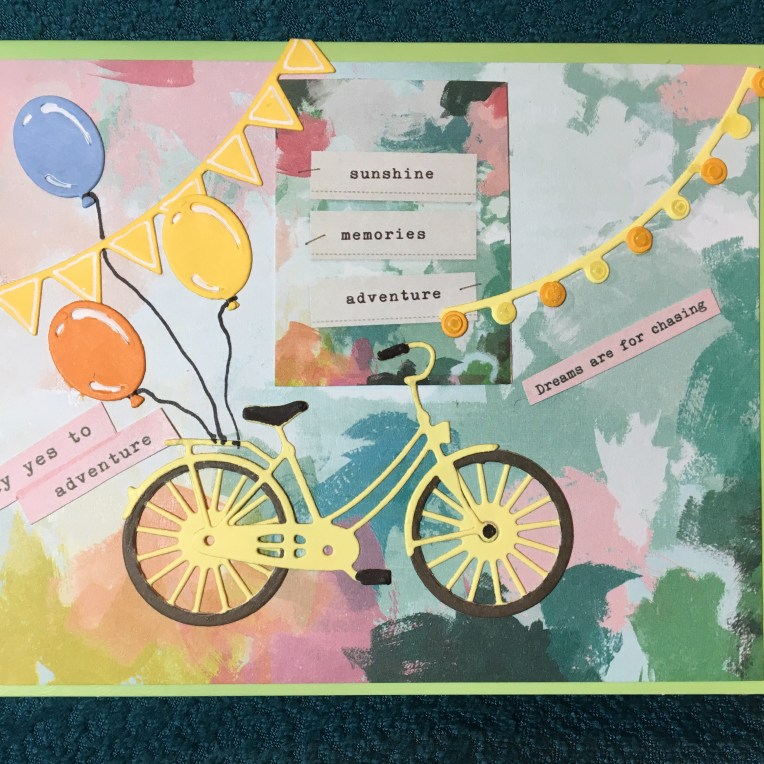
IMG_5828Say yes to adventure. Chase your dreams.  Who knows where it will lead you?  This is a card that tries to capture all these sentiments and to celebrate achievement.
The inspiration for this card comes a desire to use all of my bicycle dies, but morphed into a card trying to only use one paper set (Chasing Dreams by Maggie Holmes for Crate Paper). The bicycle die set is by Simon Says Stamp and has the wheel as a separate die so you can cut the perfect tire from a separate color and has a separate basket die as well. The balloons, string of lights and banner flags are from one of my favorite die sets by Sizzix and Courtney Chilson. A fine tipped black marker was used to color the bike’s handles, pedals and balloon strings. A white gel pen was used to color in the balloons’ highlights.

IMG_5829

While the outside of the card is to suggest the current moment, the inside is to suggest how pleasant the future will be if you chase your dreams and say yes to adventure.

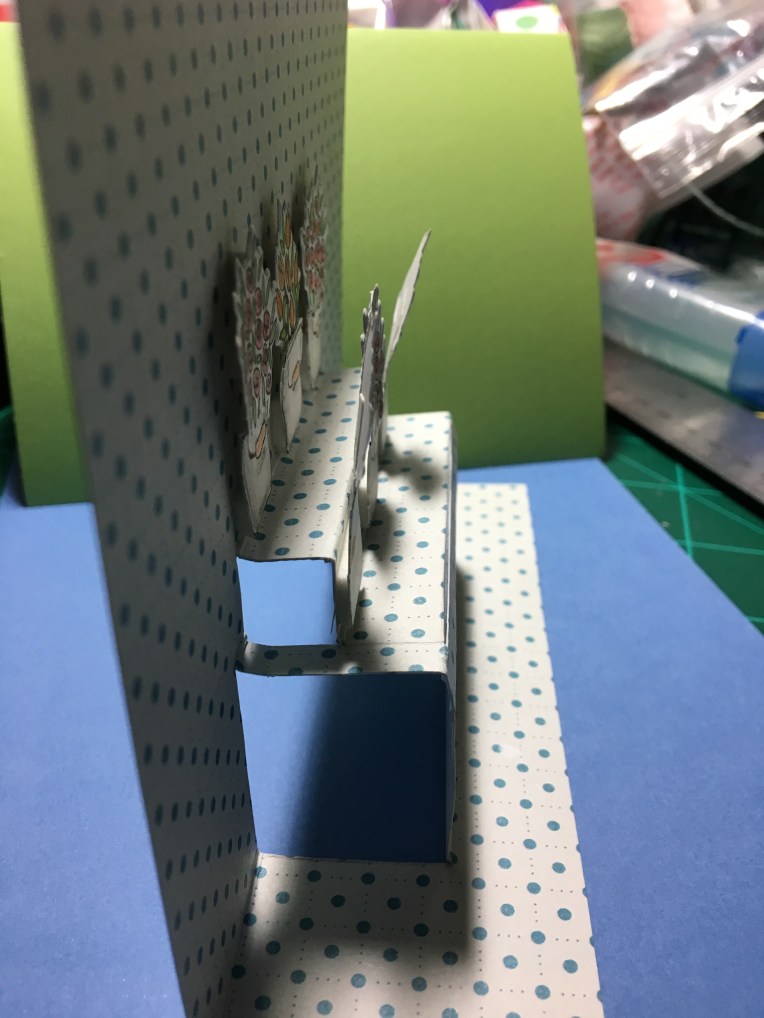
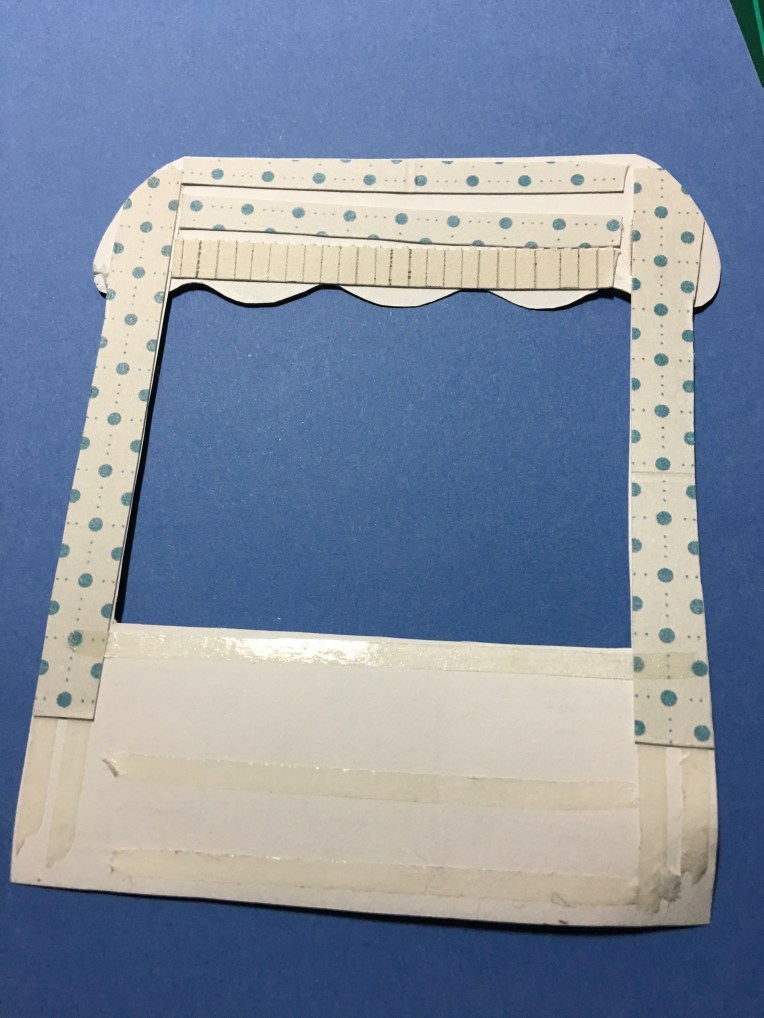
All of the pop-up, stamped, watercolored and die cut images come from the Hero Arts January 2019 My Monthly Hero kit. I had to cut off the top awning of the flower stand and lower it to fit inside the card.  I reinforced the back side of the stand with strips of scrap paper before attaching with double-sided tape.

IMG_5815

The tiered stand was inspired by a tiered pop up cake by Karen Burniston for Elizabeth Craft Designs. Since the die is no longer available, I had to improvise to create the right proportional shelves.

IMG_5816

The outside sentiments come from the paper stack while the inside sentiments are from two separate sets.  The “you’re wonderful” is stamped and embossed from the Hero Arts set and the ”Celebrate” is die-cut from Momenta Firefly’s Celebrate Happy Birthday die set.


SUPPLIES USED:

Dies


Stamps:

Paper:

Miscellaneous:

Paris in Springtime

IMG_5767IMG_5742

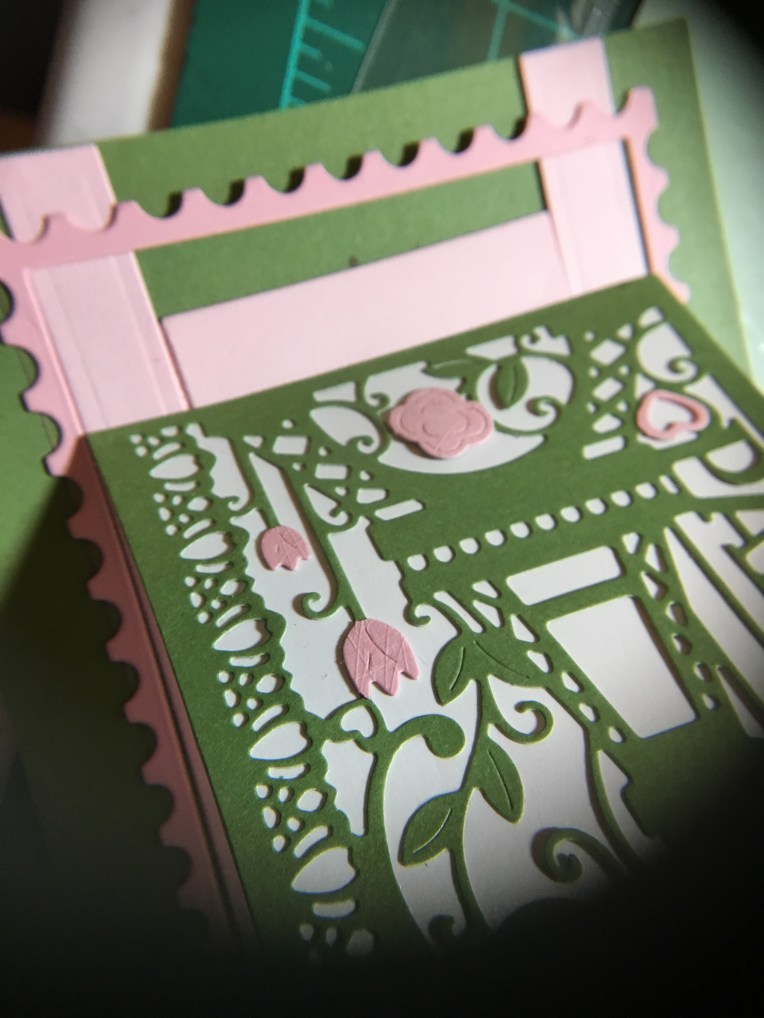
What a romantic image of Paris !  When I received the two dies that I used on this card, I looked at the packaging images for ideas for colors and layout and then did some modification to the easel mechanism.

IMG_5763

Changing the frame from a hanging charm to a larger flat panel on an easel was as simple as using ½ inch wide, red-sticky-permanent double-sided tape to hold in place the rectangle piece that was cut out for the frame.  And adhering the flat panel to the easel.

57797289798__0923E463-C45B-4C12-95BB-A64D3D2307D1

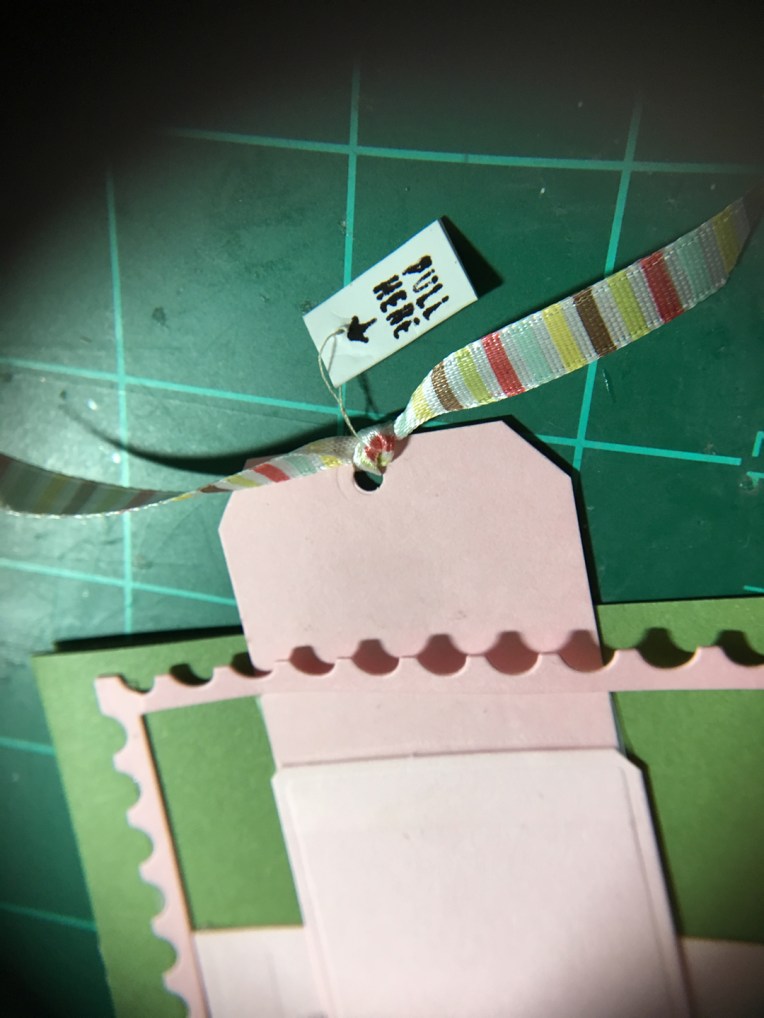
Because the flat panel is larger than the original frame pull tab, I had to add an extension tab. I used clear removable tape to smooth over the catching point where the extension level changes. In order to be able to fit the card in an A2 envelope, I punched a hole and tied a ribbon to the tab as a pull grip.

Pull Here

But how does the card recipient know to pull the ribbon?  Read my last post on CRX.

IMG_5767

Paris Easel Card

Paris in the Springtime Die set from Die Cutting essentials  issue 49

Karen Burniston’s Pop It Ups for Elizabeth Craft Designs 1104-Hanging Charm Pull Tab die set

“Pull Here” stamp from Concord and Ninth’s Mail Drop Stamp Collection


CRX – Card Recipient Experience

You create the most delightful card that moves went you pull a slider or you create a box card that folds flat, and the recipient of the card gets it in the mail and has no idea how to make it work.  This is not the ideal card recipient experience (CRX) you want.

In the web designers world, they talk about User Experience (UX). For us in the not so digital field of card designers, we need to think about CRX or how we let our users know how to operate the card if the recipient is not use to receiving interactive cards.

Arrows indicating direction to pull a slider tab are common.  Including a diagram of how a box card should look when completed is simple enough. Or you can get creative and string a “pull here” tag on a thread that can be removed once used.

A great card is both beautiful to the eye of the beholder and easily explained if it involves moving parts.

Dies/Stamps Used:

You’re In My Thoughts Box of Flowers

Lawn Fawn Scalloped Box Card Pop-Up

Build -A-Bouquet Stamp Collection for Papercrafter magazine issue 118 

Stamped in black ink and colored with Crayola Signature Brush & Detail Dual-ended Markers

Tea and Tulips Box of Flowers

Lawn Fawn Scalloped Box Card Pop-Up

Stampin’ Up’s Tearoom Copper Vinyl Stickers

Stampin’ Up’s Tea Room Specialty Designer Series Paper

Tea Room Memories & More Card Pack.

Shaded Tulip Stamp & Layer set by Susan Bates for Papercraft Inspirations magazine, issue 182

CraftSmart and Hampton Art mini ink pads.

Paris Easel Card

Paris in the Springtime Die set from Die Cutting essentials  issue 49

Karen Burniston’s Pop It Ups for Elizabeth Craft Designs 1104-Hanging Charm Pull Tab die set

“Pull Here” stamp from Concord and Ninth’s Mail Drop Stamp Collection

Two Fish, One Fish

Fish bowl 4

Two fish, one fish, is that a cat I see?

This is meant as a fun card. Ever since I saw the Die-cutting essentials magazine issue 36 Underwater Friends die set, I have been planning to make some sort of interactive card with it.

Fish bowl 2 - Copy

Finding the Karen Burniston Pop It Ups’ Oval landscape Accordion -1108 die set by Elizabeth Craft Designs gave me the idea on how to proceed to tell a story through a card.

Fish bowl 1 - Copy

First there are two fish. Then there is one fish. then there is a cat’s face watching intently.

Fish bowl 5 - Copy

Did the cat do anything beyond watching? What do you think happened?

Fishbowl-envelope

The cat’s face has a slit at the top and bottom so that it can slip off the pivot points and be signed or a greeting added.  I used Grafix Dura-Lar .005 Clear Film, an archival polyester film to die cut 3 of the accordion sections. I then die cut 6 of the blue cardstock accordion sections and then all the fish and greenery pieces. I used a combination of Tombow Aqua Mono Liquid Glue for around the blue oval frames because I could easily clean-up any messes with a damp paper towel. I used Tombow Multi Mono Liquid Glue for adhering the blue frames to the clear film because it needed to be a strong adherence for a sturdy frame.


Roses and Apple Blossoms for Mother

Flowers on Mother’s Day is a time-honored tradition. When combined with the new washi tape petals and leaves and craft papers from the Victoria & Albert Museum in London this Mother’s Day card is nostalgic.

The pop-up mechanism inside is made with Karen Burniston for Sizzix Platform, Circle & Ribbon 3-D Bigz die. The washi tape petals feel like real pressed flowers, so I decided to make it look like a pressed apple blossom complete with yellow sewing thread stamen.
I used a variety of double-sided tape to adhere the layers and Tombow aqua mono liquid glue to put the inside mechanism together. Foam tape was used to attach the sentiment doily which was cut out using the pop-up gatefold die from Papercraft inspirations issue 188.


Envelope Mothers Day card

I had been watching the PBS show Victoria and reading up on the show’s newsletter on-line and for once the pop-up ads had something, I might not have found otherwise – the V&A Collection of paper crafts. The V&A is the Victoria and Albert Museum in London which has one of the best textiles and graphics collections in the world for the 19thand early 20thcenturies. I purchased my supplies from Hobbycraft, but there are other UK suppliers of the collection.
Envelope was stamped with Hampton Arts ink pad and Inkadinkado 60-30380 Modern Flower Flourish stamp