Santa’s Naughty List

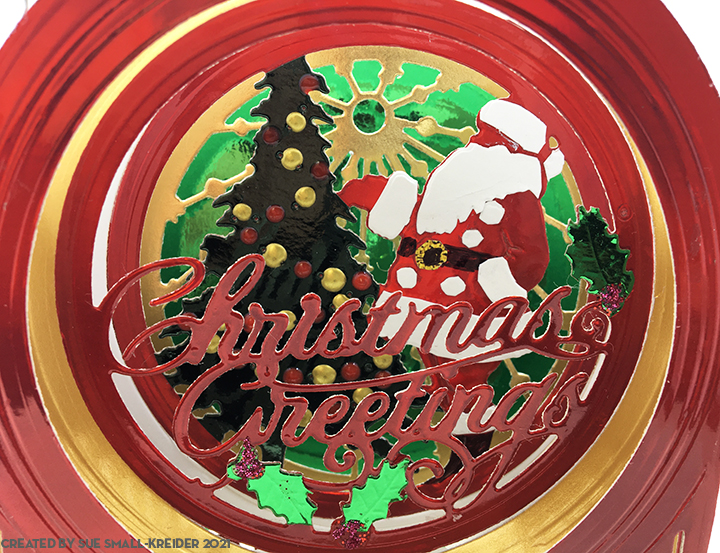
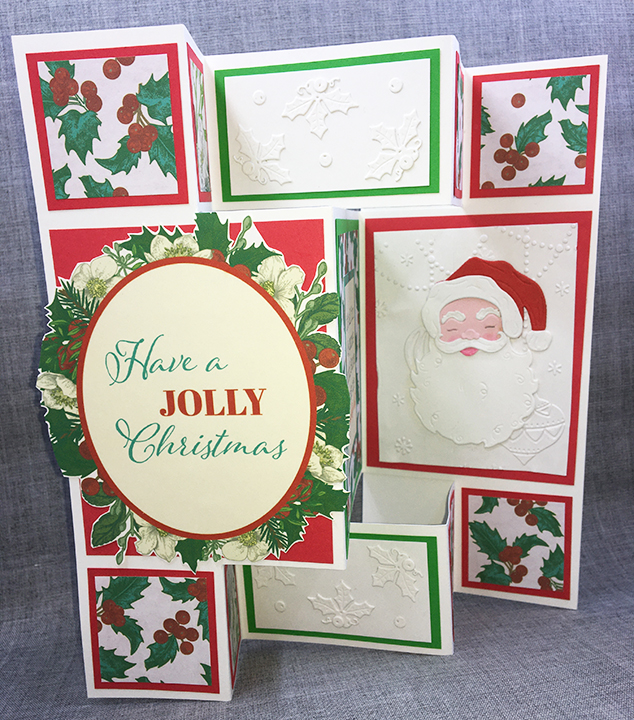
Staying off Santa’s naughty list can be a challenge sometimes.  This fun shutter card featuring a retro Santa die-cut and papers is sure to bring back childhood memories of the holidays.

Based on a card in the Die-cutting Essentials, issue 82, by Sharon-Elaine Jones, the card uses the free dies and printable papers and sentiments from the magazine.  I had to convert the template from 20cm x 30cm to fit an 8 Β½ inches x 11 inches card base.  It took me several tries to get the correct measurements and folds, but in the end I got there. (See template).

You will need to cut:

  • One rectangle from white cardstock 8 Β½ inches x 3 ΒΎ inches for the card back
  • Six 1 ΒΎ inch squares from red cardstock
  • Two rectangles 1 ΒΎ inches x 1 3/8 inches from red cardstock
  • Two rectangles 3 3/8 inches x 4 ΒΌ inches from red cardstock
  • One rectangle 3 Β½ inches x 4 ΒΌ inches from green cardstock
  • Two rectangles 3 inches x 1 ΒΎ inches from green cardstock
  • Two rectangles 2 ΒΎ inches x 1 Β½ inches from white cardstock
  • One rectangle 3 1/3 inches x 4 inches from white cardstock (to be embossed)
  • One rectangle 3 ΒΌ inches x 4 inches from patterned paper
  • Two rectangle 1 1/3 inches x 1 1/2 inches from patterned paper
  • Six 1 Β½ inch squares from patterned paper

Die-cut:

  • Six of the holly die from white cardstock
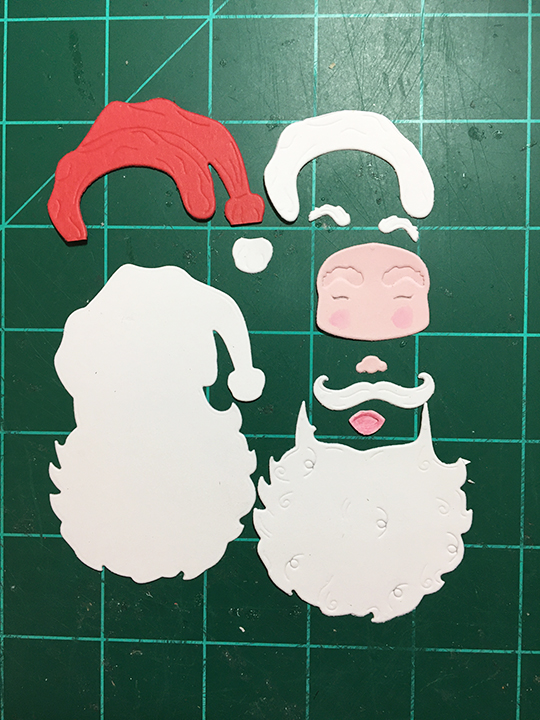
  • One of the Santa outline from white cardstock
  • One hat from white cardstock (Fussy cut just the fir trim and ball to be glued on to red hat.)
  • One beard, mustache and eyebrows from white cardstock
  • One hat from red cardstock
  • One of face, nose and mouth from pink cardstock (Using a watercolour pencil and water brush, color the cheeks and mouth pieces rosy pink. Then using a fine-tipped pencil or maker, highlight the eyes.)

Print and fussy cut from sentiments:

  • One oval sentiment topper
  • One rectangular Santa’s naughty list sentiment

To emboss the background of the Santa panel, lightly mist the white card stock (3 1/3 x 4 inches) with water before placing in embossing folder. This will allow the paper fibers to bend in the embossing folder rather than break and tear. Set emboss piece aside to dry before gluing onto red matting piece (1 3/8 x 1 ΒΎ inches).

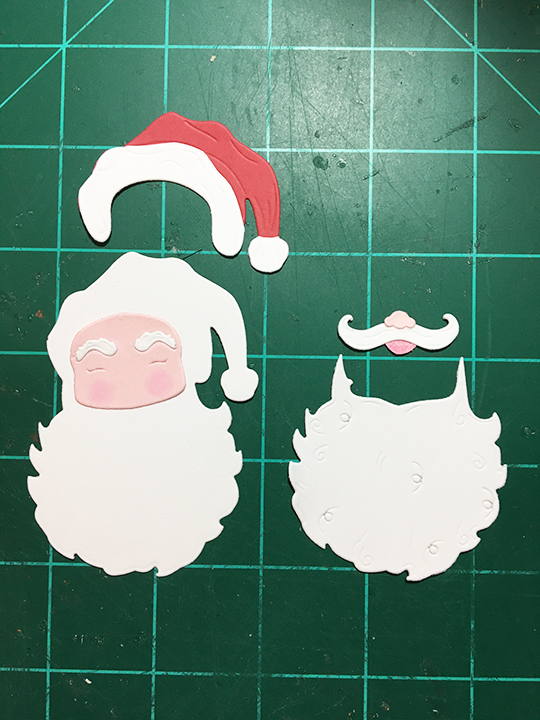
Assembling Santa:  Position the face piece on the Santa outline backing piece with the bread and hat over it. Mark position of face with pencil. Glue eyebrows on to face in indentations. Glue white fur pieces to red hat. Attach nose on top of mustache and mouth under it. Adhere face on to backing using pencil markings. Glue beard onto backing and just up to face.  Attach hat over face matching it up with same shape on backing. Glue on mustache with nose and mouth attached. Glue assembled Santa onto embossed panel that was already glued to red mat.

Faux Embossing of Holly Panels: Glue three of the holly die cuts and three of the berries on to one of the white rectangles (2 ΒΎ x 1 Β½ inches). Adhere white panel onto a green rectangle mat (3 x 1 ΒΎ inches). Repeat with another three holly die-cuts, white rectangle and green mat.

Other Panels: Glue the six square pattern papers on to six red square mats.  Glue the two small pattern paper rectangles onto the two small red rectangle mats. Glue the large patterned paper rectangle to the large green mat and then glue the Santa’s naughty list sentiment onto the center of the patterned paper.

To Assemble Card: Take white card base that has been cut, scored and folded into shutter card and open-out flat. Glue red squares and rectangles in the areas shown in photo. The large rectangle for the card front will have its topper sentiment glued on after the squares have been glued down. Adhere the green rectangles into the appropriate spaces in the center of card base.  Fold-up and glue large white rectangle piece to back of card. This back piece will be where you can write a personal message as well as helping stablish the card when opened and set on display.

Envelope: The card folds to fit inside a #10 business size envelope. To hint at what is inside the envelope, I stamped the flap with a sentiment β€œHave a Holly Jolly Christmas” and below it a Santa’s sleigh with reindeer.

Thank you for reading. If you enjoyed this blog post, please like it and follow the blog. 😊

Dies & Embossing Folder:

  • Retro Santa from Die-cutting Essentials, issue 82, October 2021
  • Cut & Emboss Baubles from Papercraft Essentials, issue 192, November 2020

Papers

Stamps and Ink

Additional Supplies:

  • Scoring board and tool
  • Paper cutter
  • Metal ruler
  • Craft knife
  • Nuvo Watercolour Pencils
  • Waterbrush

Snowy Christmas Globe

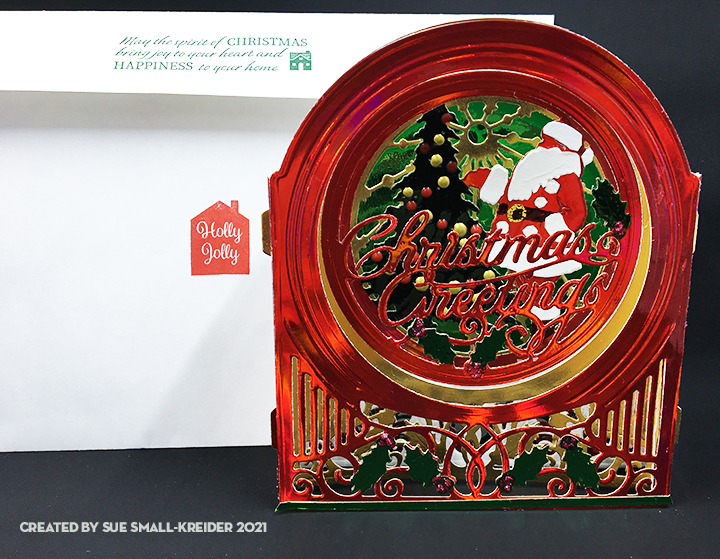
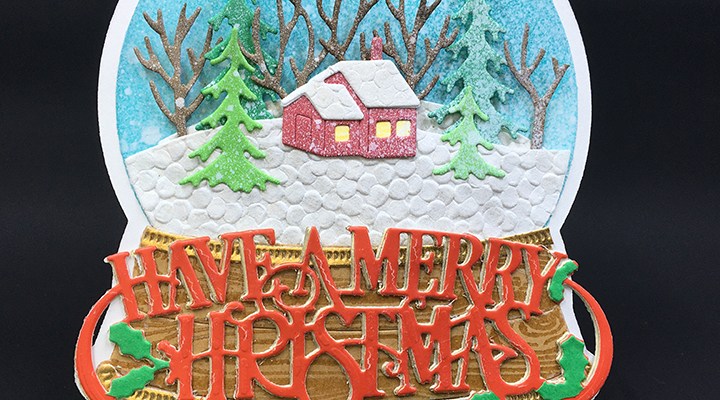
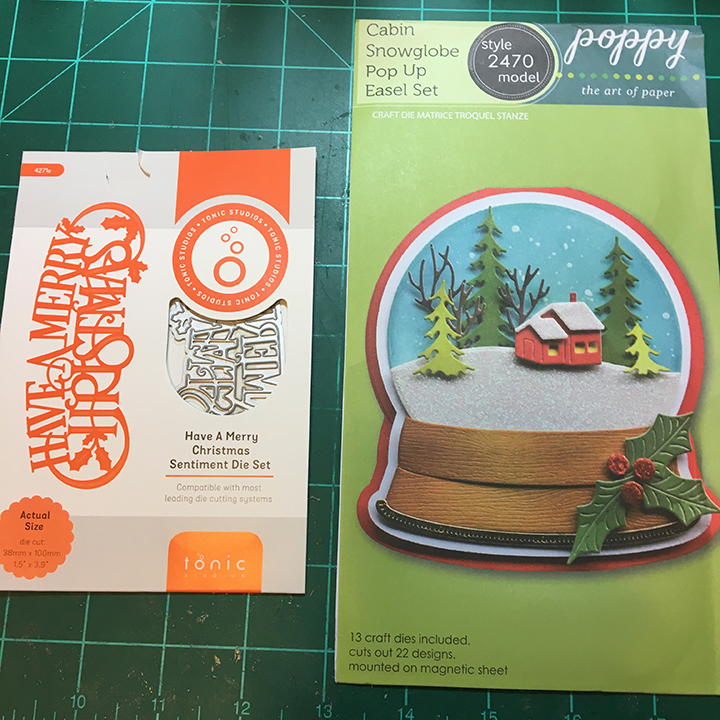
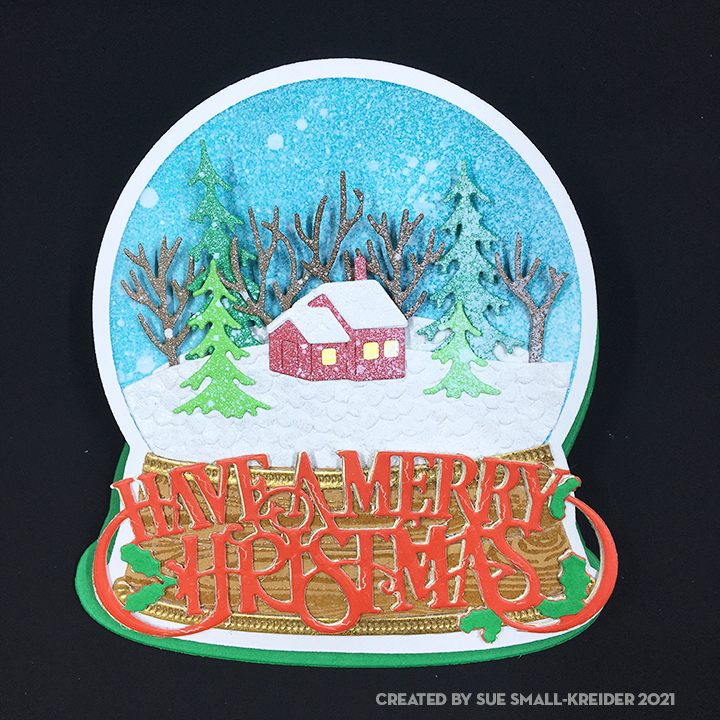
All is calm, all is bright until you shake-up the snow globe. This traditional style snow globe easel card is made with PoppyStamps/Memory Box die set with the sentiment coming from a Tonic Studios die.

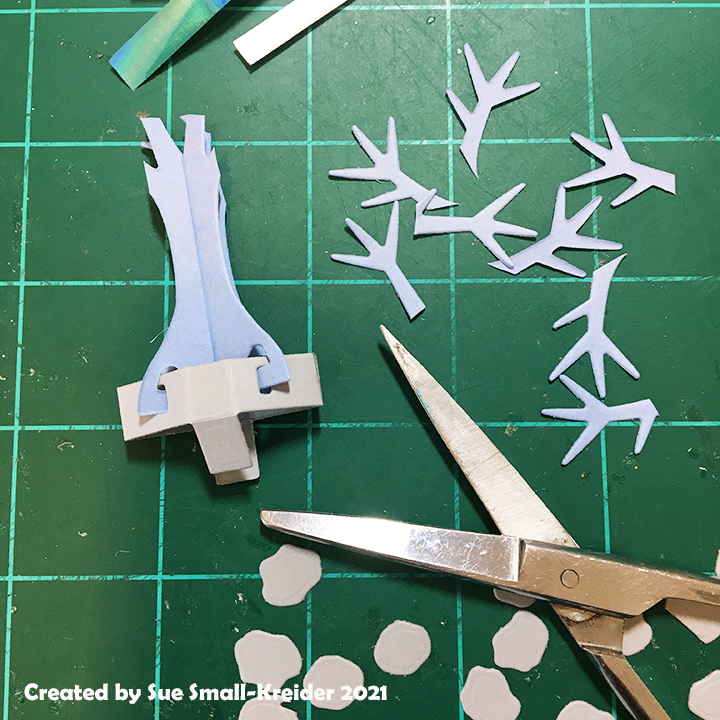
This was my first go at using these dies, so I followed the package example for the assembly and easel stopper (three holly berries placed on top of tiny foam circles with holly leaves cut from thin paper.) My green base card stock was lightweight, so I double cut the base and glued together before burnishing the fold lines.

The background white circle was ink blended use a sky-blue ink and a large blending brush. Next, I spritzed with circle once with a white ink spray. The snowy ground is a specialty handmade paper I’ve had for a while. For the cabin, I used a yellow scrap for the house outline/windows. Its roof is more of the specialty textured paper. I like the variety of fir and hardwood trees in this set which can easily be cut from various shades of green and brown scraps. The scene was laid-out and then glued to together before spraying the whole scene with white ink spray a few times.

For the woodgrain globe base, I used some heat embossed stamped woodgrain paper I had made for another project. (Click here to learn more about the paper.) I cut two of the thin trim piece from gold foil cardstock and trimmed one piece to fit the top of the woodgrain base.

To assemble the snow globe, there is a white globe outline die-cut that the assembled globe is glued onto and then the woodgrain base followed by the two gold trim pieces.

The sentiment was cut three times using the Tonic Studios die. The base layer is gold foil while the top layer is a thick red cardstock that was from some packaging that I had saved. I cut the tiny green holly leaves from a green paper.

Foam circles topped with the holly berries are used as the easel stop on the bottom card base with the holly leaves cut from thin dark green paper.

A personalized message can be written inside the card base. The card fits inside an A2 envelope (4 3/8 x 5 3/4 inches.) with its back flap stamped with stamps from the Winter Stags set by Stampendous! in a dark green ink.

Thank you for reading. If you enjoyed this blog post, please like it and follow the blog. 😊

Dies & Embossing Folder:

Stamps & Ink

  • Winter Stags stamp set by Stampendous! – free gift in Creative Stamping, issue 90, Nov. 2020.
  • Stampin’ Up – Classic Stampin’ Pad – Tranquil Tide
  • Catherine Pooler – Premium Dye Ink – Party Collection – All That Jazz
  • Avey Elle White Ink Spray
  • Simon Says Stamp Large Blending Brush
  • VersaMark – Watermark Stamp Pad
  • Stampin’ Pad – Rubber Stamp – Hardwood
  • Recollections – Detail Embossing Powder – Clear

Papers

  • White and green card stock
  • Gold foil card stock
  • White textured specialty handmade paper
  • Kraft card stock
  • Colored card stock scraps
  • A2 envelope

Additional Supplies:

Sweet Christmas Greetings

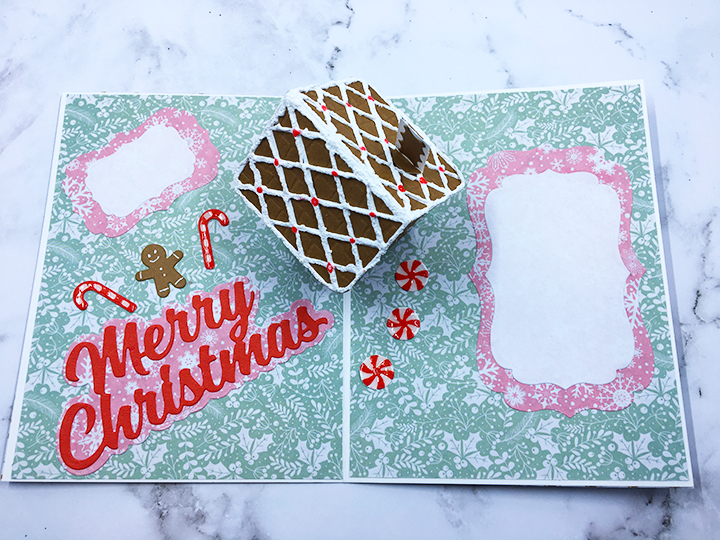
Can you smell the fresh baked gingerbread straight from the oven?  This card is made for a child’s Christmas and depicts a gingerbread house complete with white sugar icing, cinnamon drops, peppermint drops and candy canes.

This was my first attempt making Karen Burniston’s Tiny House Pop-Up and I made some mistakes that created a catch point on a roof corner. (I highly recommend watching the assembly video to avoid some of my mistakes such as making the front door of the house on the end with the bottom attachment flaps and gluing the roof unevenly on top of the house.)

Overall, the Gingerbread Tiny House Add-ons set is easy to use with the Tiny House set. The cane canes and peppermint drops are tiny and may require tweezers to assemble. (I added Glossy Accents to the tops of the candy canes and peppermint drops to give them a shiny coating.) There are other decorative die pieces for gum drops and tiny dots in the set, but I opted to use some Nellie’s Effect Snow media for dimensional icing and Nuvo Drops for red cinnamon drops. (The Effect Snow made the roof curl up some creating more of a catchpoint on the roof corner.)

The card base is an A2 size card (5 Β½ x 4 ΒΌ inches) made of heavy white cardstock and covered with patterned papers for smooth surfaces for the house to slide over. The sweets decorations are placed so that they don’t hinder the house mechanism opening.

Merry Christmas has a shadow die cut background of patterned paper and all the sentiments are cut from red paper so there are less chances of creating catchpoints. (I used some fancy nested label dies to create areas for a personal message.)

As is my style, I stamped the back of the envelope with hints of what’s inside using two colors of ink and a gingerbread house stamp set from Hero Arts.

Thank you for reading. If you enjoyed this blog post, please like it and follow the blog. 😊

Other cards that use the Tiny House Pop-up die Set

Dies:

Stamps & Ink

  • Memento -Fade-resistant Dye Ink – Rich Cocoa
  • Stampin’ Up Classic Stampin’ Pad – Melon Mambo
  • Hero Arts – Clear Stamp Set – Color Layering Gingerbread House -CM462

Papers

  • Heavy white card stock
  • Brown cardstock
  • Patterned papers from Carnation Crafts – Merry & Bright
  • Colored papers from my stash
  • A2 green envelope

Additional Supplies Used:

Snow Days

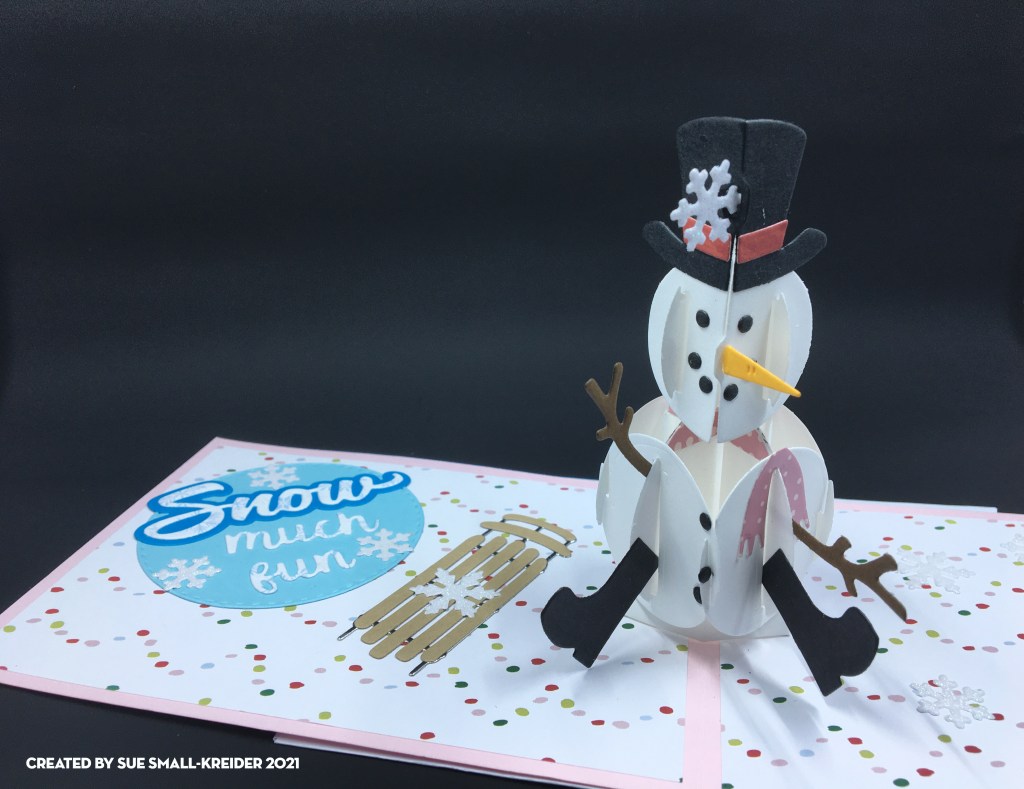
What North American children hasn’t hoped for a school closing day due to a snowstorm.Β  This is a card celebrating a snowy day in lighthearted pastels. Karen Burniston dies are used for the card.

To make this A2 size card, cut a rectangle 4 ΒΌ x 11 inches of pink heavy cardstock and fold in in the middle to make a 4 Β½ inches tall by 5 Β½ inches wide card base.  Cut four decorative paper panels at 4 x 5 ΒΌ inches. Adhere these panels to front, back and insides of the card base.

It is easiest to die cut all the pieces you will need to make both the inside and outside snowmen at the same time so that they are similar in colors and papers used. Also cut three circles or other label shapes on which to mount your sentiments. (For the personalized message circle, I added a smaller white circle.) Think about using contrasting colors for your words and their backgrounds. (I used blue to make the mostly white with snowflake paper I used for the words standout.)

After watching the assembly video on the inside snowman assemble as directed. Once the snowman is adhered to the card base, you can begin to decorate the card. (I used a sled die-cut from Memory Box to add to the snow time activities.) Remember to balance out the position of decorations from one side of the card to the other. There are two different snowflakes in the two snowmen die sets by Karen Burniston. They make wonderful filler decorations for the card.

Because I could not make up my mind on which stamp to use on the back of the envelope, I stamped two envelopes with hints as to the card’s theme. The word cloud is from Stampendous while the snowman is from Art Impressions.

Thank you for reading. If you enjoyed this blog post, please like it and follow the blog. 😊

Dies:

Stamps & Ink

  • Stampin’ Up Classic Stampin’ Pad – Dapper Denim
  • Stampendous – Winter Stags stamp set from Creative Stamping issue 90, Dec 2020
  • Art Impressions – Unmounted Rubber Stamp – Scrapbook.com exclusive Snowman – 5084

Papers

  • American Crafts – 348953
  • Pink card base – Bazzill -Pink Icing – PS1 – 102
  • Glitter paper – white from my stash
  • Colored cardstock from my stash
  • A2 Envelope

Additional Supplies Used:

Fineline 20 Gauge Applicator & Bottle

Tiered Cupcakes

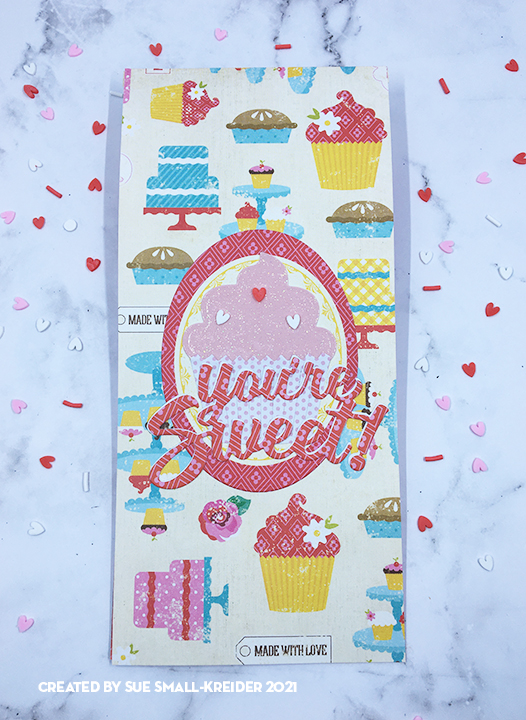
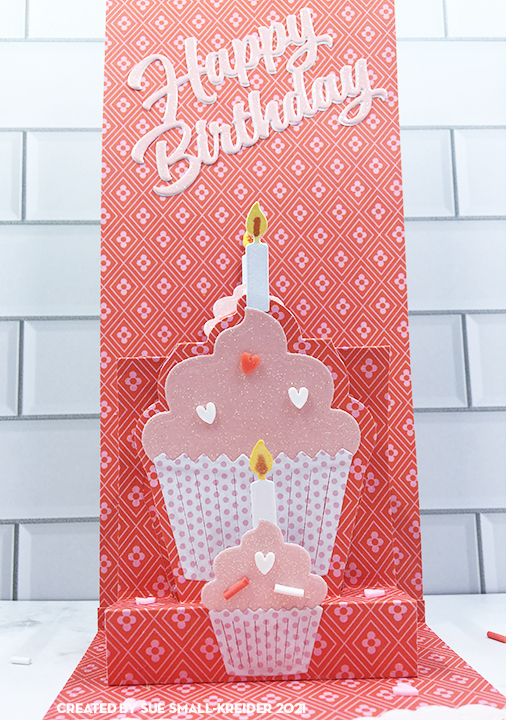
Cards for tiered birthdays (as in 29 again and again) can be fun to make when you add in a pop-up element like a third tiny cupcake.

This card was inspired by the Karen Burniston Mission Poppable for August 2021 to use her Parcel Pop-Up die set. In addition to that die set, I used her Cupcake Pop-Up, the sentiments of β€œYou’re Sweet” and β€œHappy Birthday,” and the candle from the Cake Pop-Up.

The double side paper is from Echo Park which is an older set designed by Lori Whitlock called Happiness is Homemade. Because the heavy cardstock is double-sided, it cut down on heavy layers of decorative papers.

I assembled the parcel pop-up as shown in Karen’s assembly video But I did not put on the decorative square front panel or flap. I also used a longer strip as the pop-up arm so that it would be tall enough to be seen behind the cupcake pop-up which was cut from a scrap piece of card stock and cut with tabs at the top and bottom to attached to card base and the parcel mechanism front.

The sentiments are cut once from pink glitter cardstock and once from glossy white paper (backside of some packaging). The white is just slightly seen so that the red on red stands out on the β€œYou’re Sweet.”  I used a topper from the paper set that had an oval design and the used an oval die to cut it out to frame the cupcake.

Because the card is a slimline size card to fit in a No. 10 business envelope, I needed a large white paper doily to fill the bottom half of the card and allow for a space to write a personal message.

The back of the envelope is stamped with a watermelon colored ink using a cupcake and β€œMade with love” stamps from Simply Made Crafts.

Thank you for reading. If you enjoyed this blog post, please like it and follow the blog. 😊

Dies:

Stamps & Ink

Papers

  • Echo Park – Happiness is Homemade by Lori Whitlock
  • Glitter paper – pink and white from my stash
  • Dotted paper from my stash
  • No. 10 Business Envelope – Neenah Social – Bare White Techweave

Additional Supplies Used:

Summer Is In The Air

Hello, it’s Sue of the Dies R Us Design Team and today we are making a summer pop-up card for a vegetable gardener using Karen Burniston dies.
The chair die just fits in a 3 Β½ inch x 6-inch mini slimline card. I started by cutting a 3 Β½ inch by 11-inch piece of lightweight white card stock and folded it in half.
Next, I cut piece of patterned background paper slightly larger than 3 Β½ inch by 5 Β½ inch and marked with a pencil where the chair arms connect with the card back on the patterned paper and cut slits so that the printed paper could be slid into place behind the chair. Using the same technique, I cut a piece of green grassy card stock 3 Β½ inch by 6-inch for the ground, cutting slots for the chair feet. Glue both decorative papers to card base.

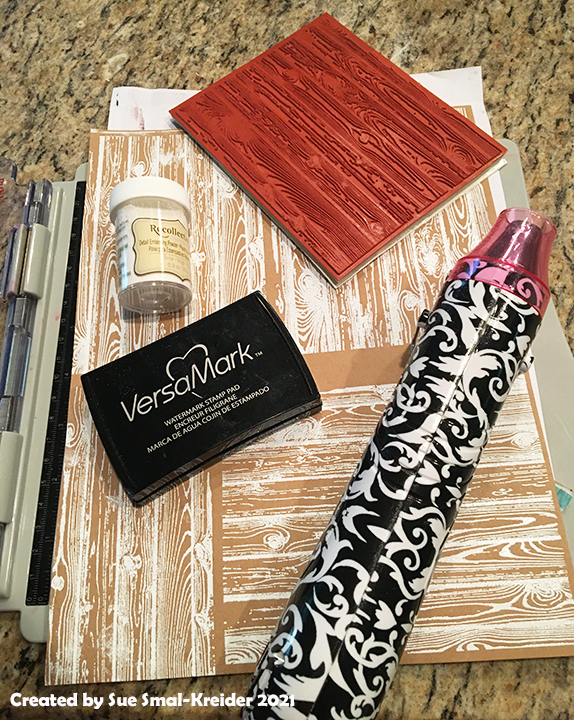
Cut chair, arms and seat from woodgrain paper. (I made my own woodgrain paper using a woodgrain stamp that I heat embossed with watermark ink and clear embossing powder.)

Fold woodgrain chair folds as shown on packaging. Glue wood grain chair to patterned paper chair matching up the seat, back, arms and leg pieces. Train the chair to pop-up by opening and closing card a few times.

Decorate card with the Garden Charm set cutting off the charm loops. To make the basket of corn and tomatoes, use the basket from the Picnic Elements set and the fruit from the Tree Fruit set. (I had corn and red apples already cut from a Rubberneck Stamps dies set which I use turning the apples sideways to look like tomatoes.)

On the card back I cut a patterned piece of green card stock 3 Β½ inch by 6-inch and glued to the card base. For the card front I cut a 3 Β½ inch by 7 Β½ inch piece of green printed paper and glued it onto the card base folding over onto the back of the bard. I added a small decorative topper to finish the back of the card. For the front of the card I used some of the garden charms to hint at what is inside.

The Karen Burniston β€œHello sunshine, hello summer” sentiments were cut twice and glued together using a fine-tipped glue bottle for the tiny lines. This adds some depth to the words.

Hope this fun card has put a smile on your face and provided some inspiration for your crafting. 😊

See more chair cards below:

Dies from Dies R Us:

Additional Supplies Used:

Don’t forget to come join in the fun at the Dies R Us Challenge Blog. There’s a new challenge theme offered on the 1st and 15th of each month and one lucky randomly drawn winner will receive a gift voucher prize to the Dies R Us Store.  

 For your convenience, all the important Dies R Us links are provided below.

click below for:

STORE

CHALLENGE BLOG

FACEBOOK

INSPIRATION BLOG

FRIENDS OF DIES R US PINTEREST PAGE

Spring Is In The Air

Hello, it’s Sue of the Dies R Us Design Team and today we are making a spring time pop-up card for a gardener using Karen Burniston dies.

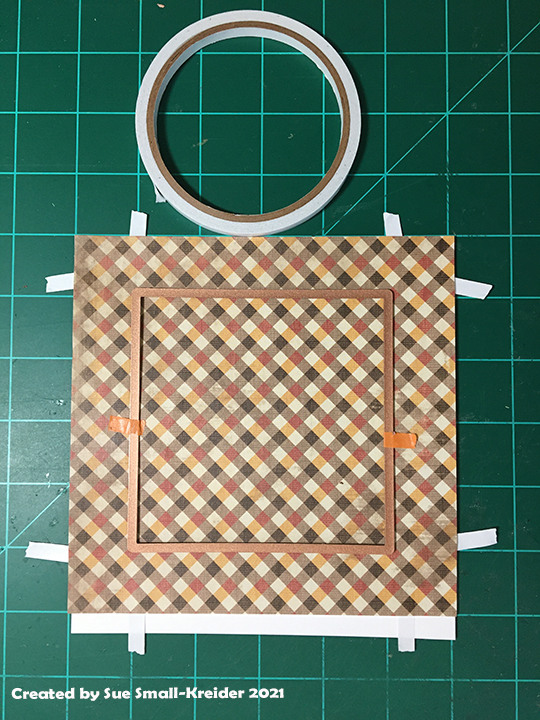
Cut the two printed papers to 4 15/16 inches x 7 inches. Position them inside the card base so that there is a gap between the papers where the fold can be seen. Using removable tape, tape them together and place the chair die with the nibs over the fold.

Run taped papers with die through die-cutting machine. Cut chair, arms and seat from woodgrain paper. (I aged the chair with white ink pad rubbed over the grain.)

Glue printed papers inside card base, adding matching scraps of papers to cover the brown spaces let where chair is cut away. Fold woodgrain chair folds as shown on packaging. Glue wood grain chair to patterned paper chair matching up the seat, back, arms and leg pieces. Train the chair to pop-up by opening and closing card a few times.

Decorate card with the garden charm set cutting off the charm loops. (I dirtied-up the tools and gloves with brown ink.) The pink flowers are made with the flowers from the Tiny Trees Pop-Up set.

Fold up all the petals on the flowers and then glue a smaller flower on top of a larger flower. Add a yellow Nuvo Drop center to flower. Let dry overnight before gluing on to card.

The front of the card is made with scrap rectangles of green patterned paper with another watering can cut on the back side of the mirror cardstock and rounded with my fingers so that it pours from the left. The sentiment is a also a Karen Burniston die.

Hope this fun card has put a smile on your face and provided some inspiration for your crafting. 😊

See more chair cards below:

Dies from Dies R Us:

Additional Supplies Used:

Don’t forget to come join in the fun at the Dies R Us Challenge Blog. There’s a new challenge theme offered on the 1st and 15th of each month and one lucky randomly drawn winner will receive a gift voucher prize to the Dies R Us Store.  

 For your convenience, all the important Dies R Us links are provided below.

click below for:

STORE

CHALLENGE BLOG

FACEBOOK

INSPIRATION BLOG

FRIENDS OF DIES R US PINTEREST PAGE

Winter Is In The Air

Hello, it’s Sue of the Dies R Us Design Team and today we are making a Christmas pop-up card with a Charlie Brown Christmas tree using Karen Burniston dies.


The chair die just fits in a 3 Β½ inch x 6-inch mini slimline card. I started by cutting a 3 Β½ inch by 11-inch piece of lightweight white card stock and folded it in half. Next, I cut piece of patterned background paper slightly larger than 3 Β½ inch by 5 Β½ inch and marked with a pencil where the chair arms connect with the card back on the patterned paper and cut slits so that the printed paper could be slid into place behind the chair. Using the same technique, I cut a piece of white glitter card stock 3 Β½ inch by 6-inch for the ground, cutting slots for the chair feet. Glue both decorative papers to card base.

Cut chair, arms and seat from woodgrain paper. (I made my own woodgrain paper using a woodgrain stamp that I heat embossed with watermark ink and snow embossing powder.)

Fold woodgrain chair folds as shown on packaging. Glue wood grain chair to patterned paper chair matching up the seat, back, arms and leg pieces. Train the chair to pop-up by opening and closing card a few times.

Decorate card with the Holiday Charm set cutting off the charm loops. To make the tiny potted fir tree, use the pine branch from the charm set and the sand pail from the chair set.

I used Cosmic Shimer Fluffy Stuff to create the little piles of snow around the base of the chair. Read the directions on the bottle before using! (You need to be careful when you heat the fluffy stuff up so as not to burn your card with your heat tool.)

Last, I sprayed the inside of the card with a white spray paint for a soft snow fall effect.

For the card front I cut a 3 Β½ inch by 5 Β½ inch piece of white glitter card stock and glued it onto the card base. On the card back I cut a textured piece of white card stock 3 Β½ inch by 6-inch and glued to the card base. Next taped the top seam of the front and back with a red plaid washi tape and continued down the back of the card for added decoration. On the front the Merry Christmas sentiment is an old die I’ve had in my stash for many years. The snowflakes are from the charm set. (I used a fine-tipped glue bottle for adding glue to the sentiment and snowflakes that made it so easy to glue without a big mess.)

The back of the mini slimline envelope is stamped with fir trees in a dark green ink.

Hope this fun card has put a smile on your face and provided some inspiration for your crafting. 😊

See more chair cards below:

*  Cat In The Window

*  Fall Is In the Air

*  Spring Is In The Air

*  Summer Is In The Air

*Β·  Winter Is In The Air

* Happy Hour at the Beach

Dies from Dies R Us:

Additional Supplies Used from Dies R Us:

Don’t forget to come join in the fun at the Dies R Us Challenge Blog. There’s a new challenge theme offered on the 1st and 15th of each month and one lucky randomly drawn winner will receive a gift voucher prize to the Dies R Us Store.  

 For your convenience, all the important Dies R Us links are provided below.

click below for:

STORE

CHALLENGE BLOG

FACEBOOK

INSPIRATION BLOG

FRIENDS OF DIES R US PINTEREST PAGE

Fall Is In The Air

Hello, it’s Sue of Ully Cat’s World and today we are making an autumn birthday pop-up card for a gardener using Karen Burniston dies.

Cut the two printed papers to 4 15/16 inches x 7 inches. Position them inside the card base so that there is a gap between the papers where the fold can be seen. Using removable tape, tape them together and place the chair die with the nibs over the fold.

Run taped papers with die through die-cutting machine.

Glue printed papers inside card base, adding matching scraps of papers to cover the brown spaces let where chair is cut away.

Cut chair, arms and seat from woodgrain paper. (I made my own woodgrain paper using a woodgrain stamp that I heat embossed with watermark ink and clear embossing powder.)

Fold woodgrain chair folds as shown on packaging. Glue wood grain chair to patterned paper chair matching up the seat, back, arms and leg pieces. Train the chair to pop-up by opening and closing card a few times.

Decorate card with the garden charm set cutting off the charm loops. (I dirtied-up the tools and gloves with brown ink.)

The chrysanthemum-like flowers are made with the smallest flower from the Flower Pot Pop-up or Flowers and Bee set cut like fringe around the center circle. Cut two, fringe, push up fringed petals and glue one on top of the other. Glue three flowers onto foliage from charm set. Trim foliage as needed.

Round flowerpots and watering can over a marker or glue bottle. Add oak leaves from Tiny Tree Pop-Up to potted flowers and around card.

Make flowerpots and watering can pop-up taking printed paper cut into strips, fold and glue into squares. Glue pot to square and onto card.

The front of the card is made with a label die and a sentiment from Karen Burniston Word Set 7 – Autumn.

(I used a fine tipped glue bottle to added glue to the die-cut words that worked extremely well. Then I used a fine-tipped brown pen to mark stitches using the die as a stencil.)

Inside, the β€œHappy Birthday” is another Karen Burniston die that has been colored with Distress Ink. A label die-cut is used for a personal message.

Hope this fun card has put a smile on your face and provided some inspiration for your crafting. 😊

See more chair cards below:

*Β  Cat In The Window

*Β  Fall Is In the Air

*Β  Spring Is In The Air

*Β  Summer Is In The Air

*Β  Winter Is In The Air

* Happy Hour at the Beach

Dies from Dies R Us:

Additional Supplies Used:

Don’t forget to come join in the fun at the Dies R Us Challenge Blog. There’s a new challenge theme offered on the 1st and 15th of each month and one lucky randomly drawn winner will receive a gift voucher prize to the Dies R Us Store.  

 For your convenience, all the important Dies R Us links are provided below.

click below for:

STORE

CHALLENGE BLOG

FACEBOOK

INSPIRATION BLOG

FRIENDS OF DIES R US PINTEREST PAGE